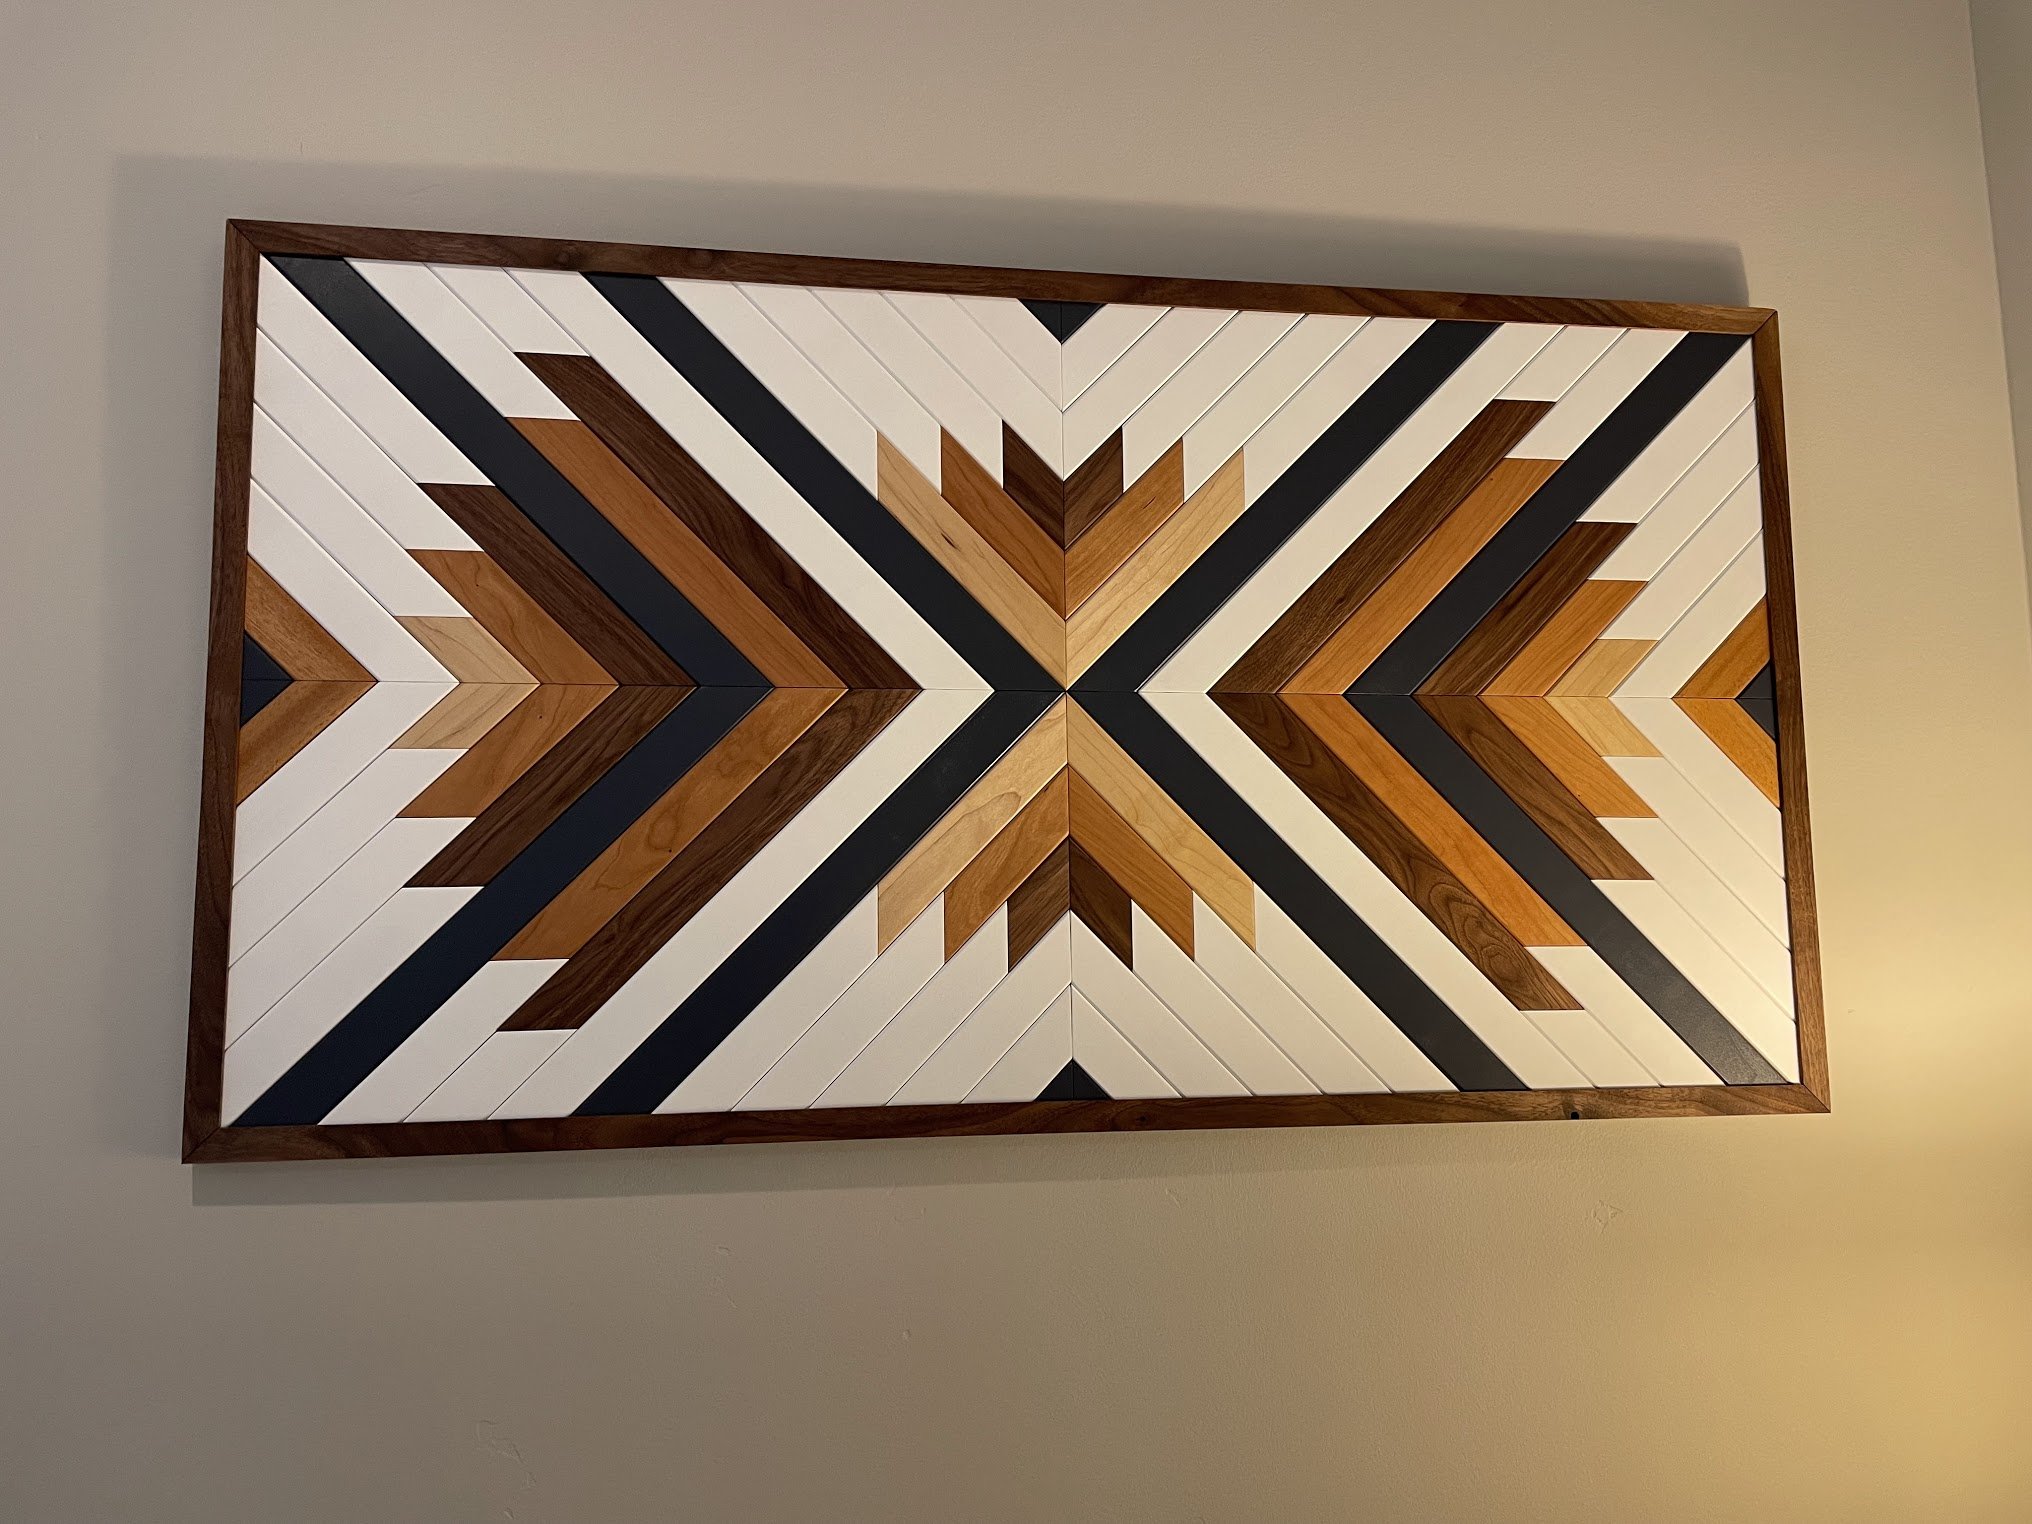
Geometric Wall Art
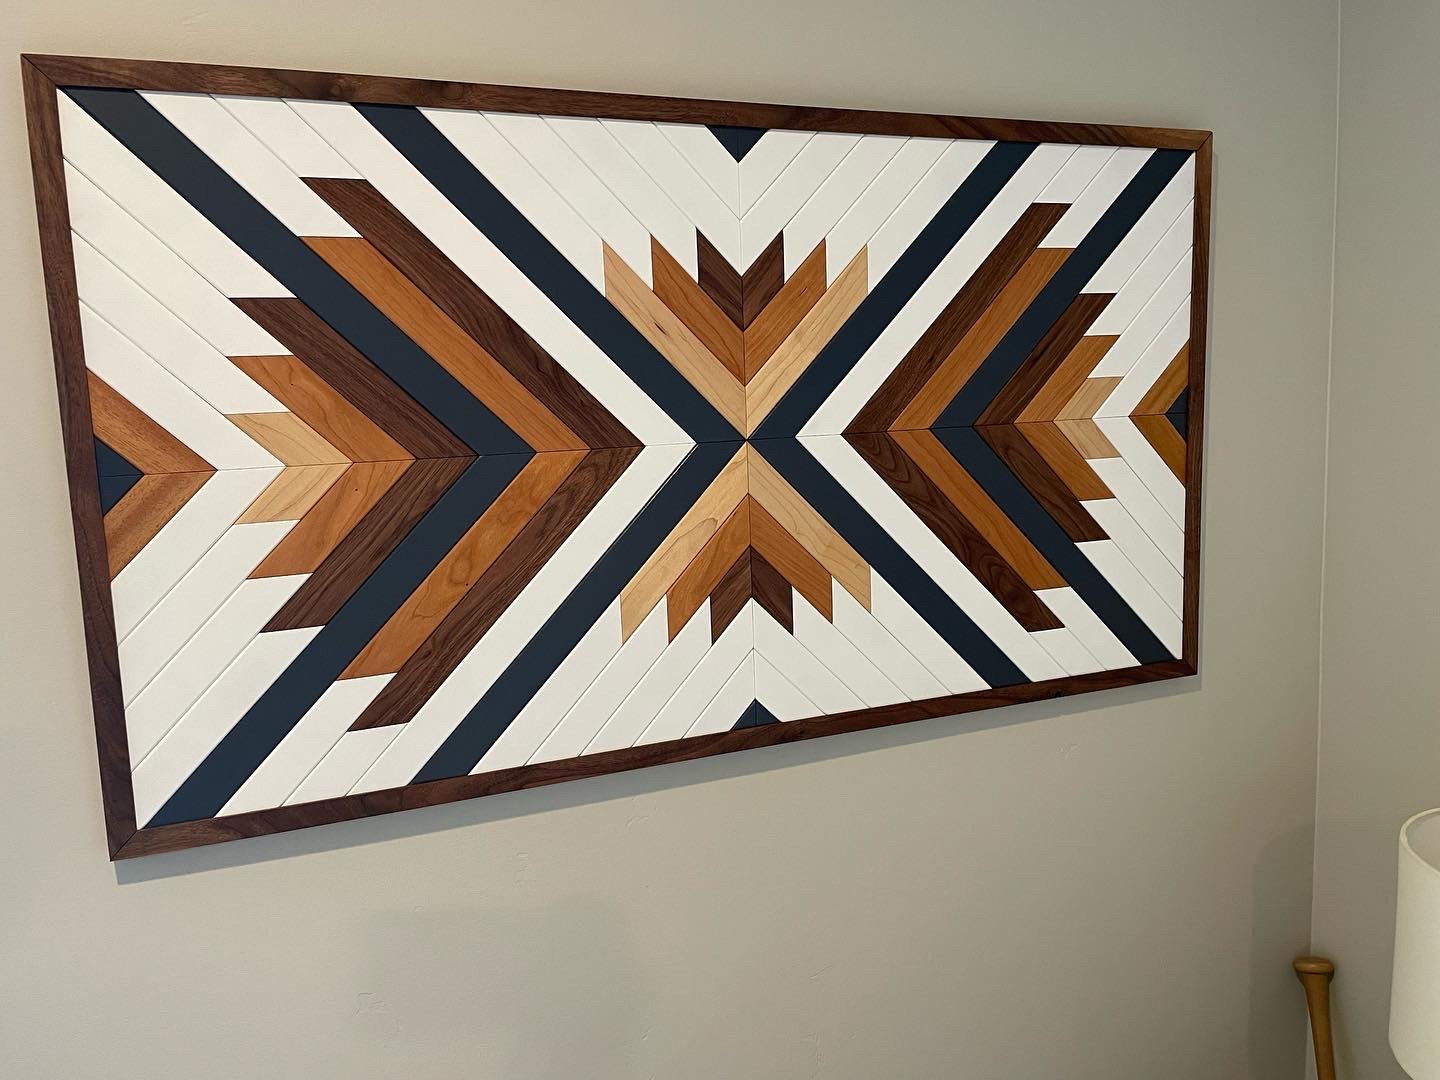

This was an adventure and pretty much completely new to me. Briana asked if I would make something to fill this spot in our bedroom and I said why not. I came up with the design after looking around at some others I liked. I wanted to combine painted wood with different types of hardwood to create multiple colors.
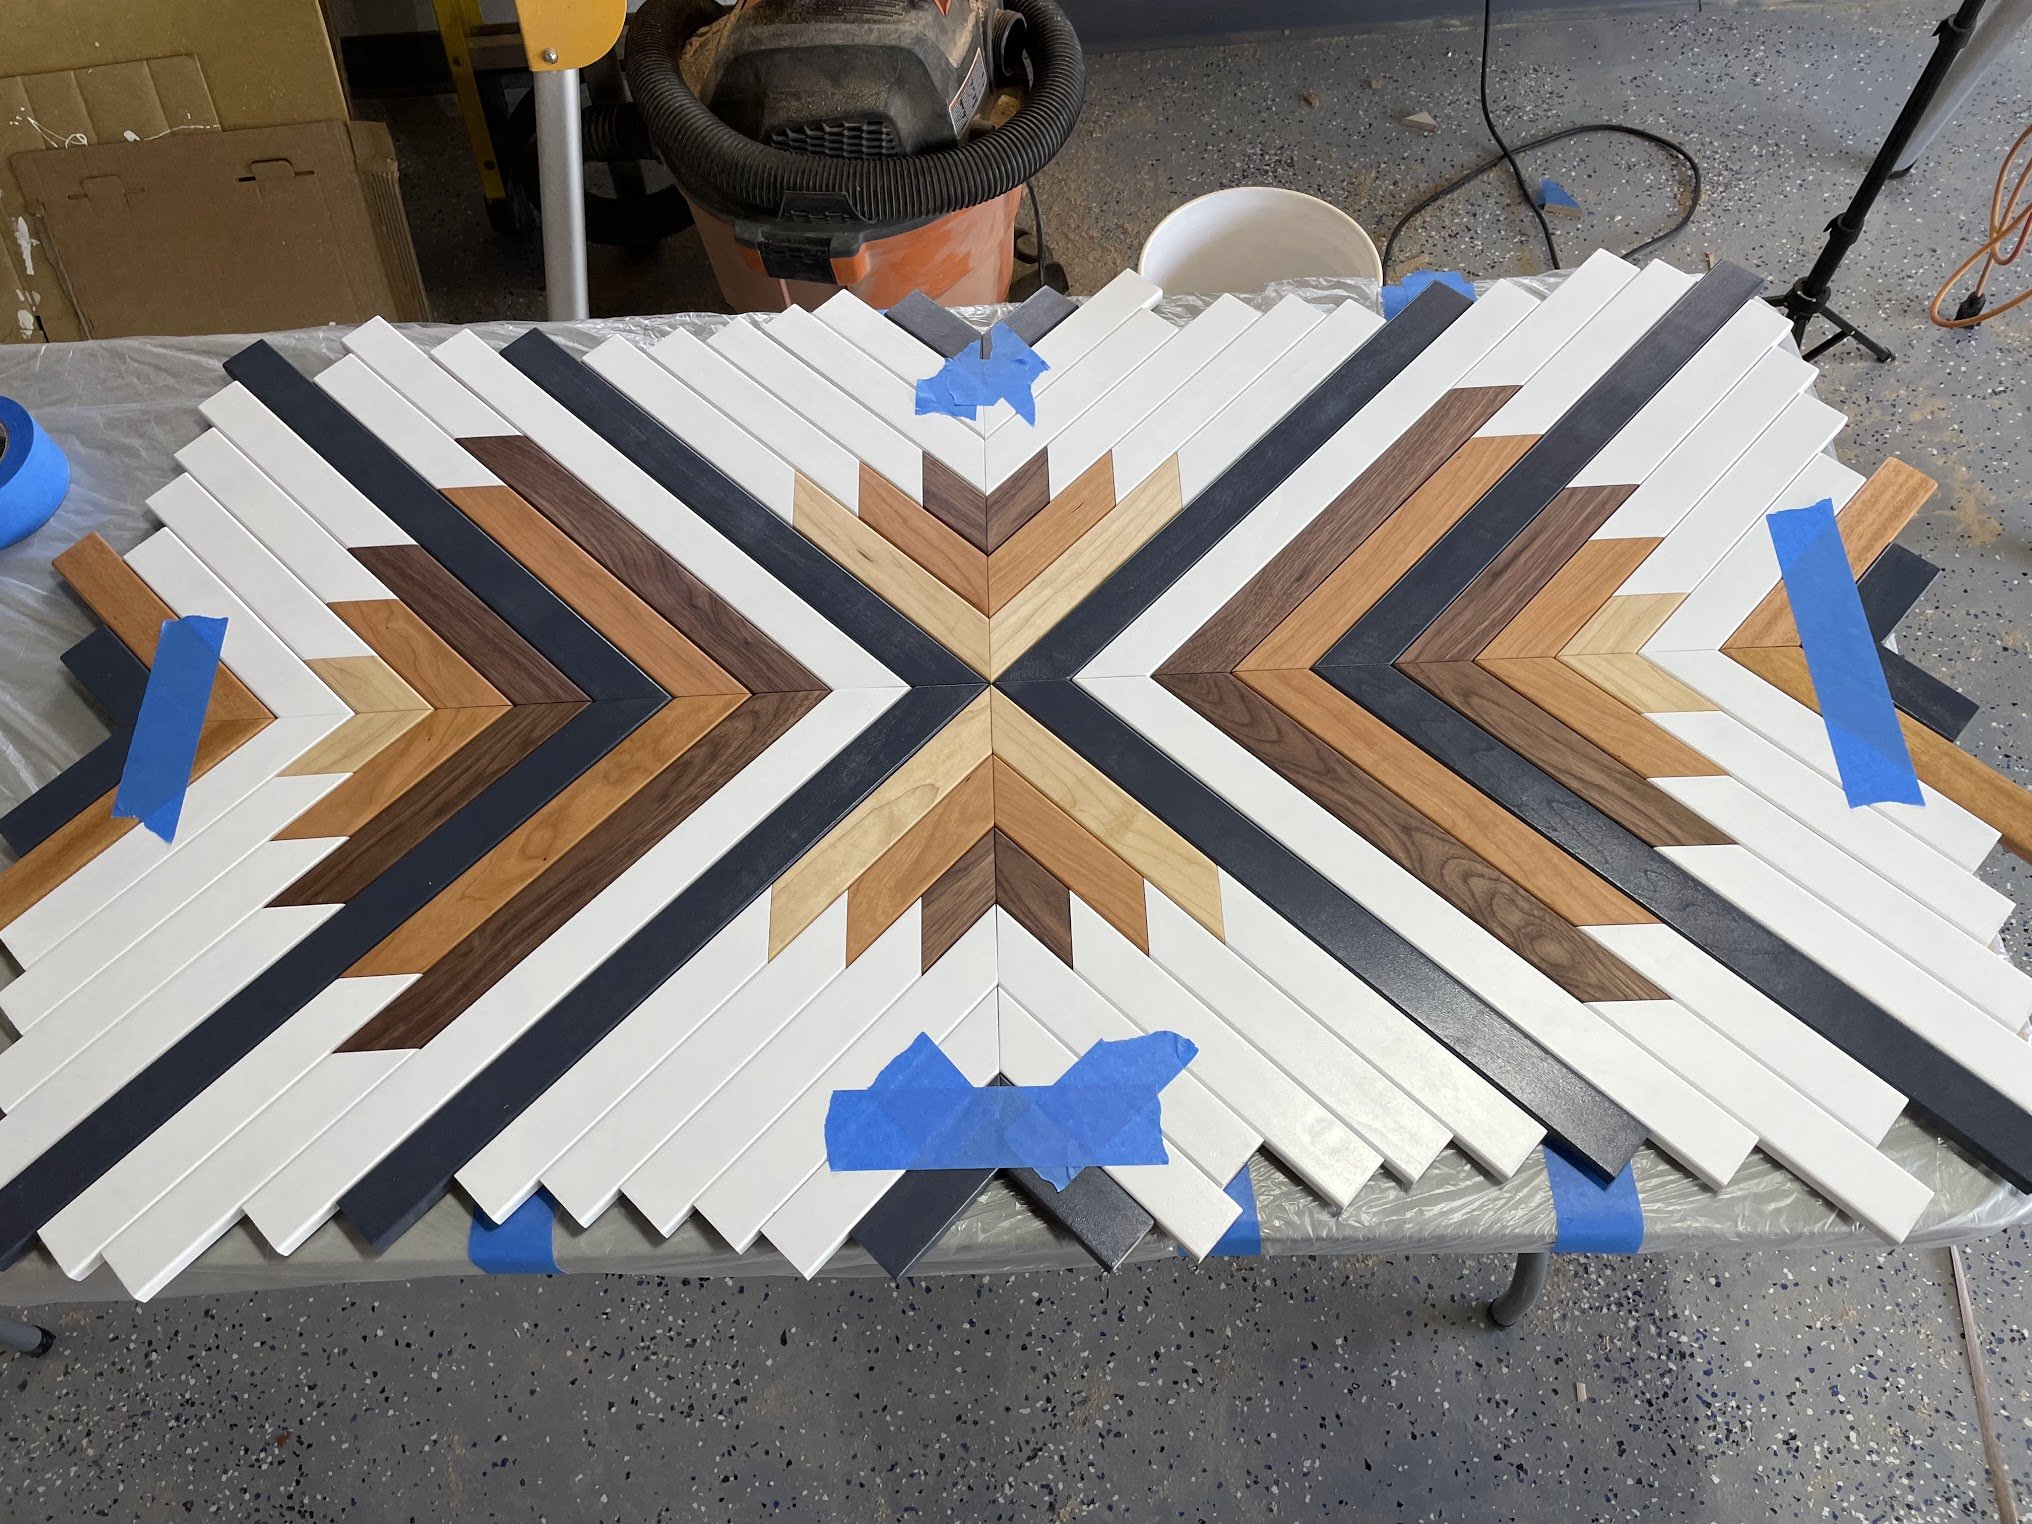
It’s made out of a combination of walnut, maple, cherry, mahogany, and poplar (the painted parts). Each piece is 1.5 inches wide with a 1/8 roundover to accentuate the lines. 100 pieces total. The frame is also walnut. All the hardwoods finished in Rubio Monocoat pure.

The Process
I started, as is often the case, in Google Slides. After looking around for inspiration from what others had made, I started working on my own design. A lot of wall art out there was more rustic—often using reclaimed wood in different hues. I wanted something with a similar design that was a little more modern looking in the details. So I wanted to combine the different colors of premium hardwoods with some painted colors. After many different iterations, I came up with this design.

I bought a bunch of 1/2” poplar, maple, walnut, cherry, and mahogany, and cut them into some manageable lengths. Then I ran everything through the planer to make sure all the different types of wood were a nice even thickness. There was probably about a 1/16 variance between them coming from the store, and I wanted them to sit flat next to each other.


Then, I cut each panel into 1.5” strips on the table saw, and then used a router and a 1/8” roundover bit on the long edges of each piece. I thought the rounded edges would make the edges between each piece standout, and would also mask any imperfections in the cuts if any two pieces didn’t line up perfectly together.


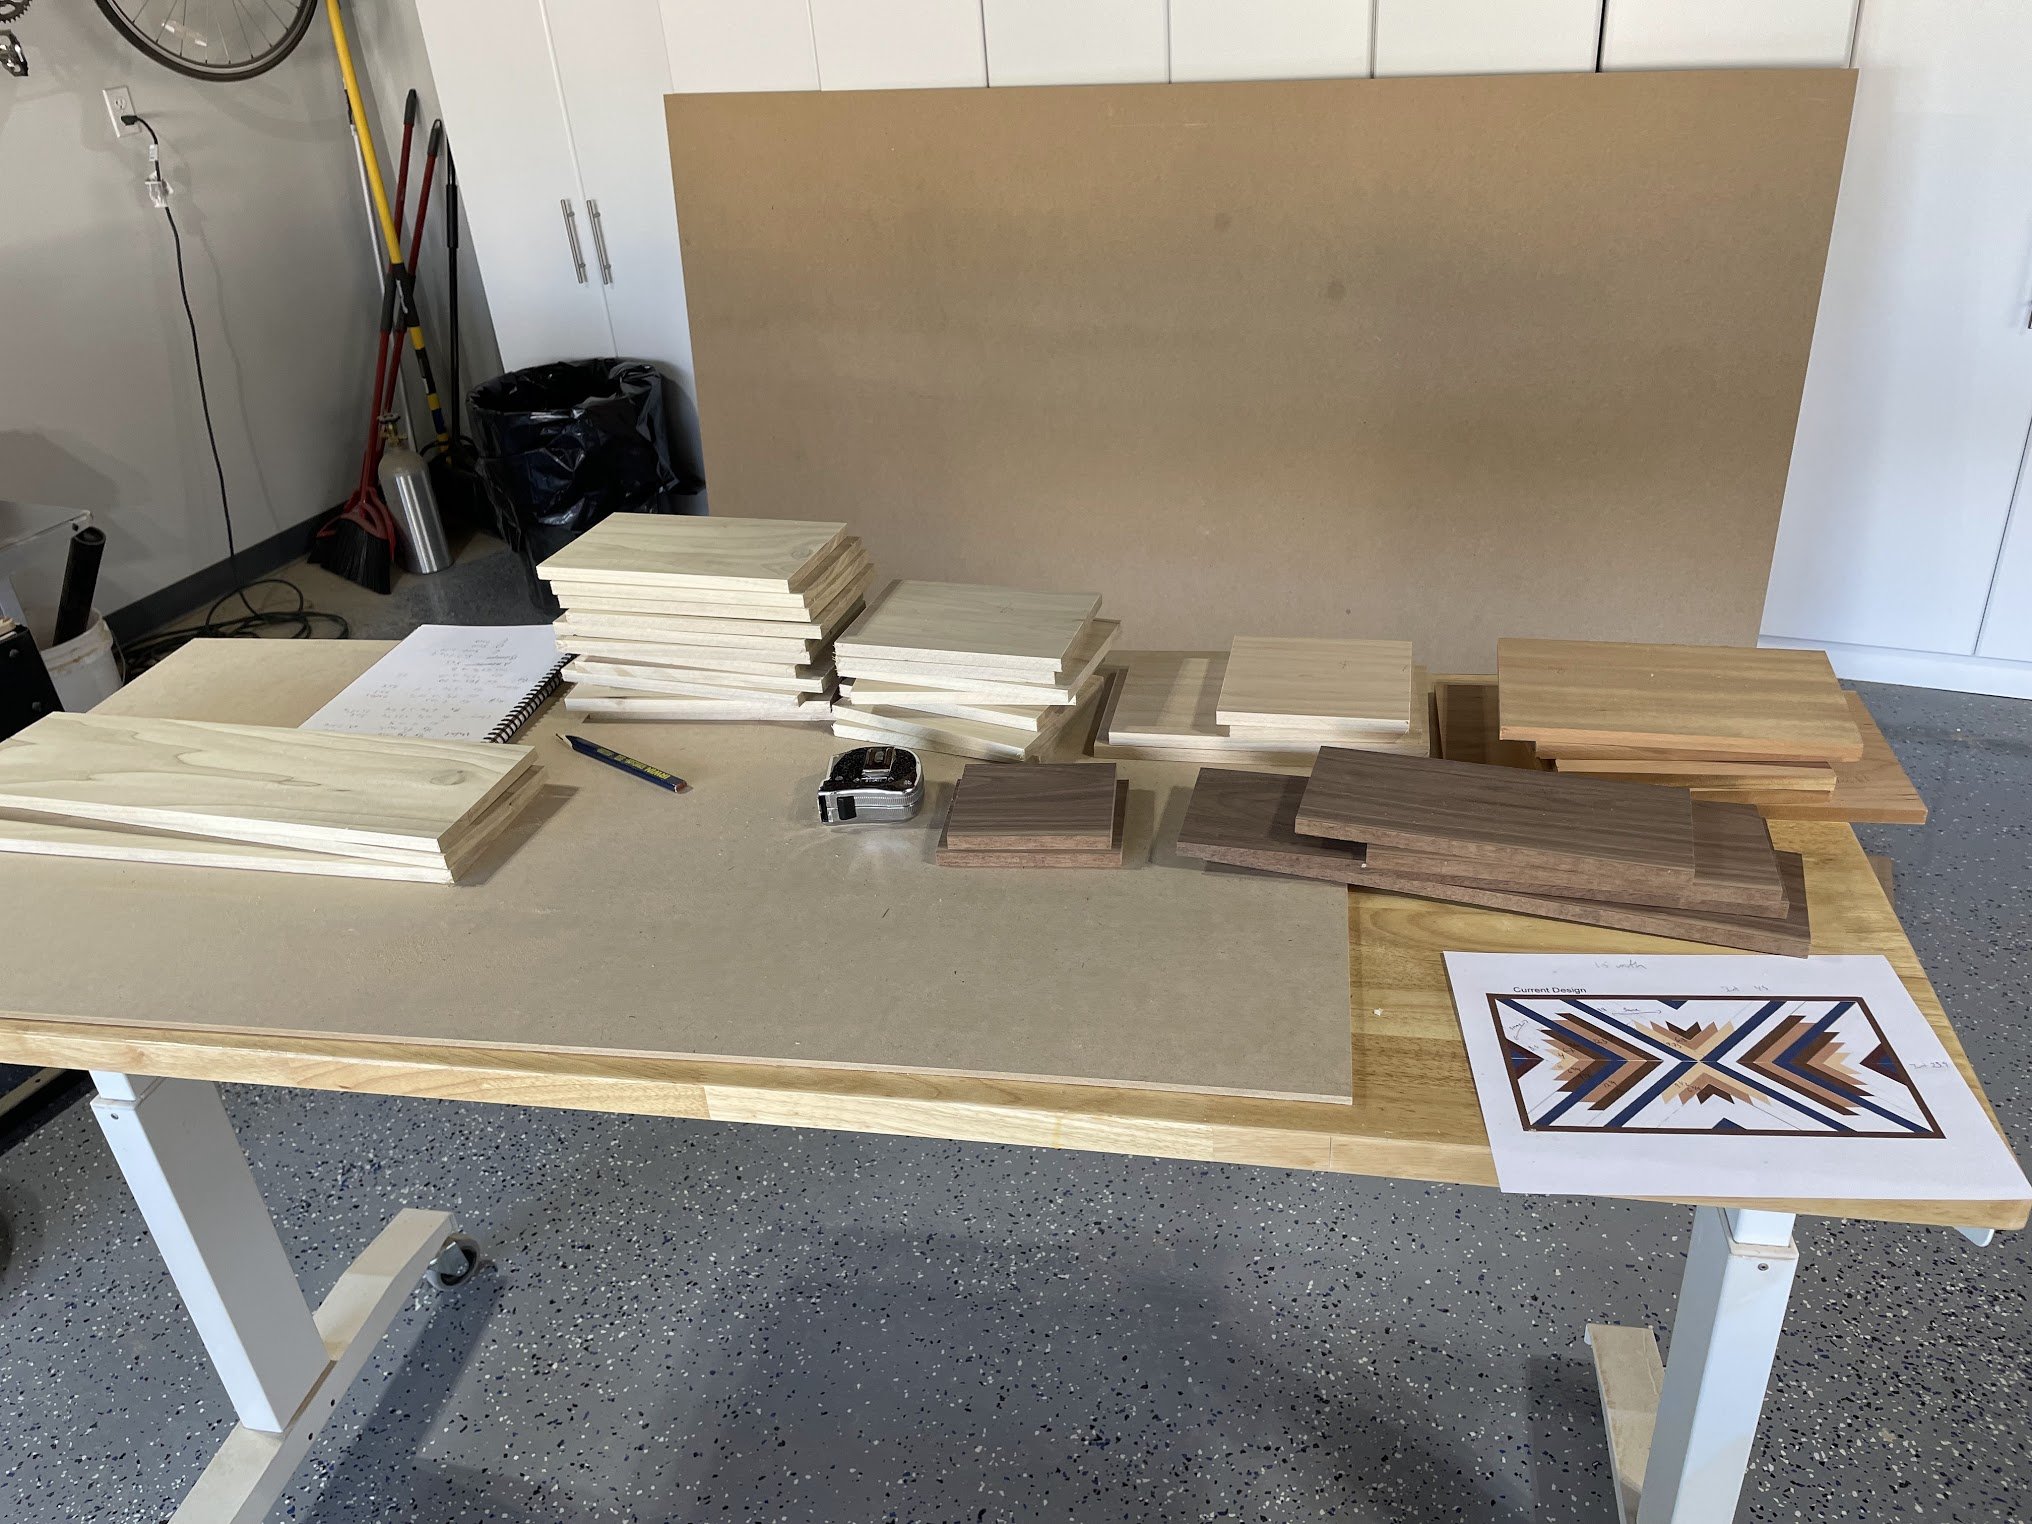

Then, I started cutting 45’s and laying everything out. I started in the center and worked outward. For any piece that went the full length of the art piece and so would intersect with the edge/frame, I didn’t worry about precise length. My plan was to come in later and clean up those edges all at once with a circular saw. Where there were going to be multiple pieces in a “row”, I had to figure out exact lengths for those pieces. Since the whole thing is symmetrical across both axes, I was always working in sets of 4. Any piece in one quadrant should have an exact matching or flipped copy in every other. Once I had those lengths, I added the poplar pieces on top of them.
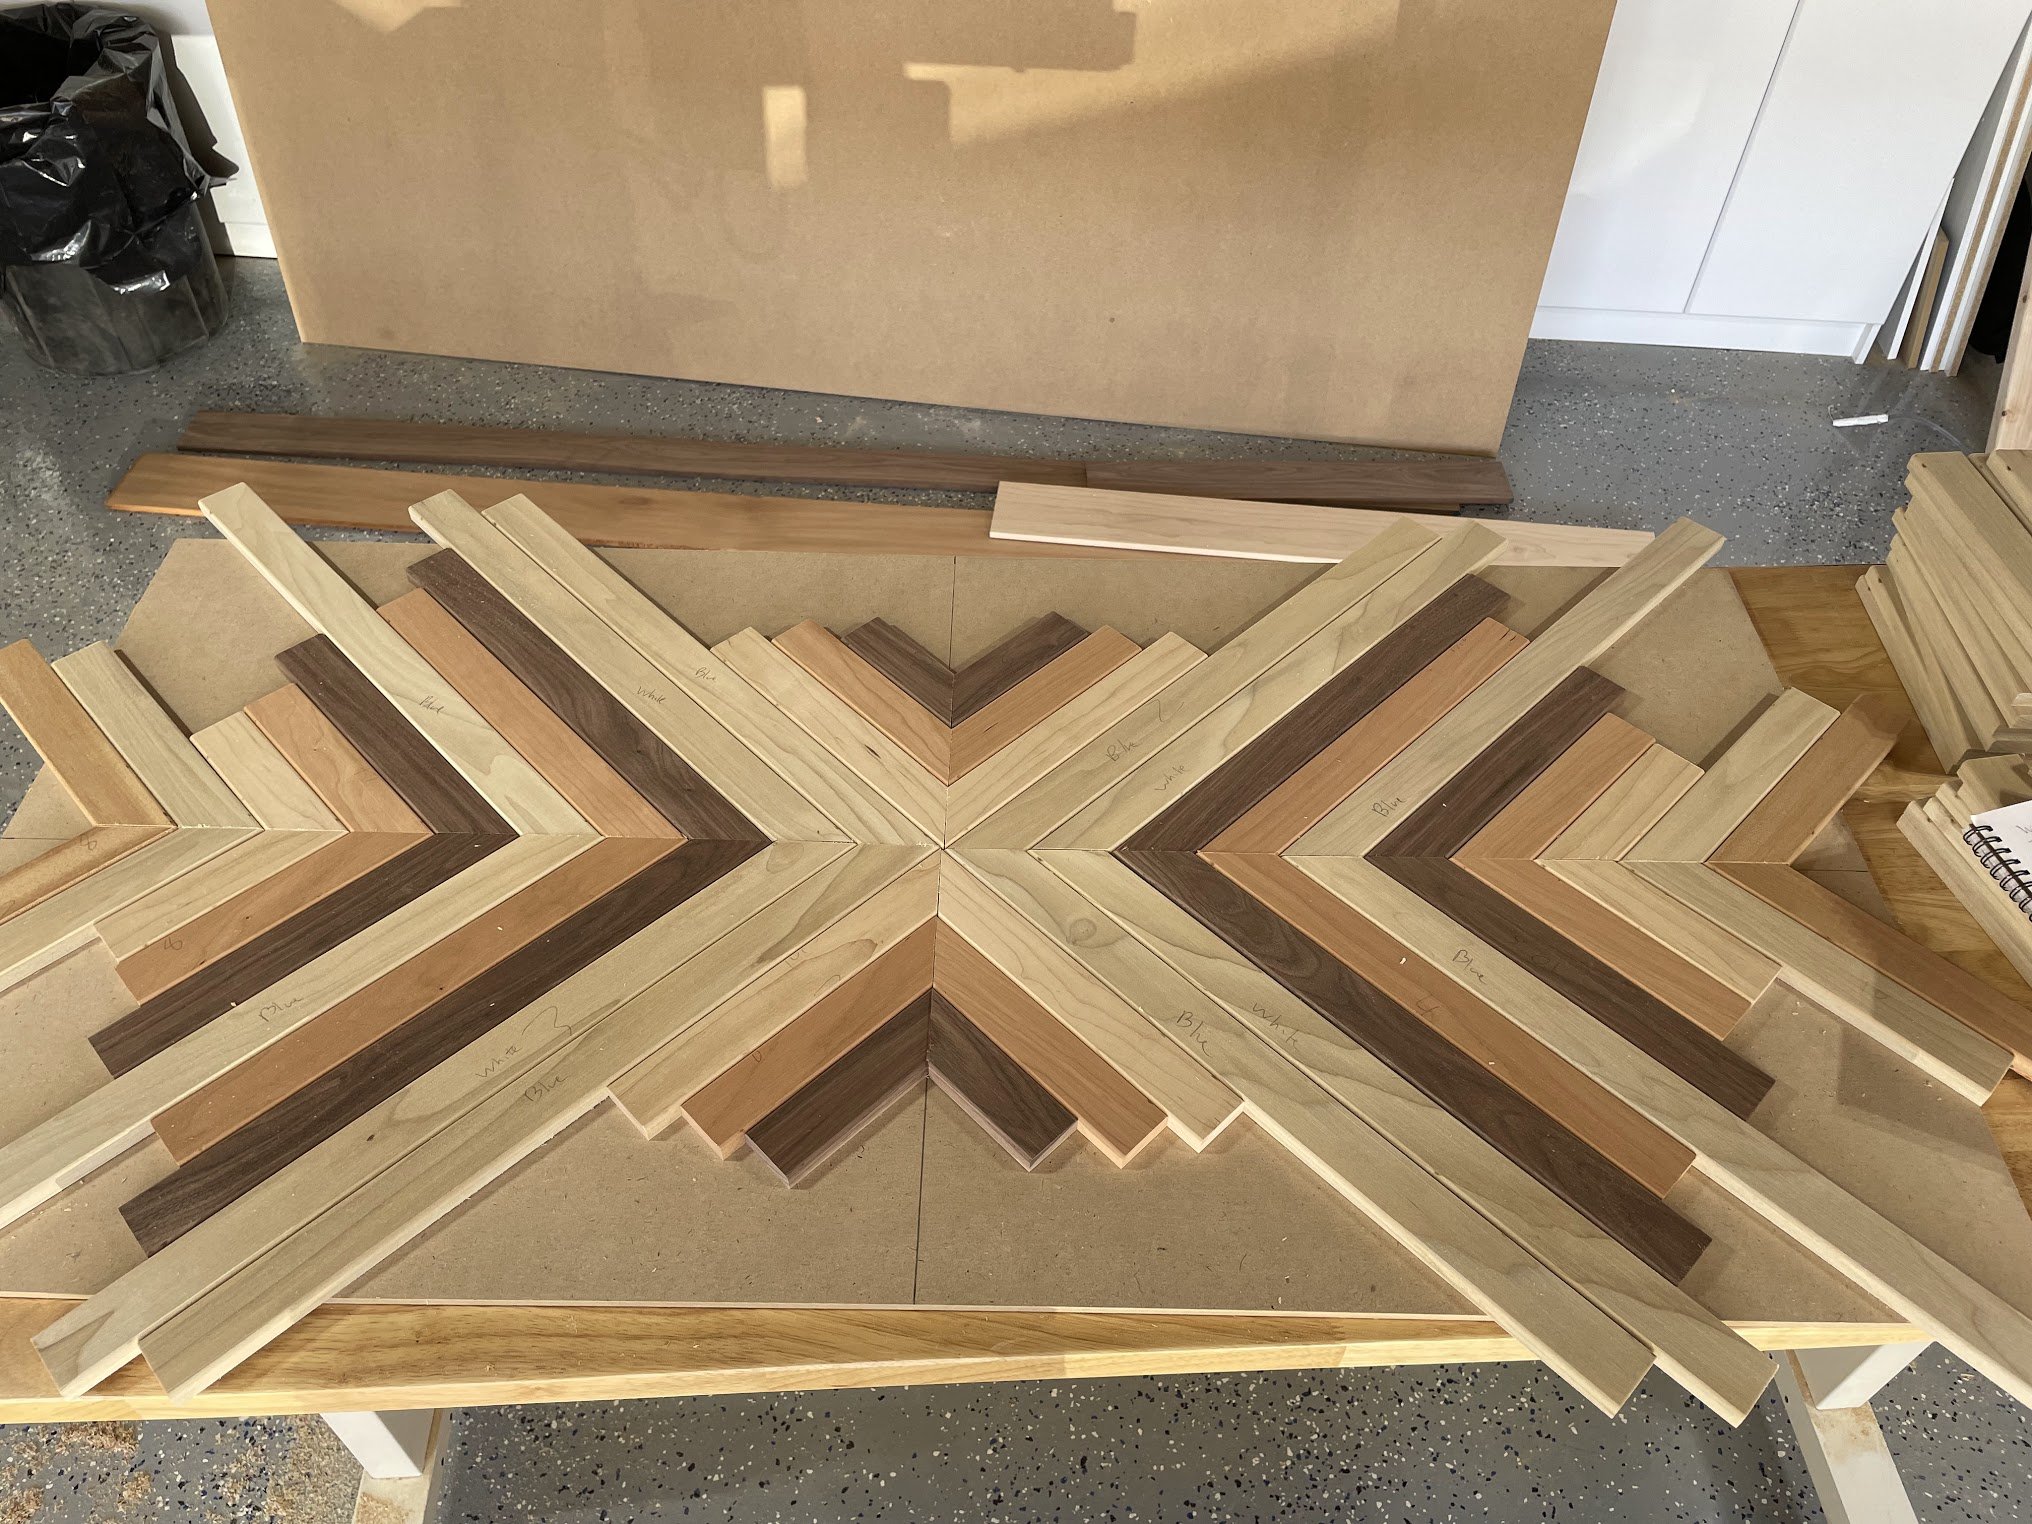
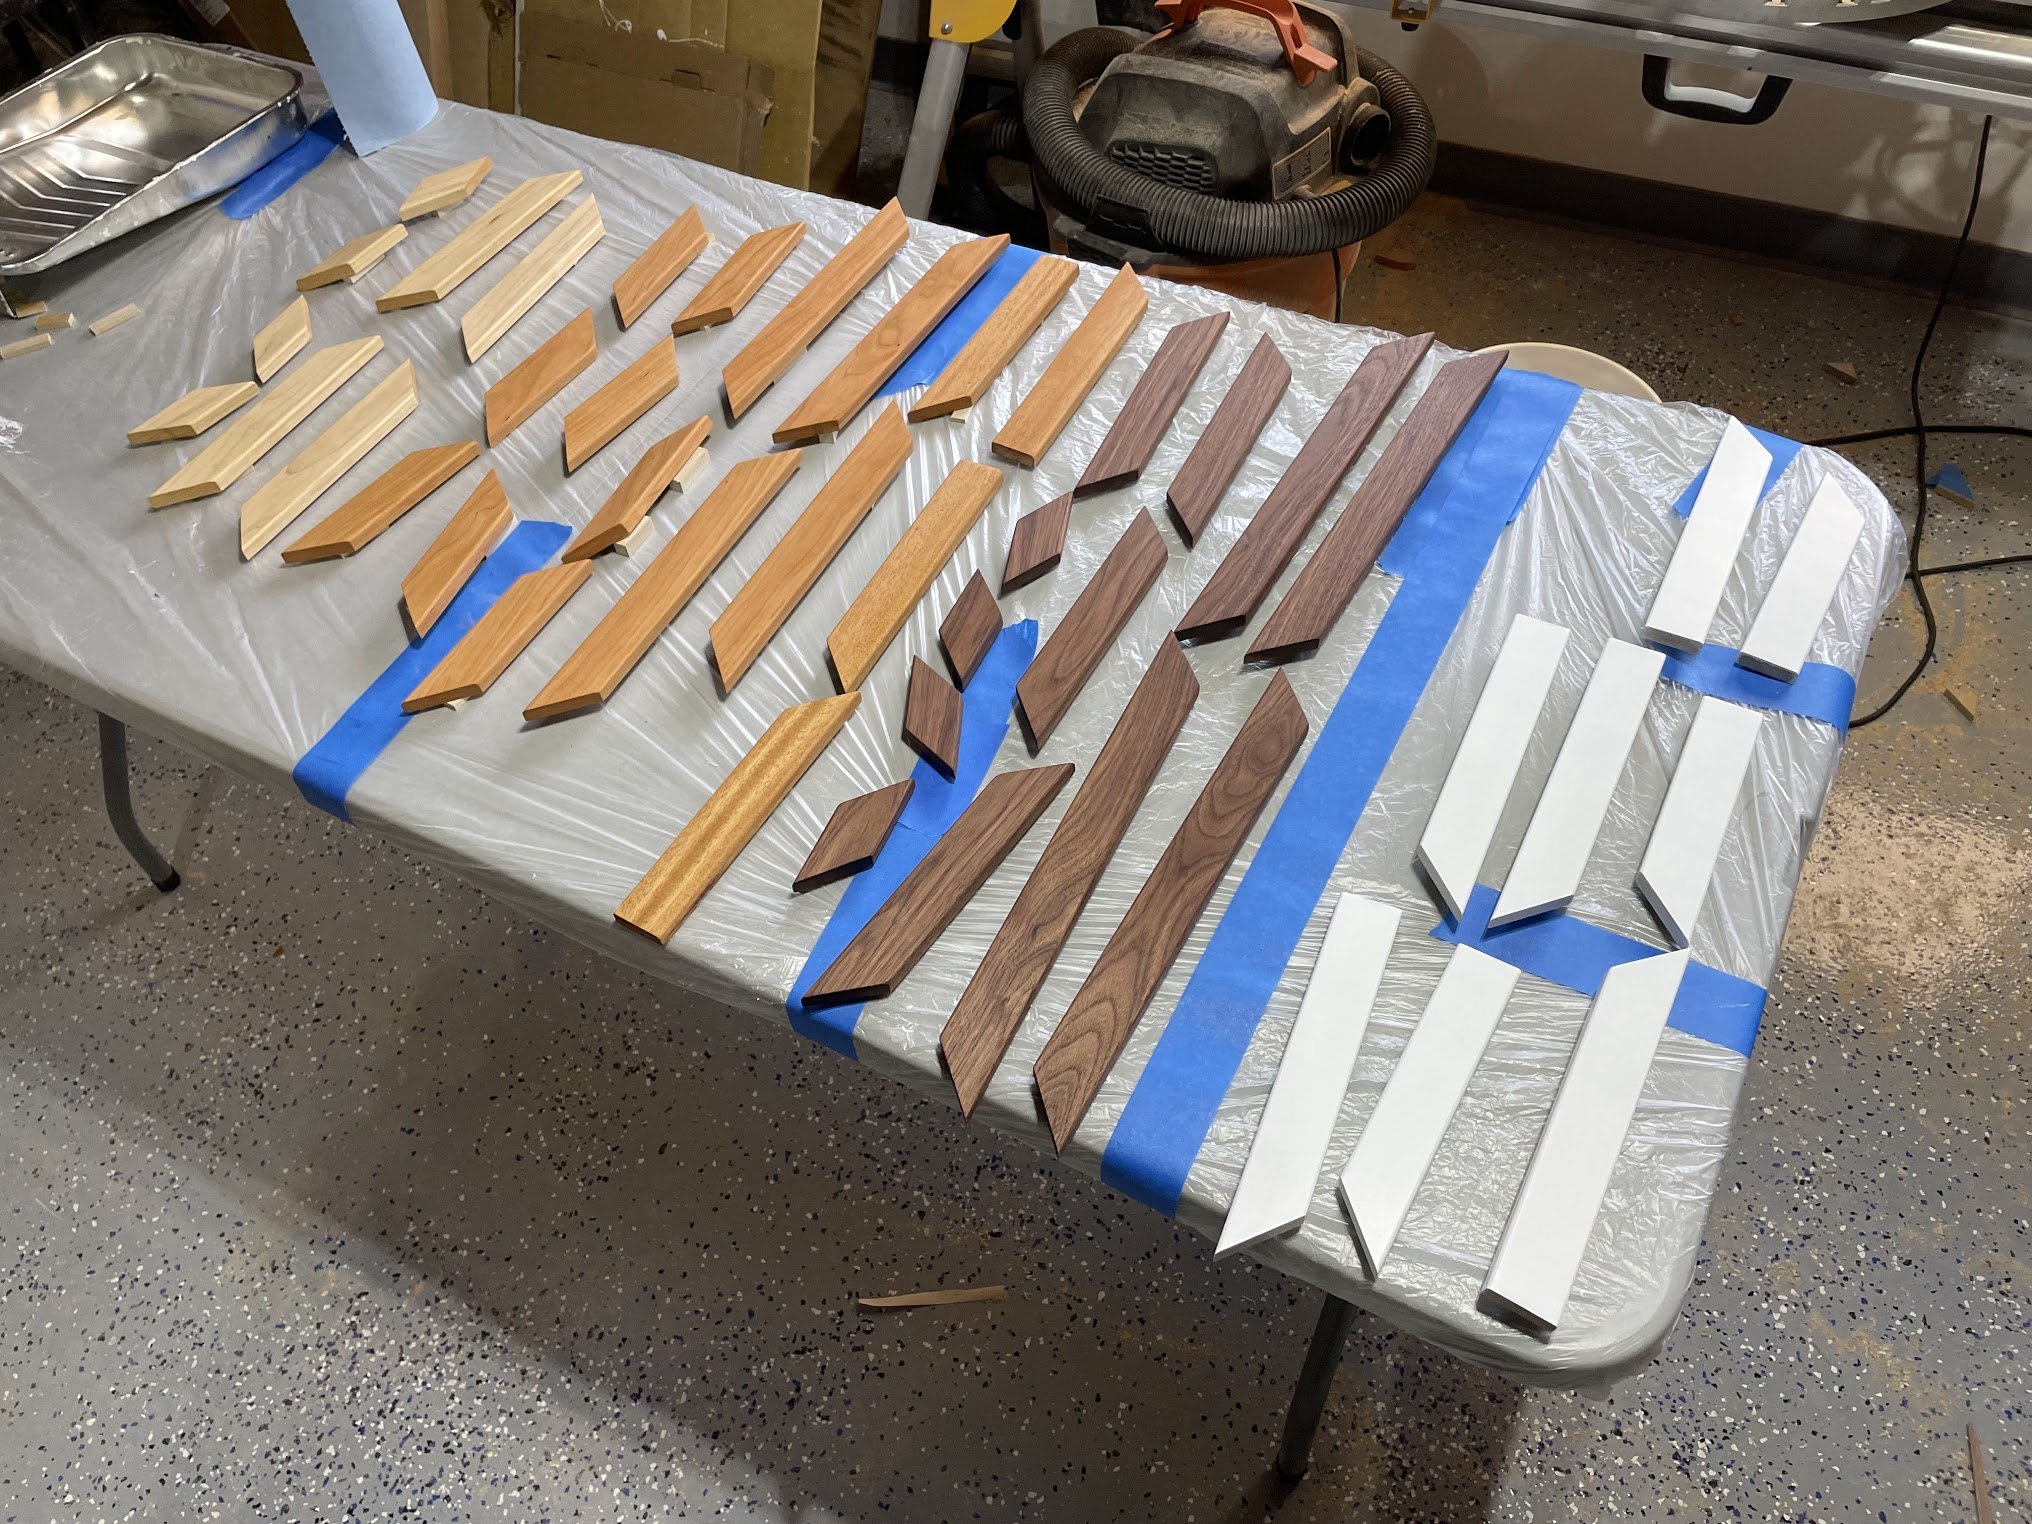
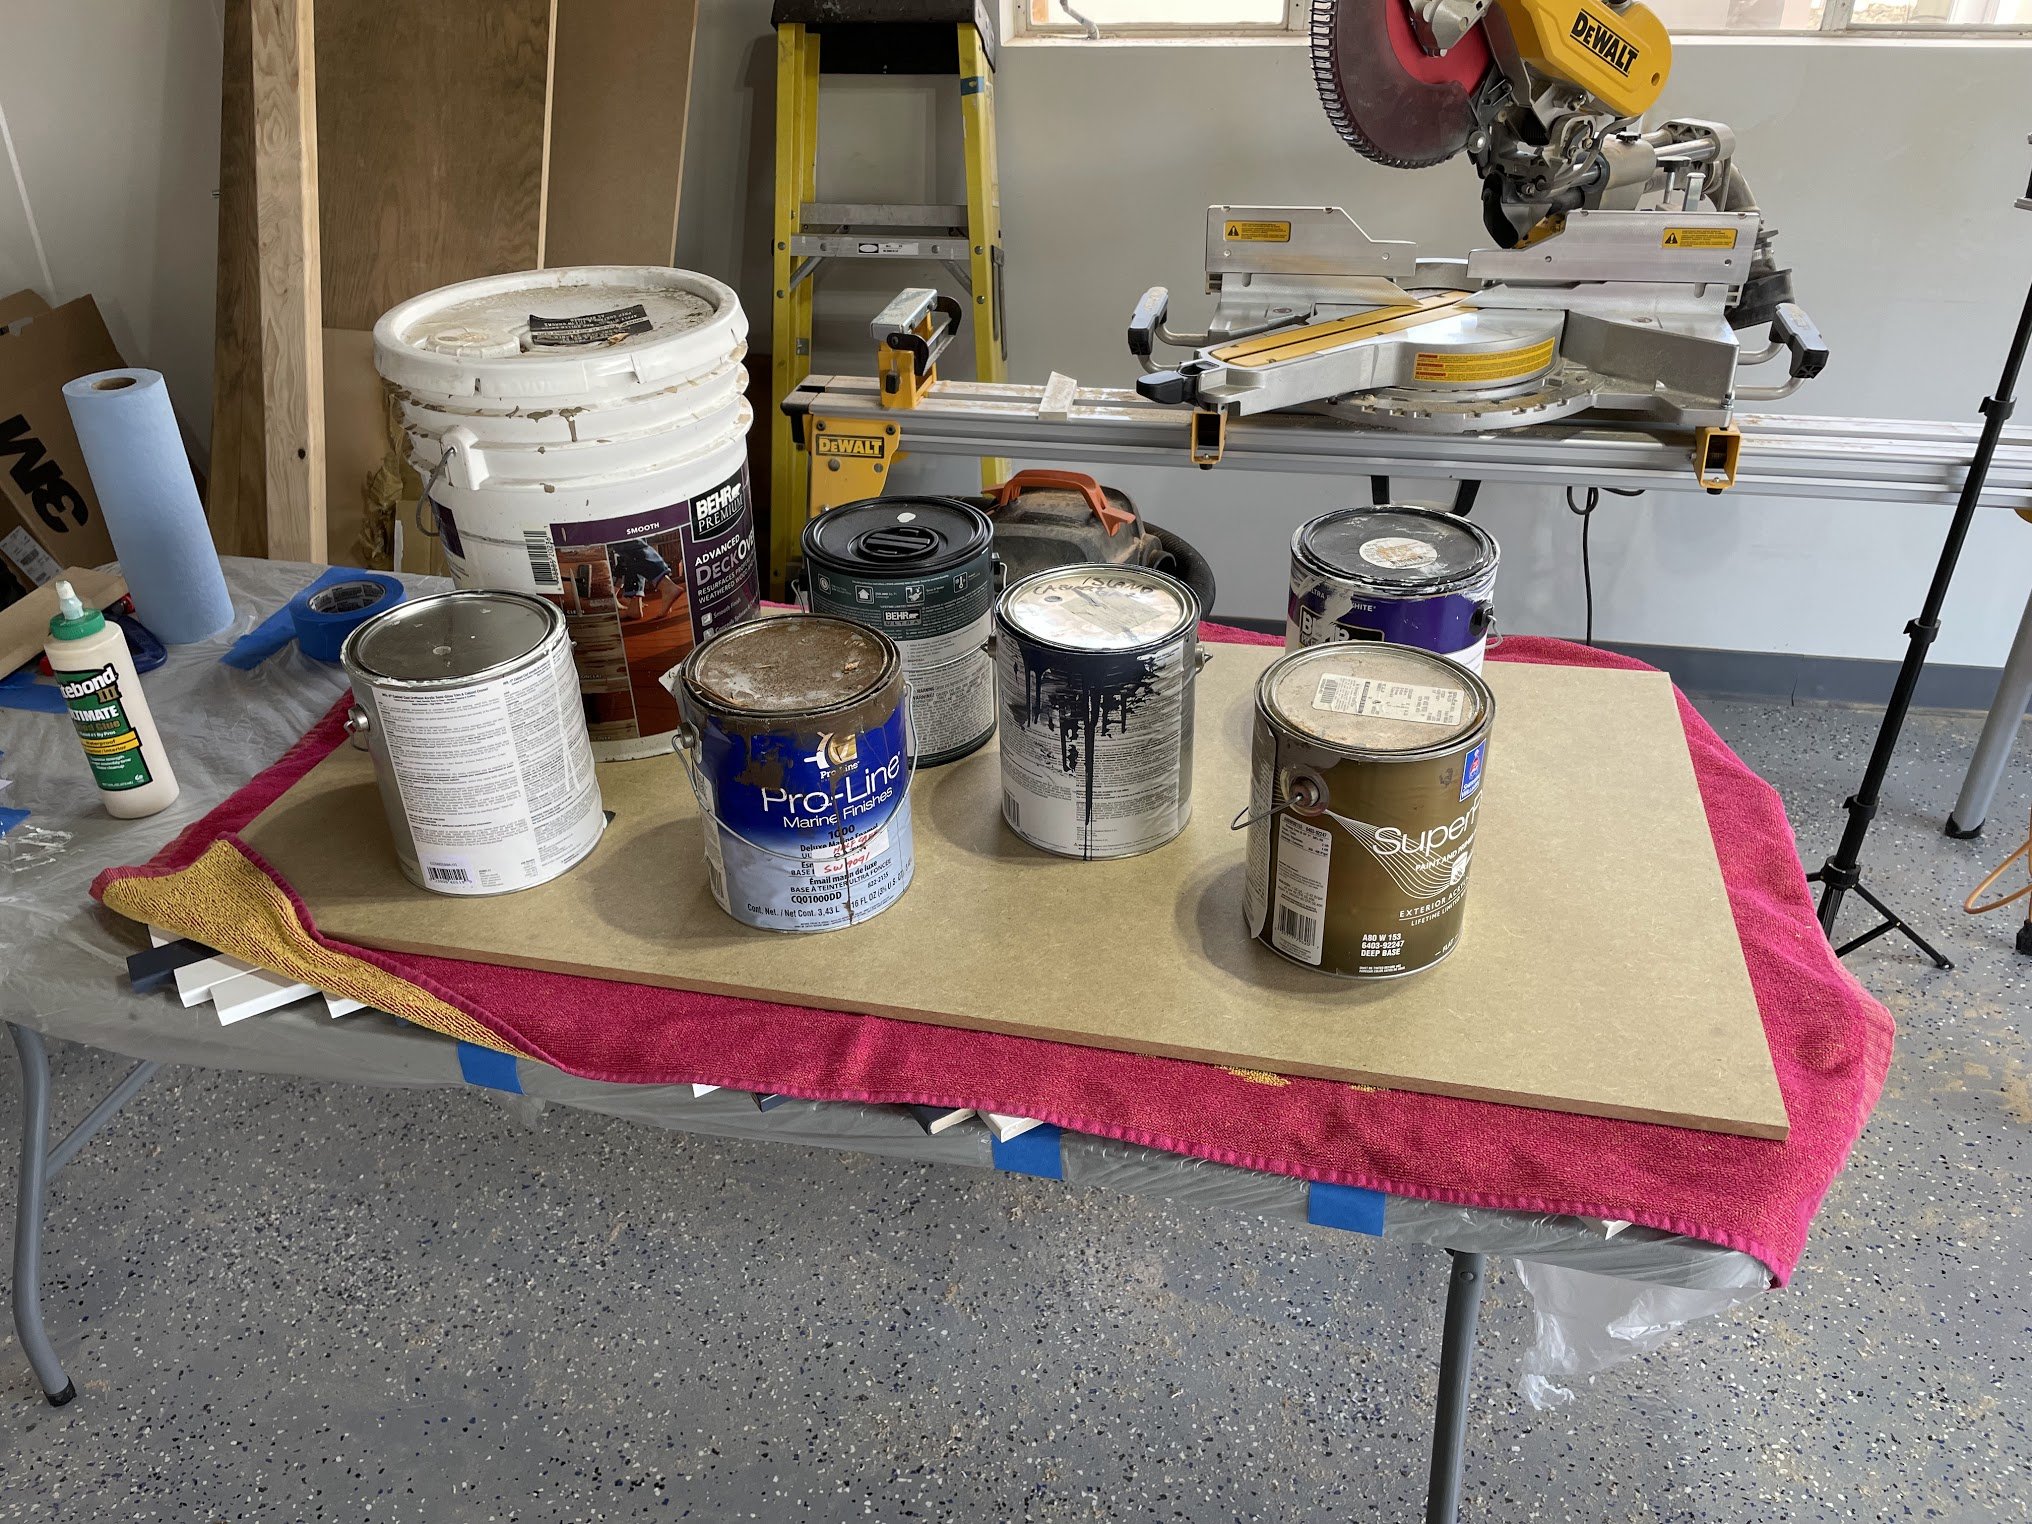
With all the pieces cut and laid out, it was time for finish and paint. I used my favorite Rubio Monocoat in Pure on the natural pieces, and white and blue paint (that I had sitting around from our cabinets) on the poplar pieces. I was pretty happy with how everything came out, though I thought the mahogany would be redder. Instead it looked very similar to the cherry, so that variation I was looking for in my design kind of went away. I only used 4 pieces of mahogany, so no big deal.

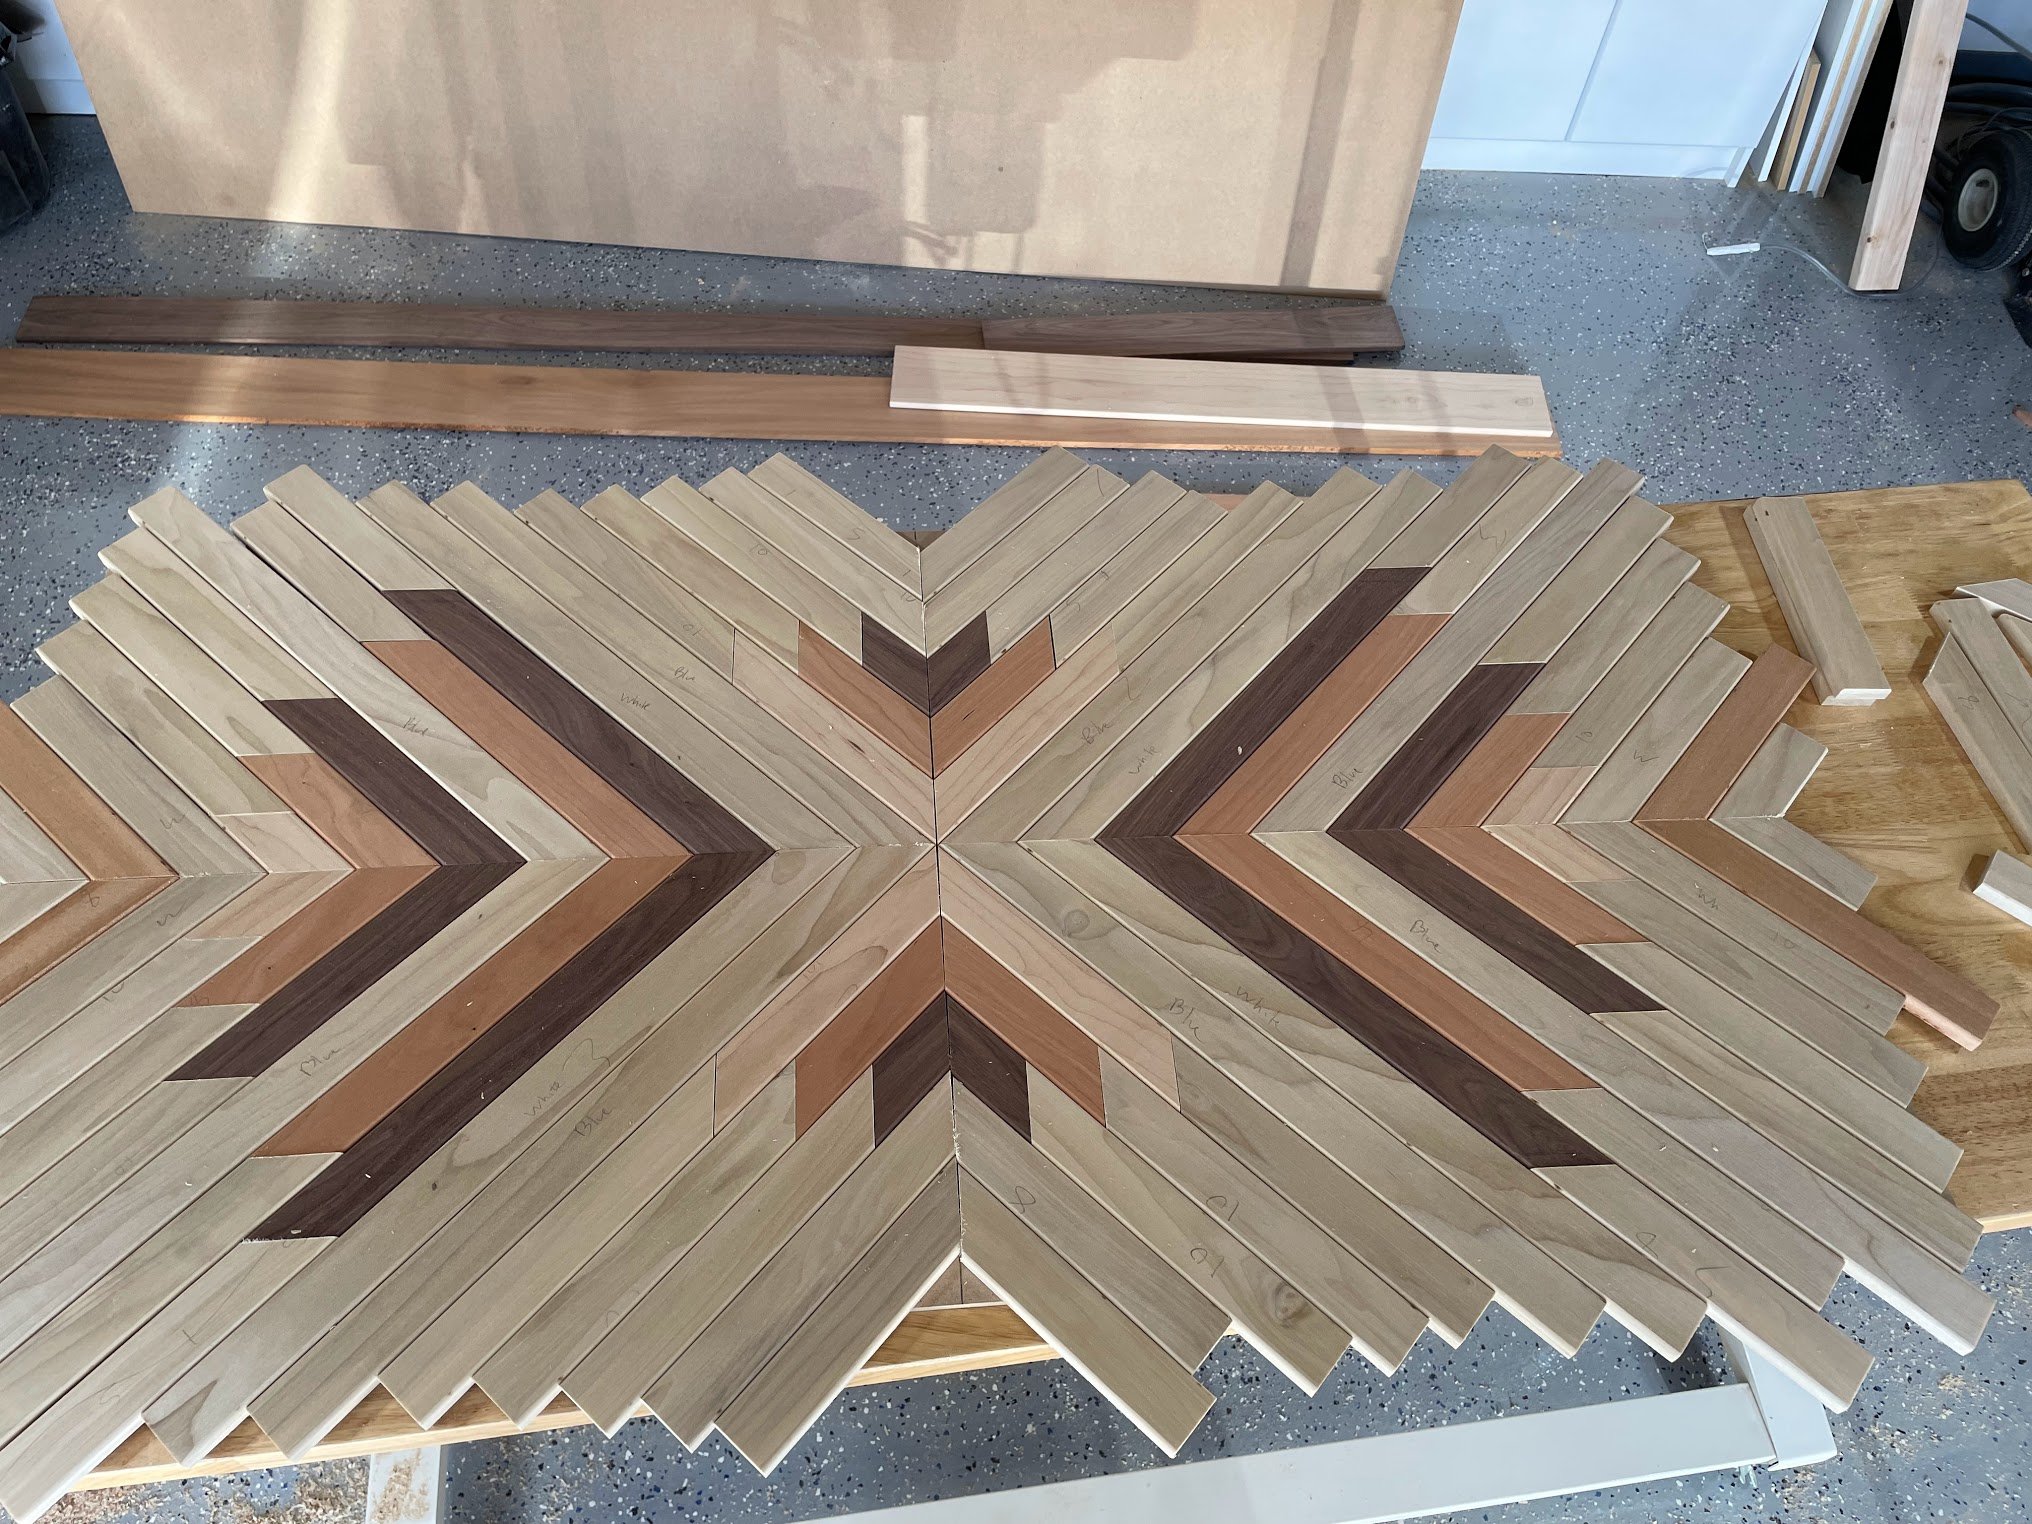
Once that was all done, I did a final dry (no glue) assembly to make sure everything looked good and dial in where the edges of the whole thing would be.
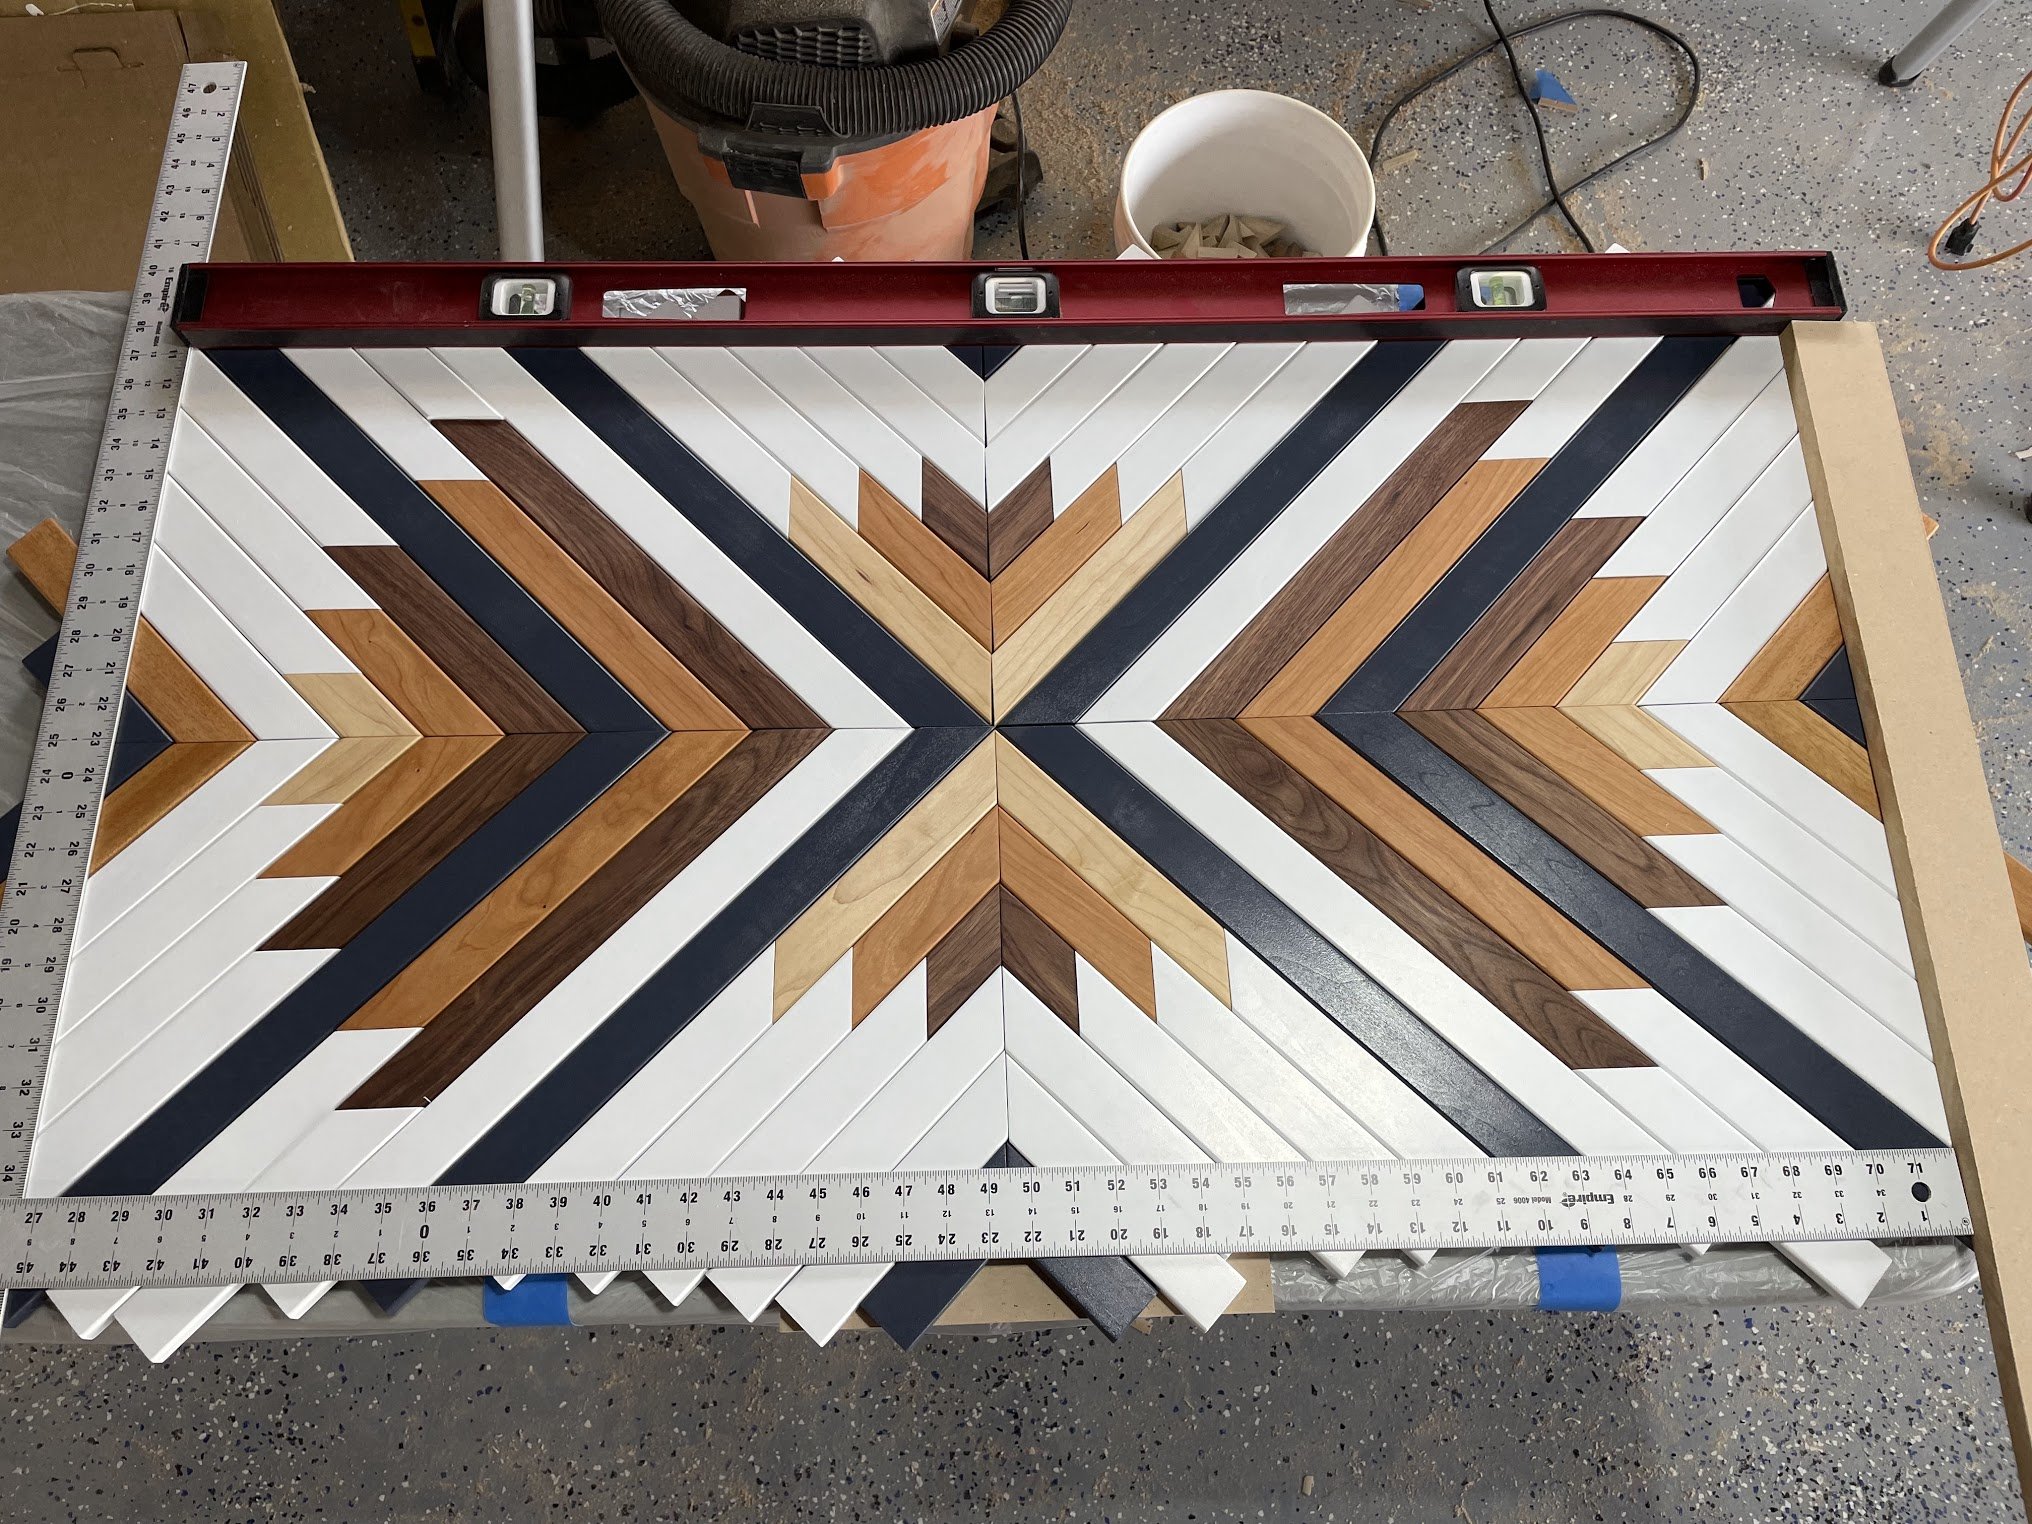
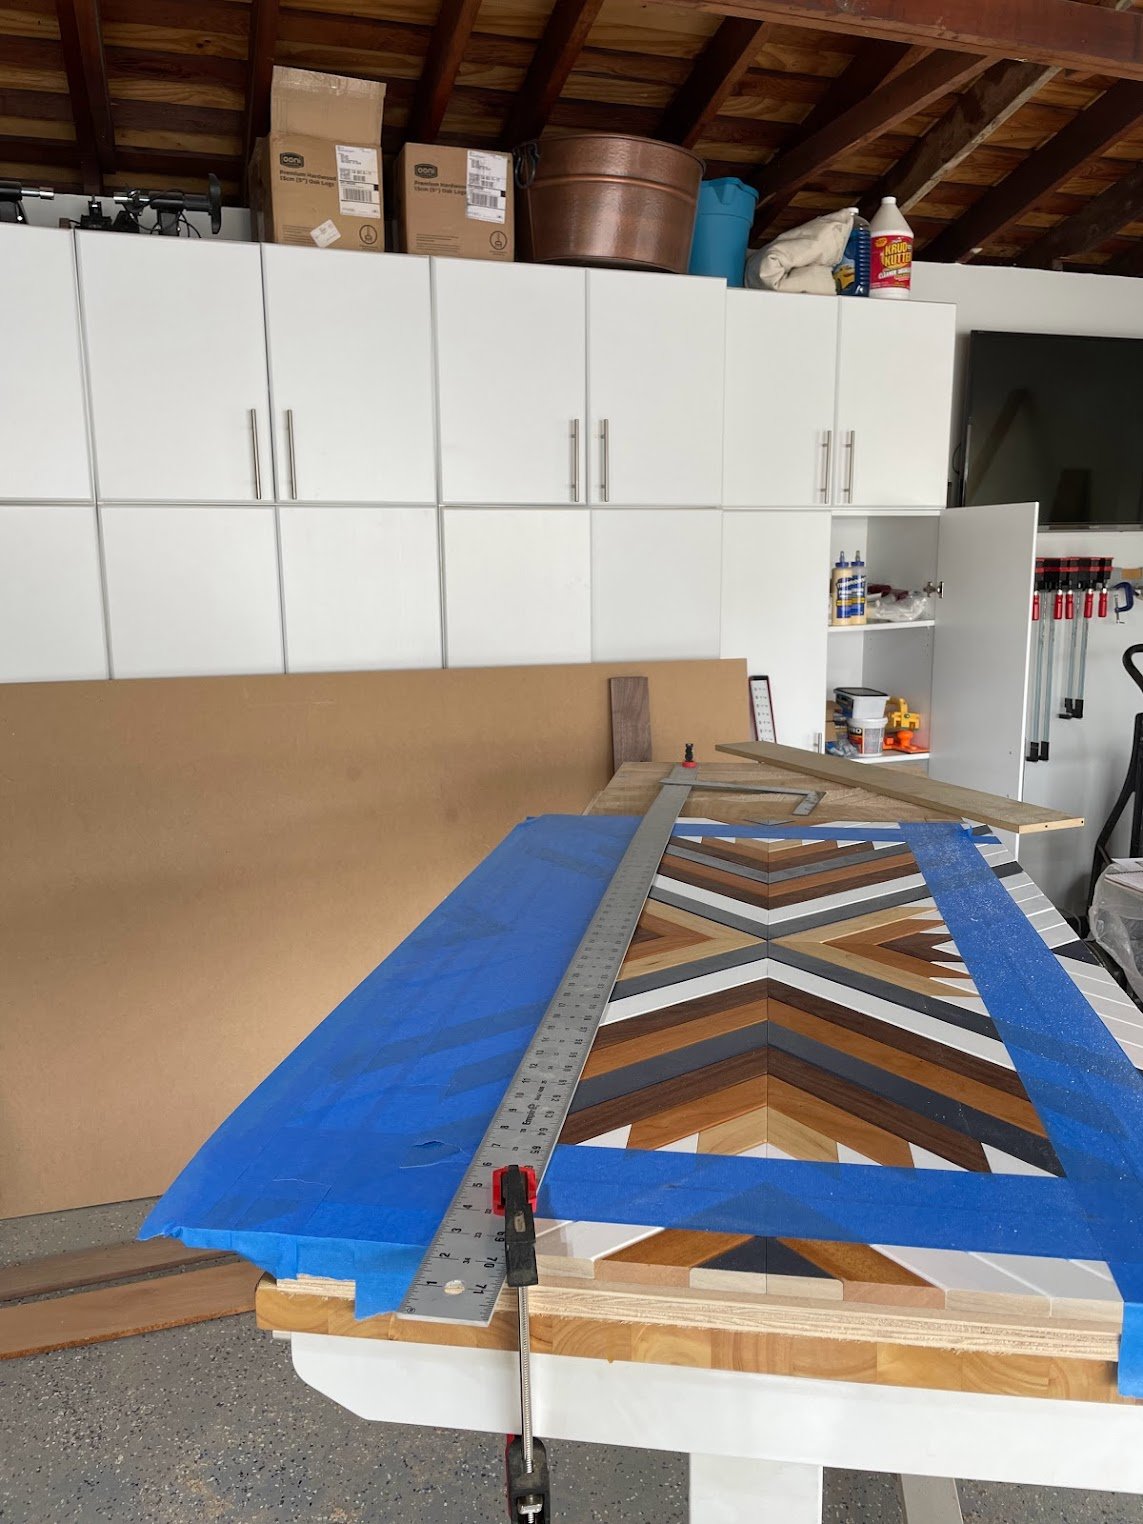
Finally, I glued everything to the MDF backing board. I decided to do it one quadrant at a time, using a straight edge and a square to set the borders of the first quadrant to make sure I had straight lines.
Once everything had glue on it, I taped down some of the smaller pieces, and then put a board over the whole thing with some paint on top to apply some downward pressure.
When the glue was dry, I moved on to cutting the edges square. I put a bunch of tape over the areas I’d be working on to protect it, then clamped my straight edge down along each side to act as a guide for the circular saw.


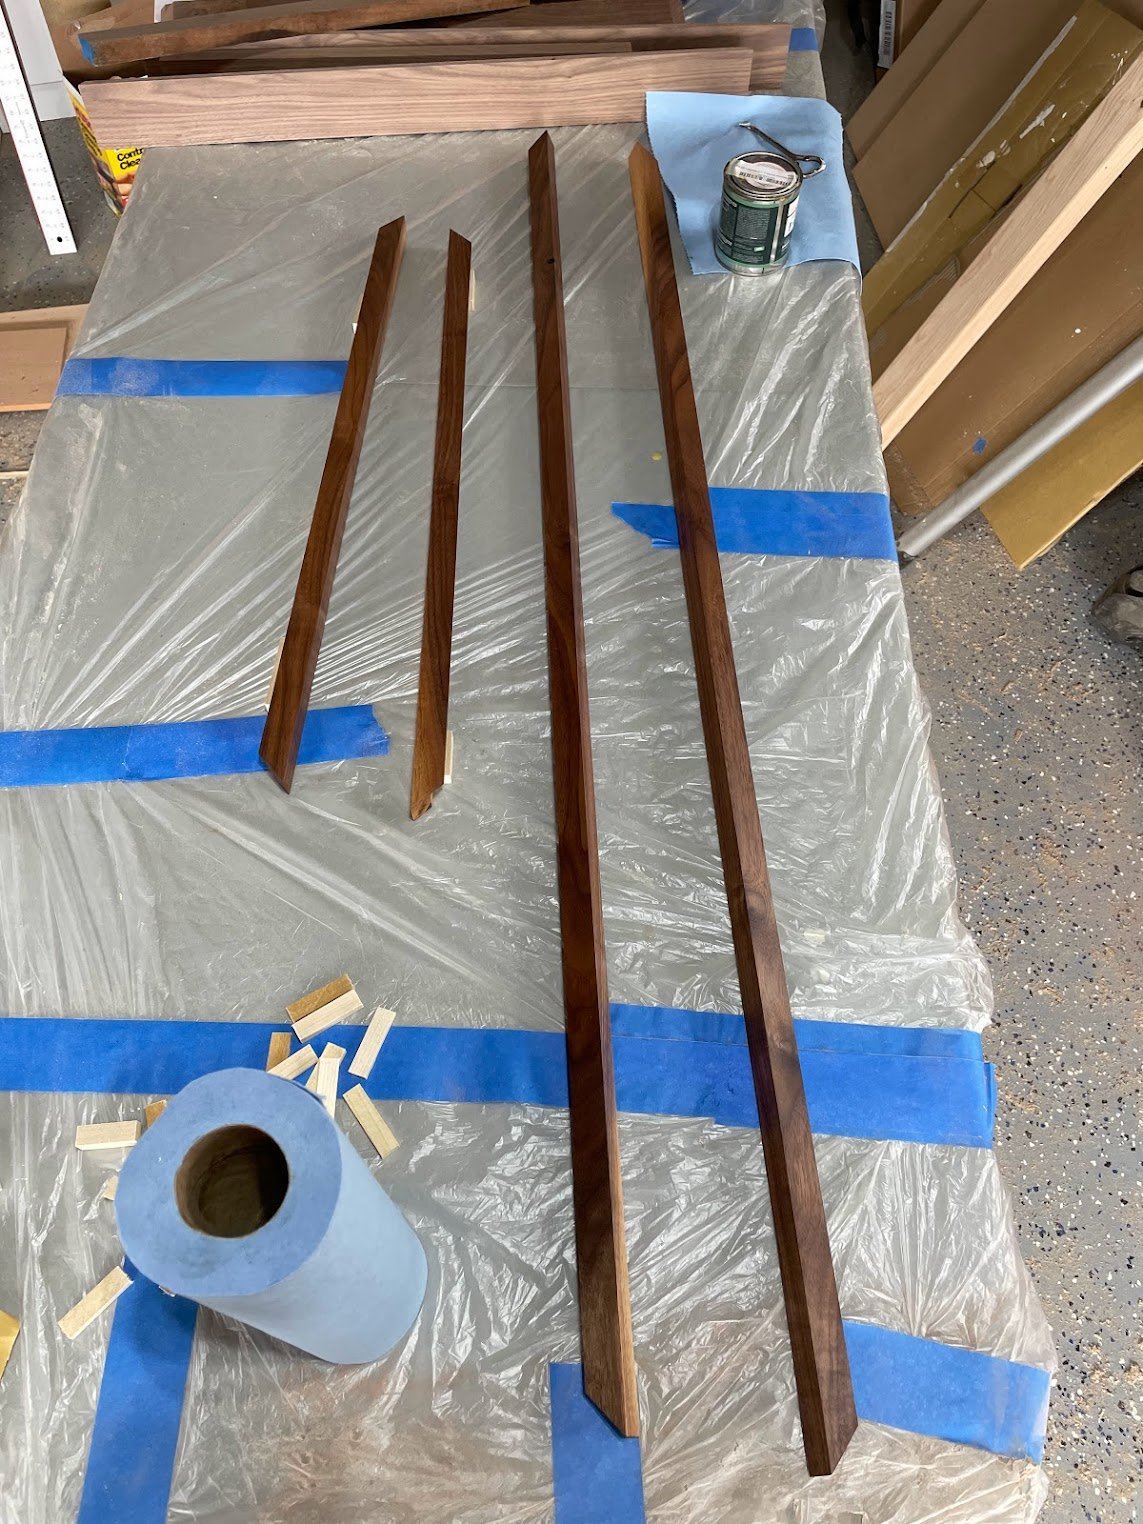
Next, I cut and then finished strips of walnut for the frame. These pieces were notched out so that they’d cover about half an inch of the edge of the art pieces. I glued these on and then I was done! I threw some hanging hardware on the back and put it on the wall.