
White and Maple Crib
This one was incredibly fun to do! Made of painted poplar (frame and base) and natural maple (spindles, legs, and mattress support).
The main challenge with this project was making it modular and collapsable while still being very sturdy. It breaks down into 6 flat pieces plus the legs, so that it can easily be stored and moved. I built in three height settings and a toddler rail that can easily replace the front panel. The design is pretty similar to some babyletto cribs, but I added a couple of my own elements with the frame offsets and maple legs.
Very excited for our baby girl to check it out! Next up is a matching dresser and changing table.


The Process
The design for the crib was based on two cribs we liked from babyletto: the Lolly and the Hudson. We liked the combination of white and natural wood and the generally modern design. The main differences in my design were:
The legs—they are larger and blockier than the other cribs and are natural wood rather than painted
The frame offset—where the vertical and horizontal rails come together there is a 1/4 inch offset, which I thought would be a cool design element
The type of wood—I used a harder (and more expensive) maple instead of pine
I started by rough cutting all the frame pieces, which were made out of poplar. First I cut everything to rough length, then to rough width. Then I went back and cut all the pieces to their final width (on the table saw) and length (on the miter saw).
Once those were ready, I used my new Festool Domino Joiner (very exciting!) to cut domino holes into the frame pieces where they would be joined together. I used dominos instead of a simple butt joint (just gluing the two pieces directly together) for added strength. Obviously it was very important in this project for everything to hold together!
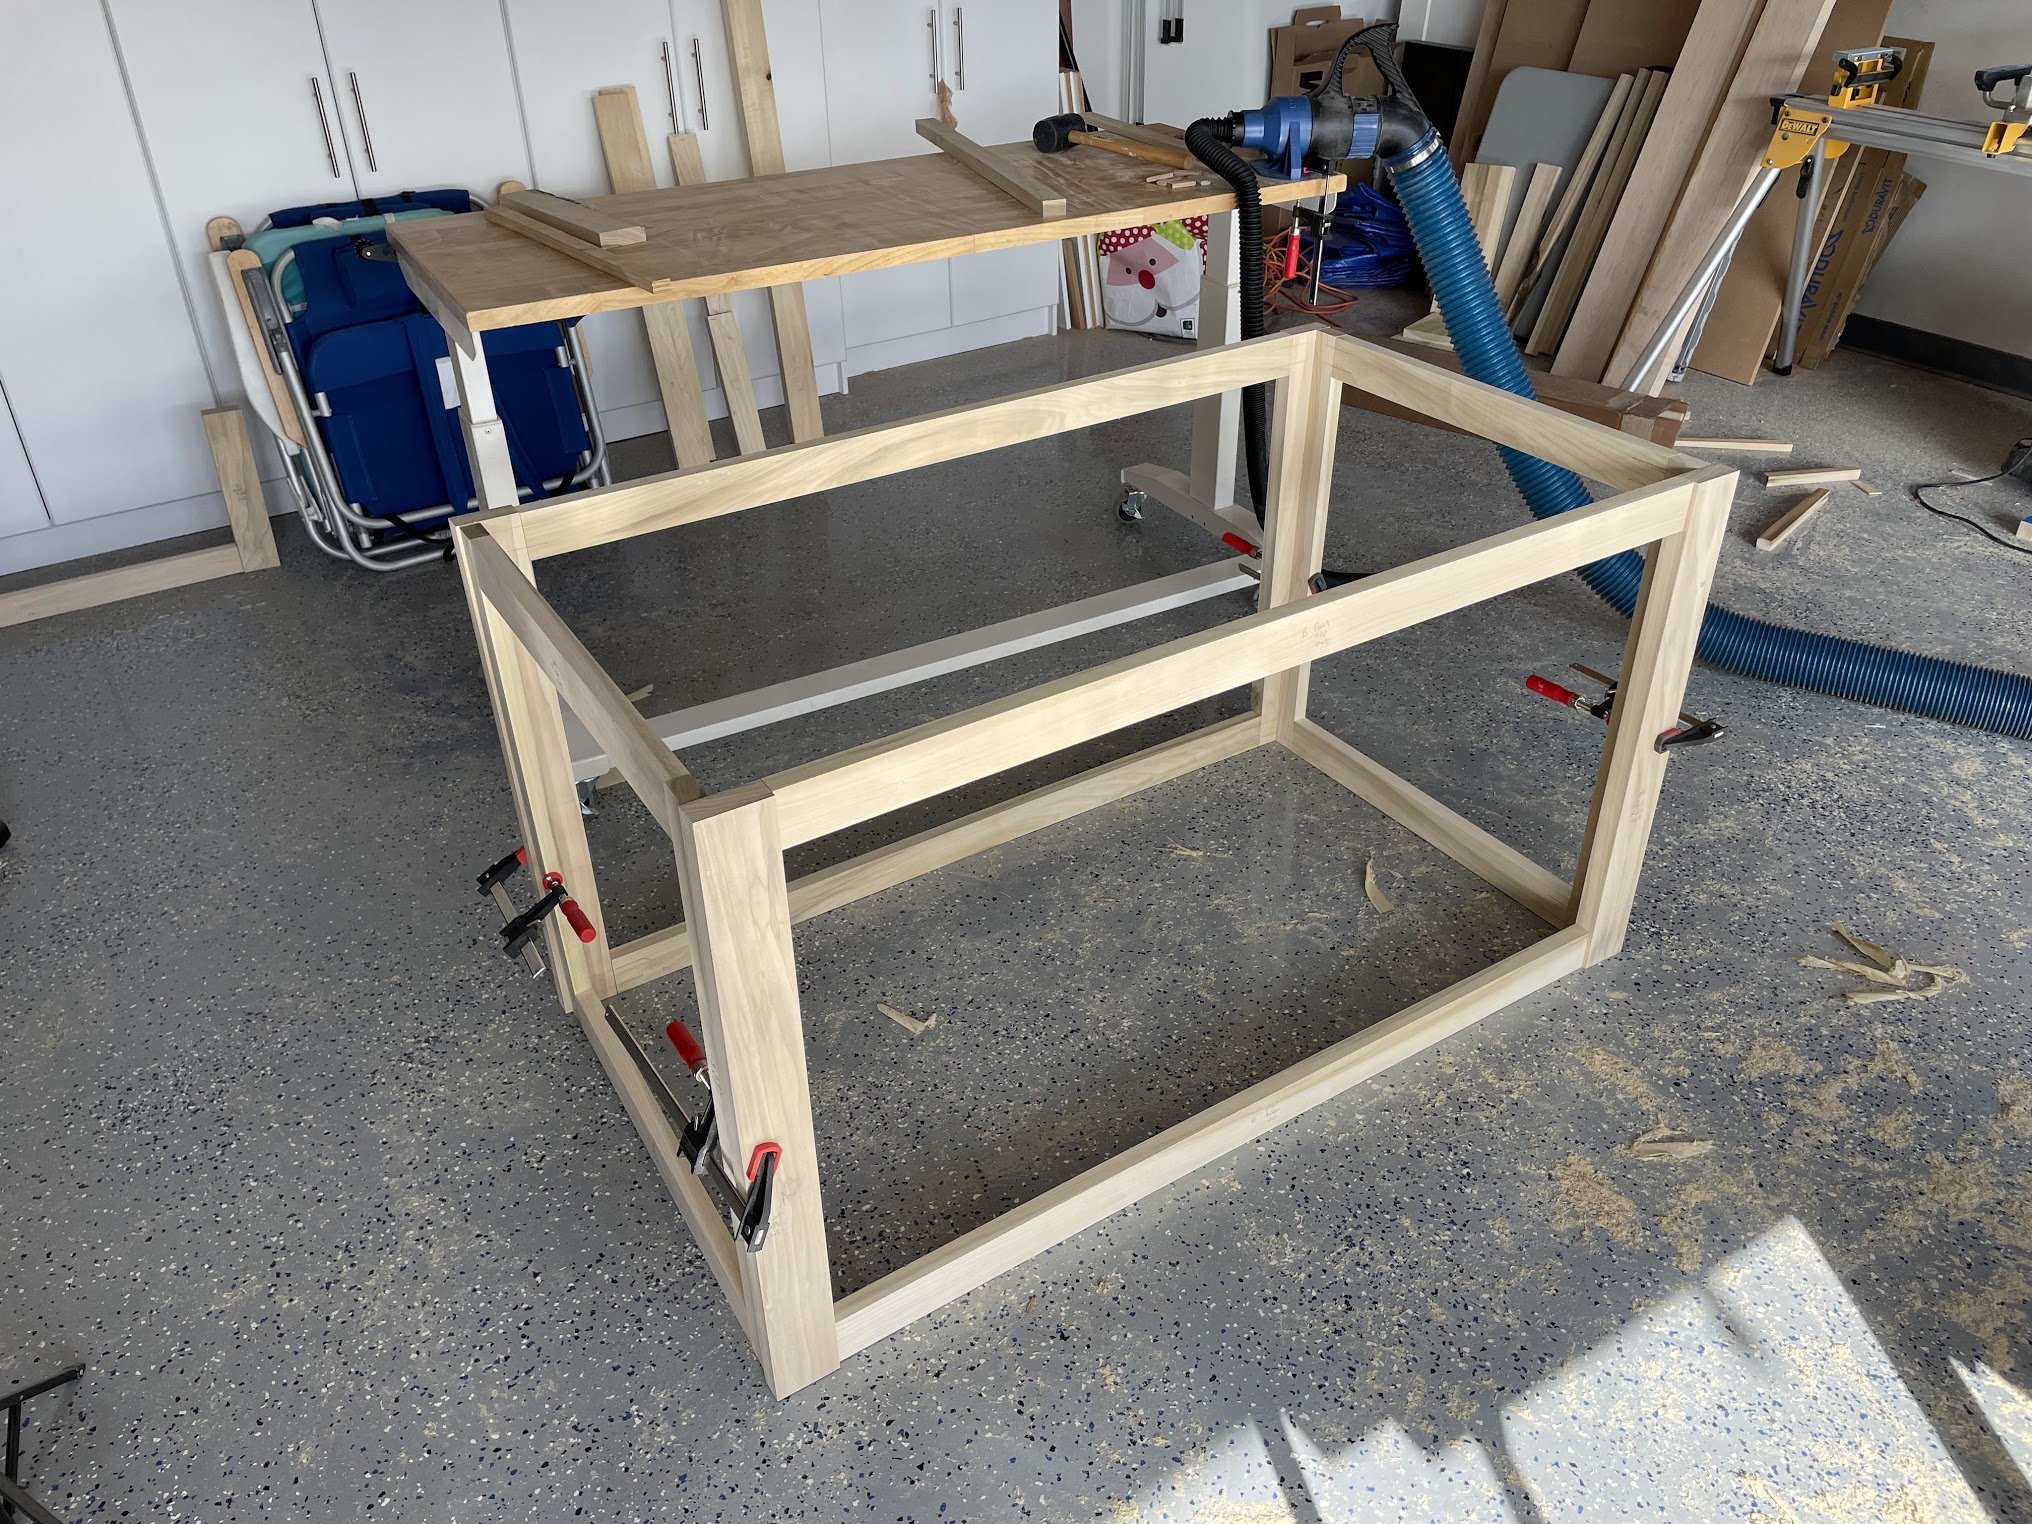
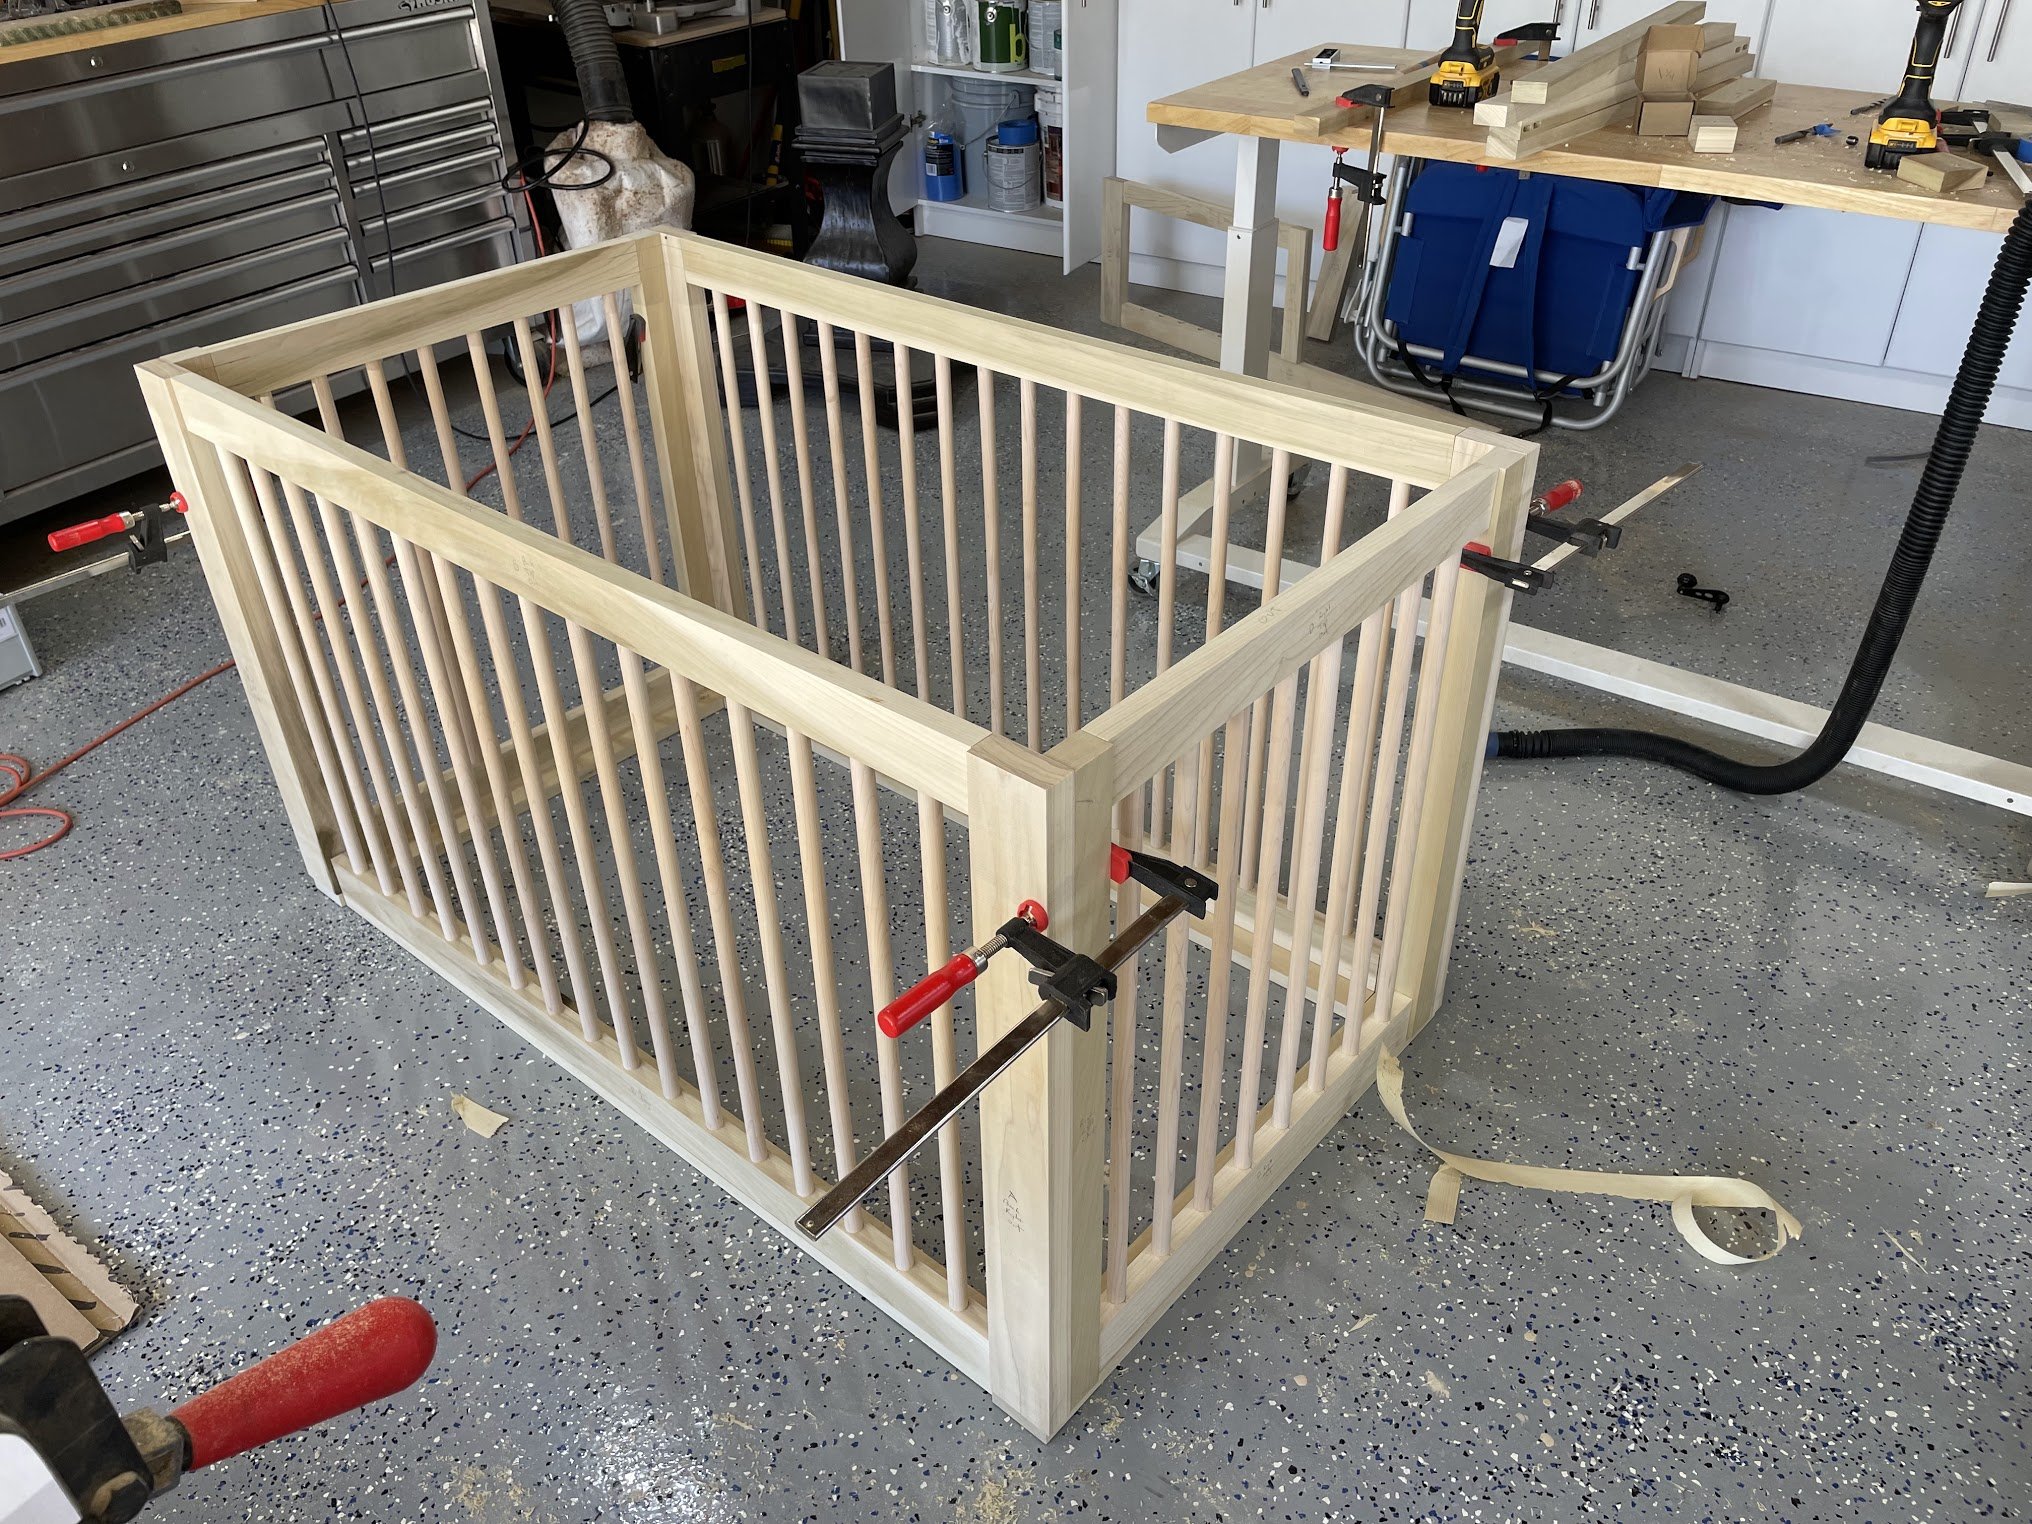
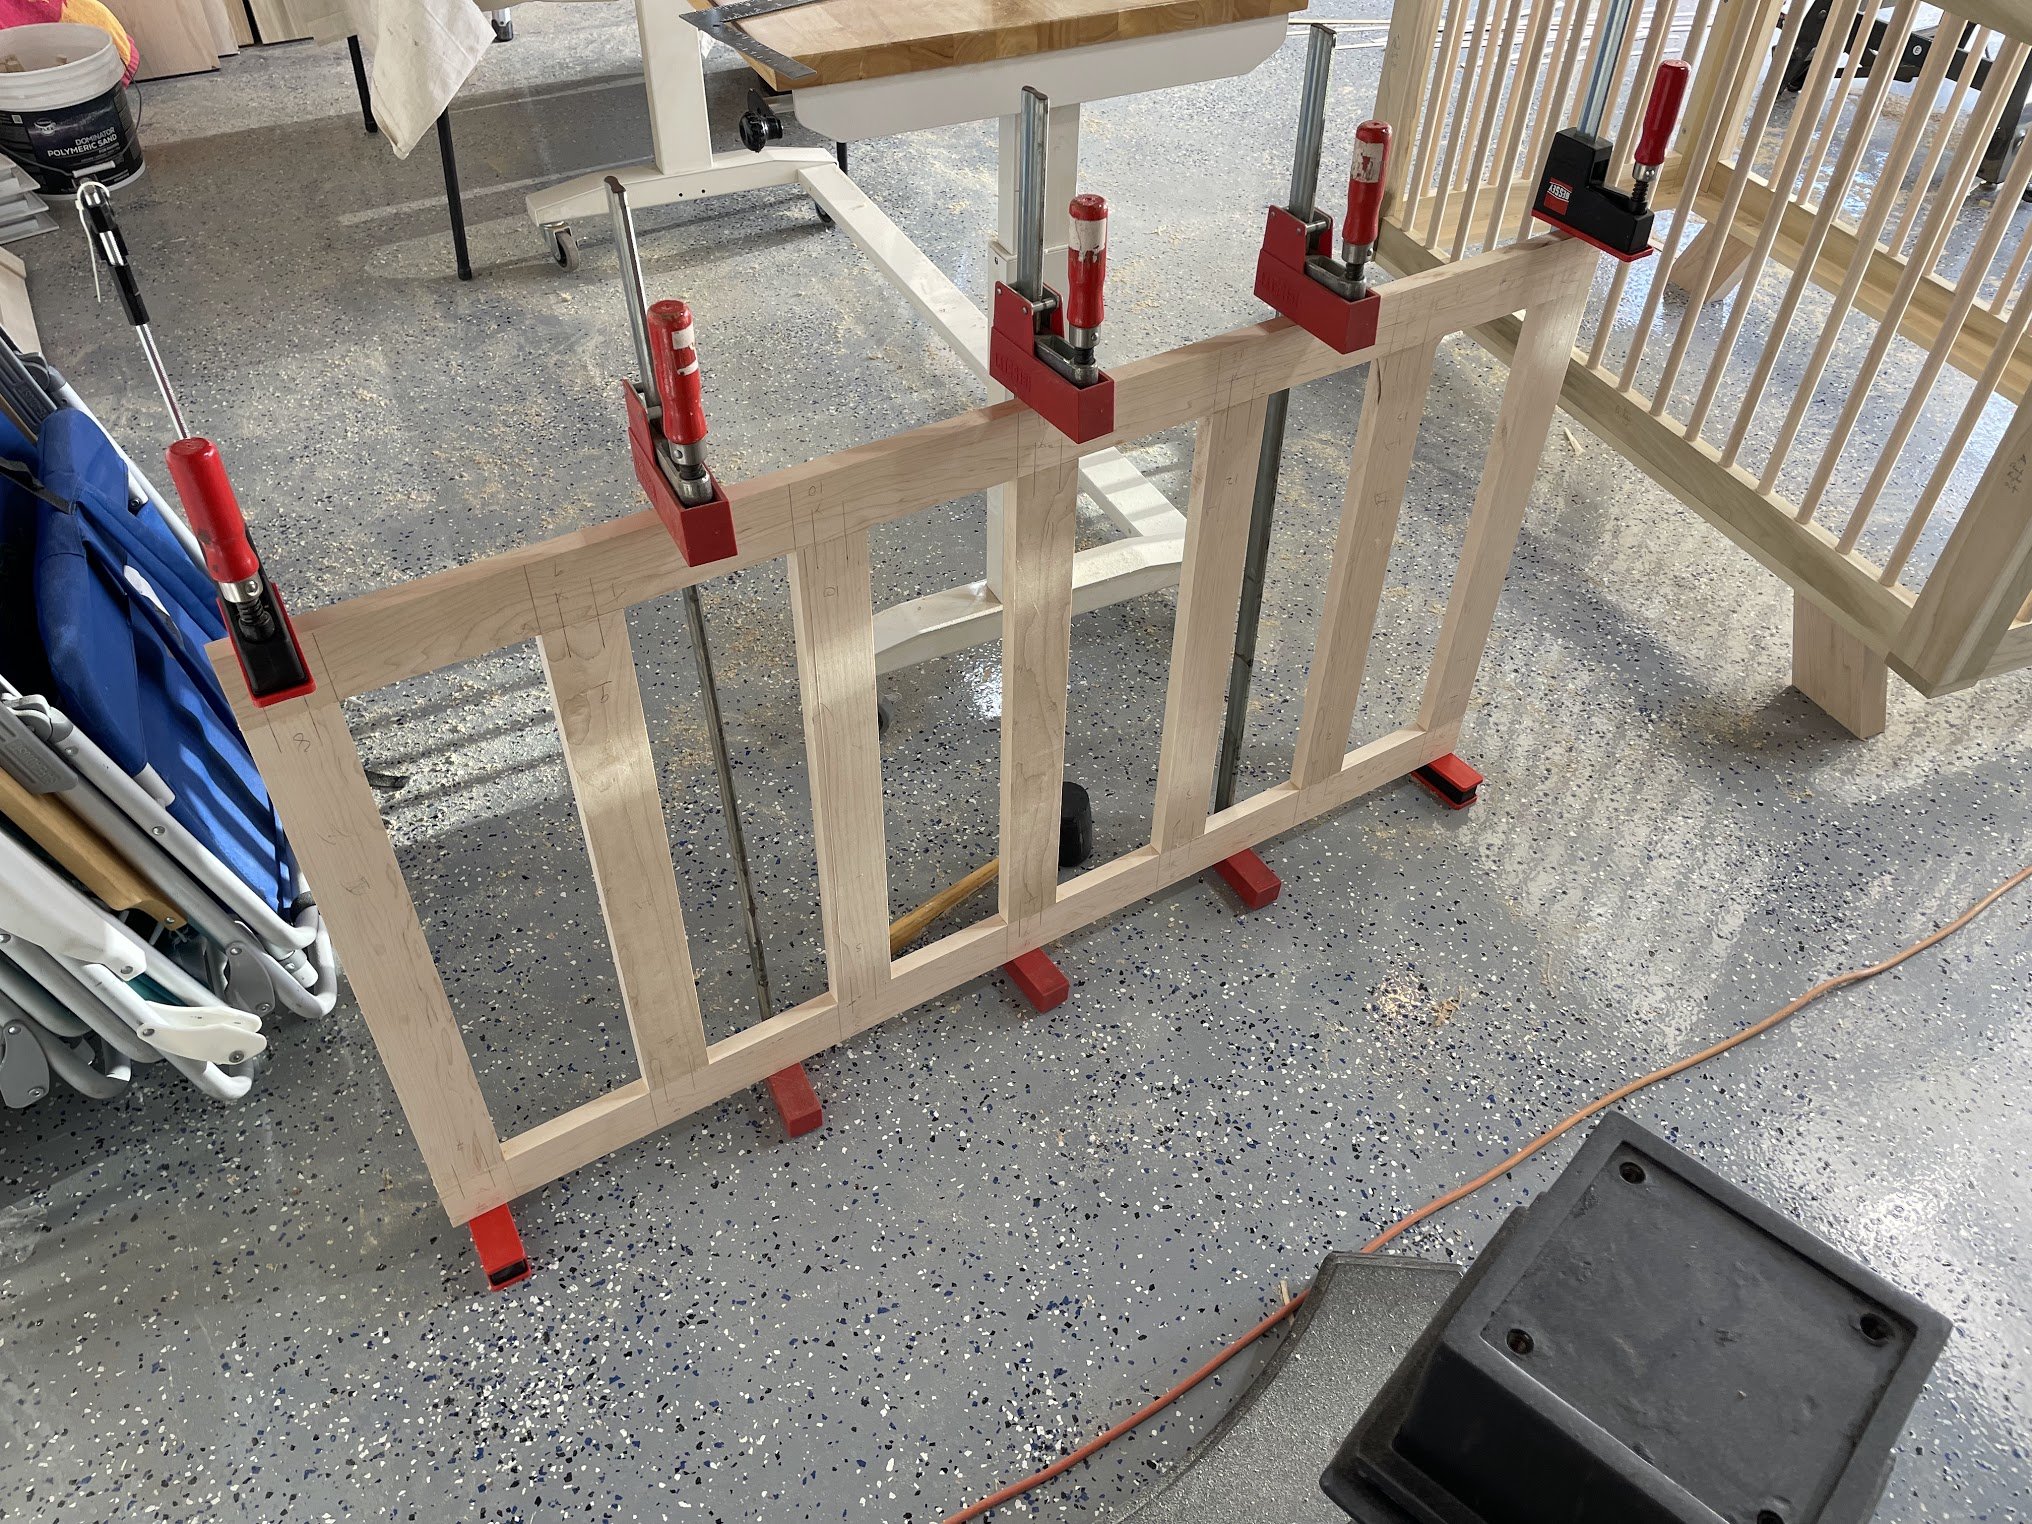
I was essentially creating 6 panels: the front and back, the two sides, the base, and the toddler rail that can replace the front. For the first 5 of those, it was a pretty simple rectangle frame, so I used two dominos at each of the 4 corners. The toddler rail was just a little different shape, but pretty similar.

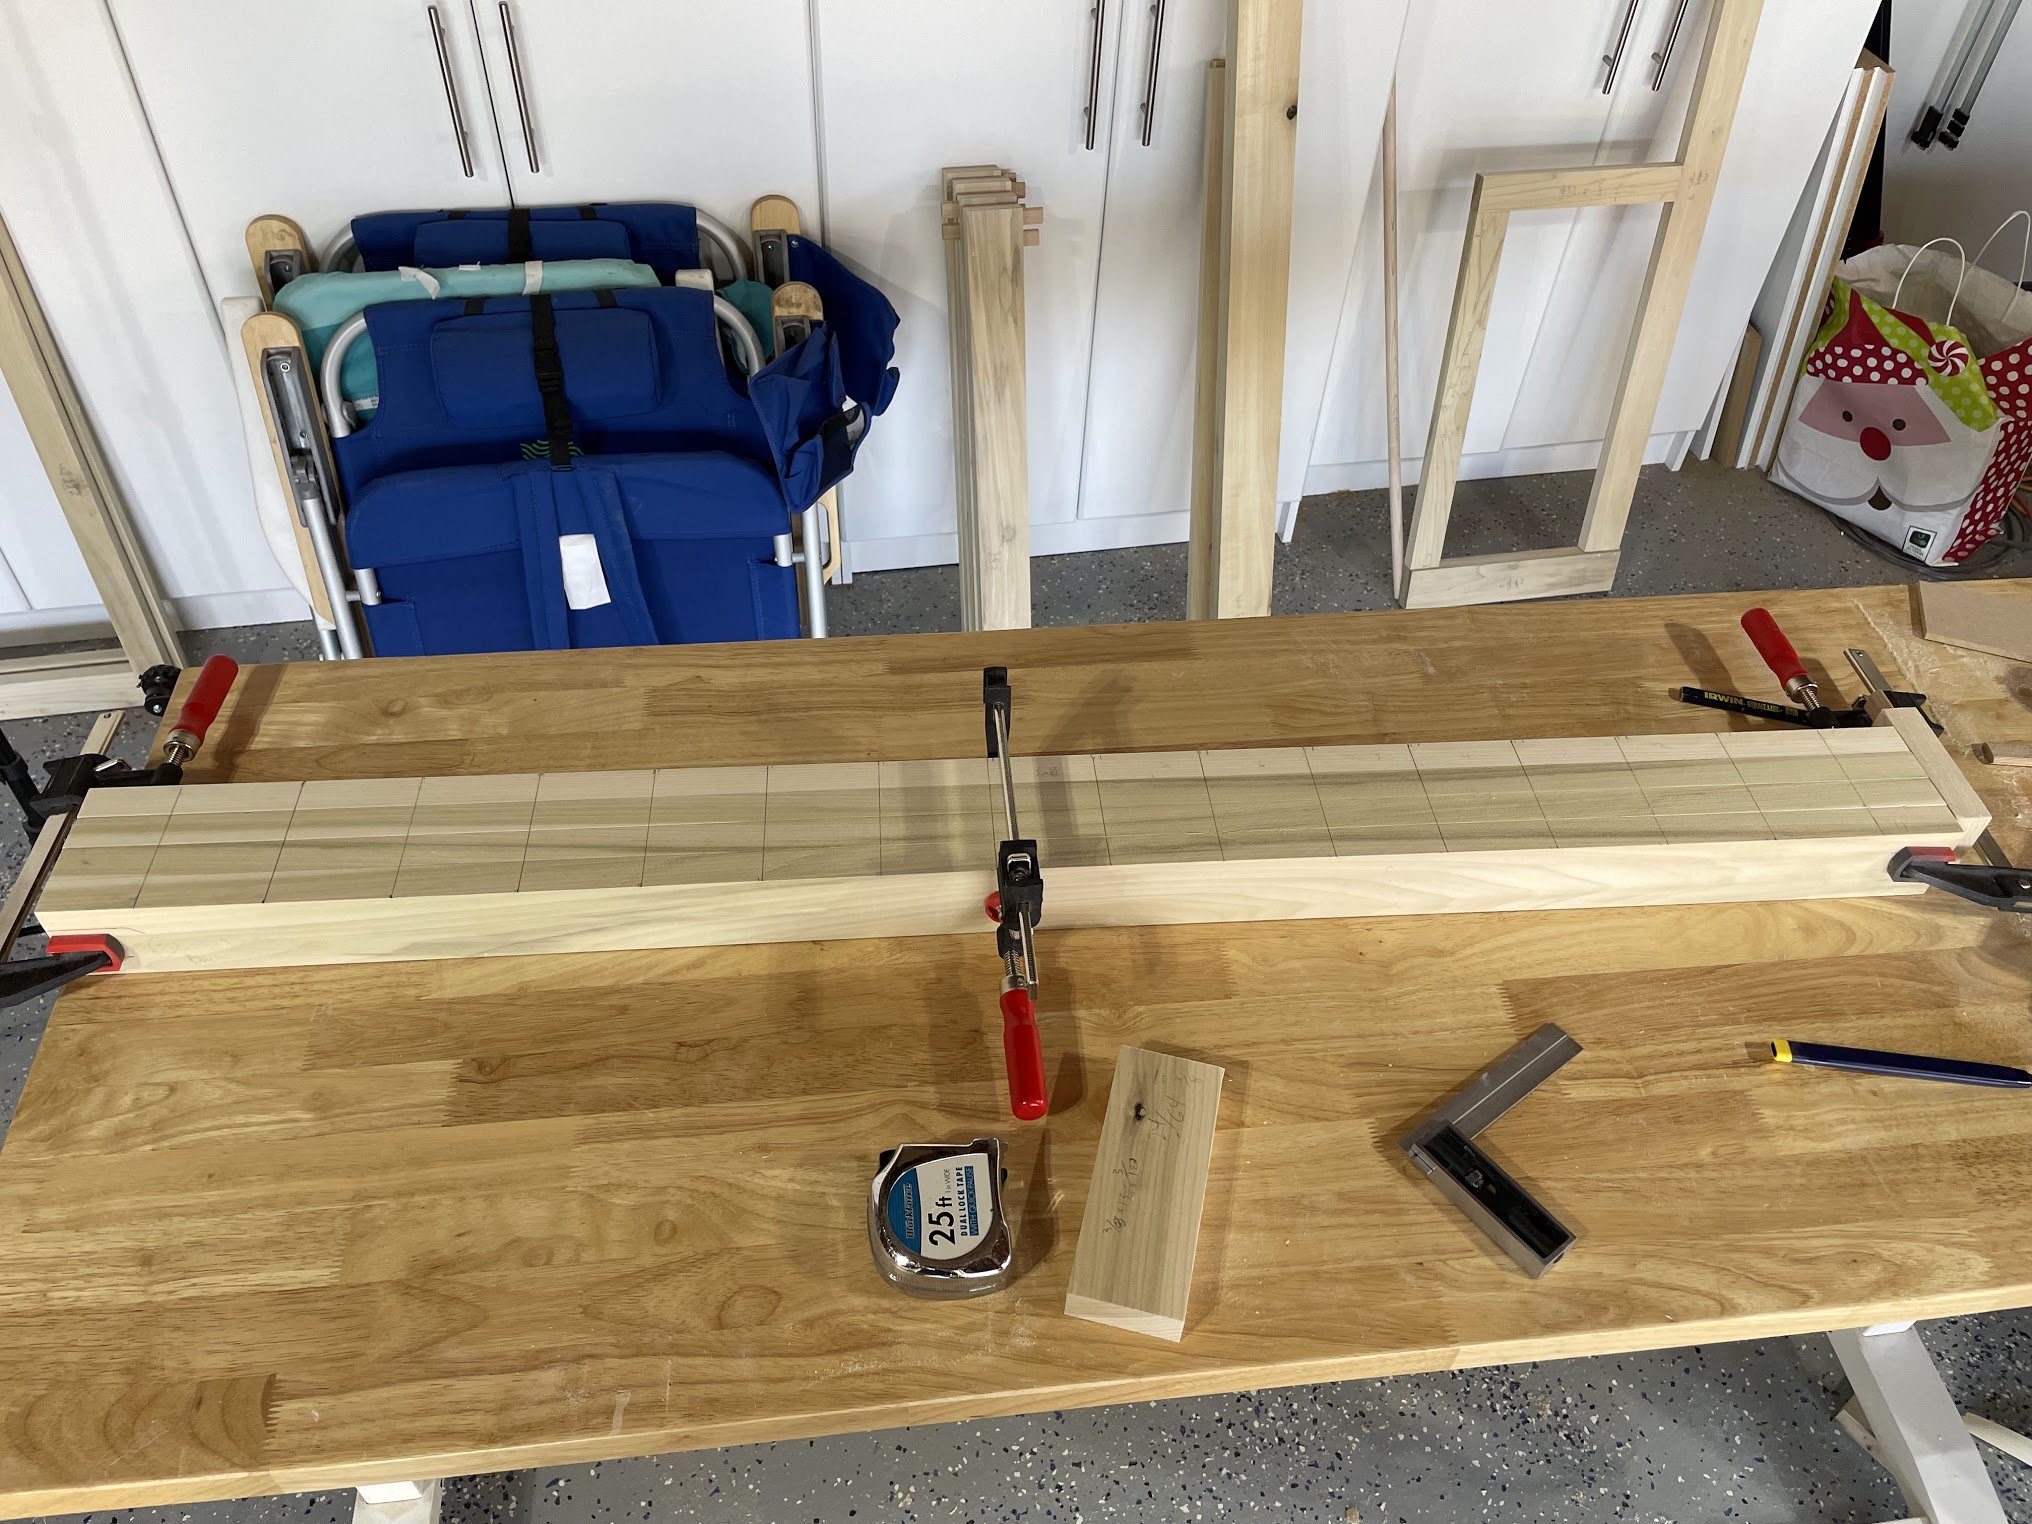
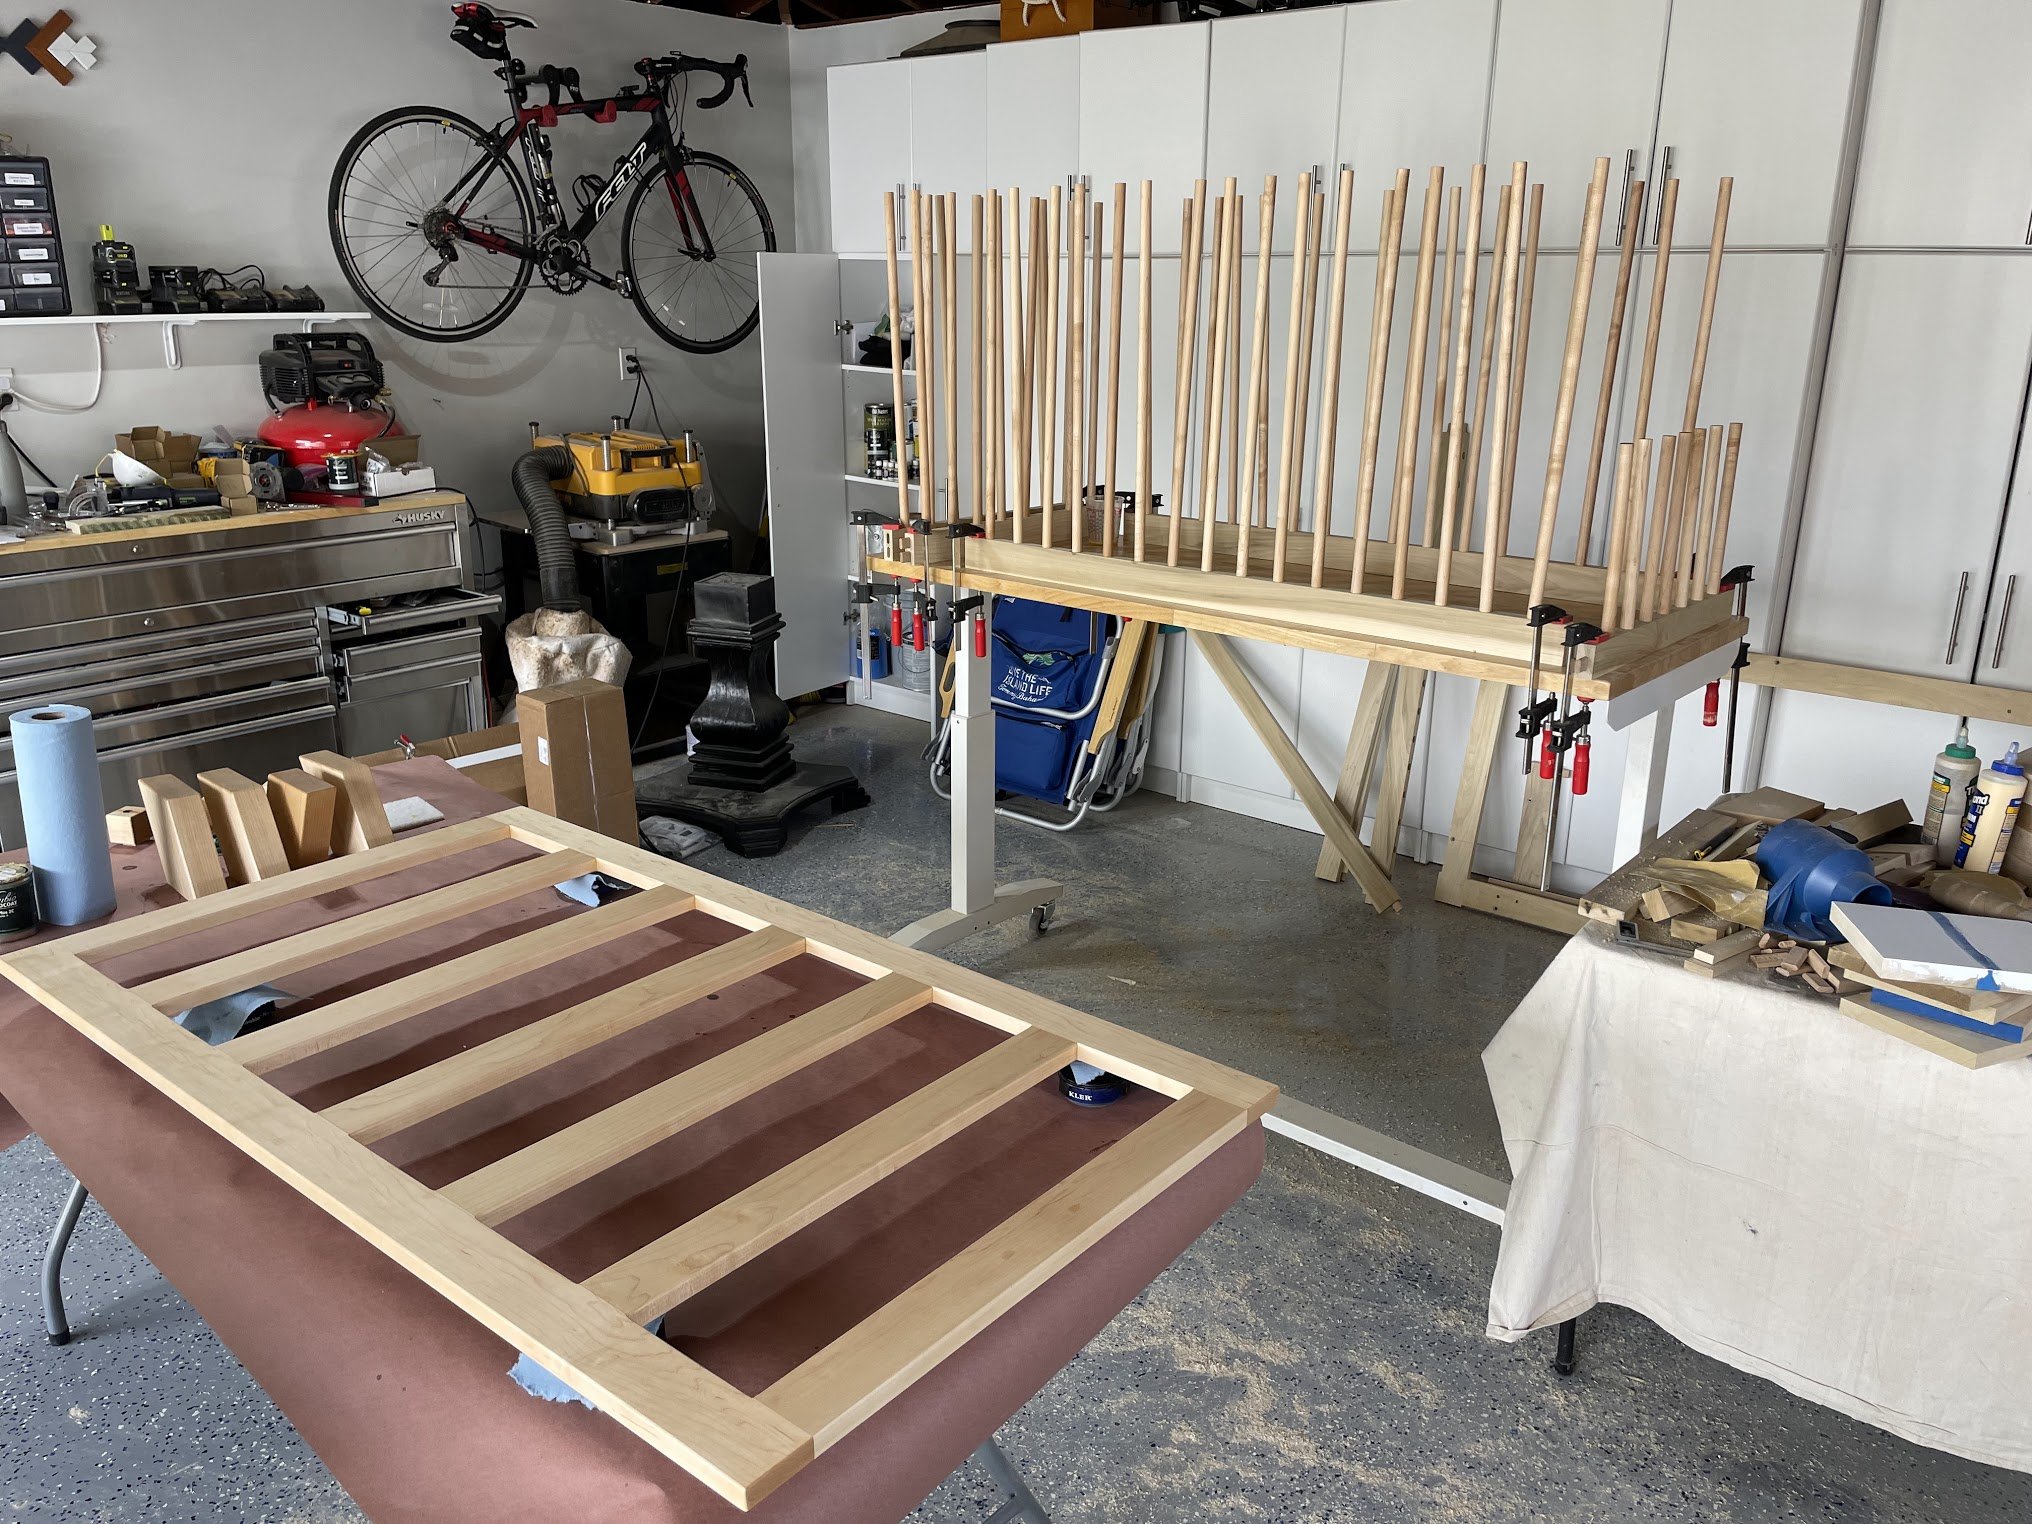
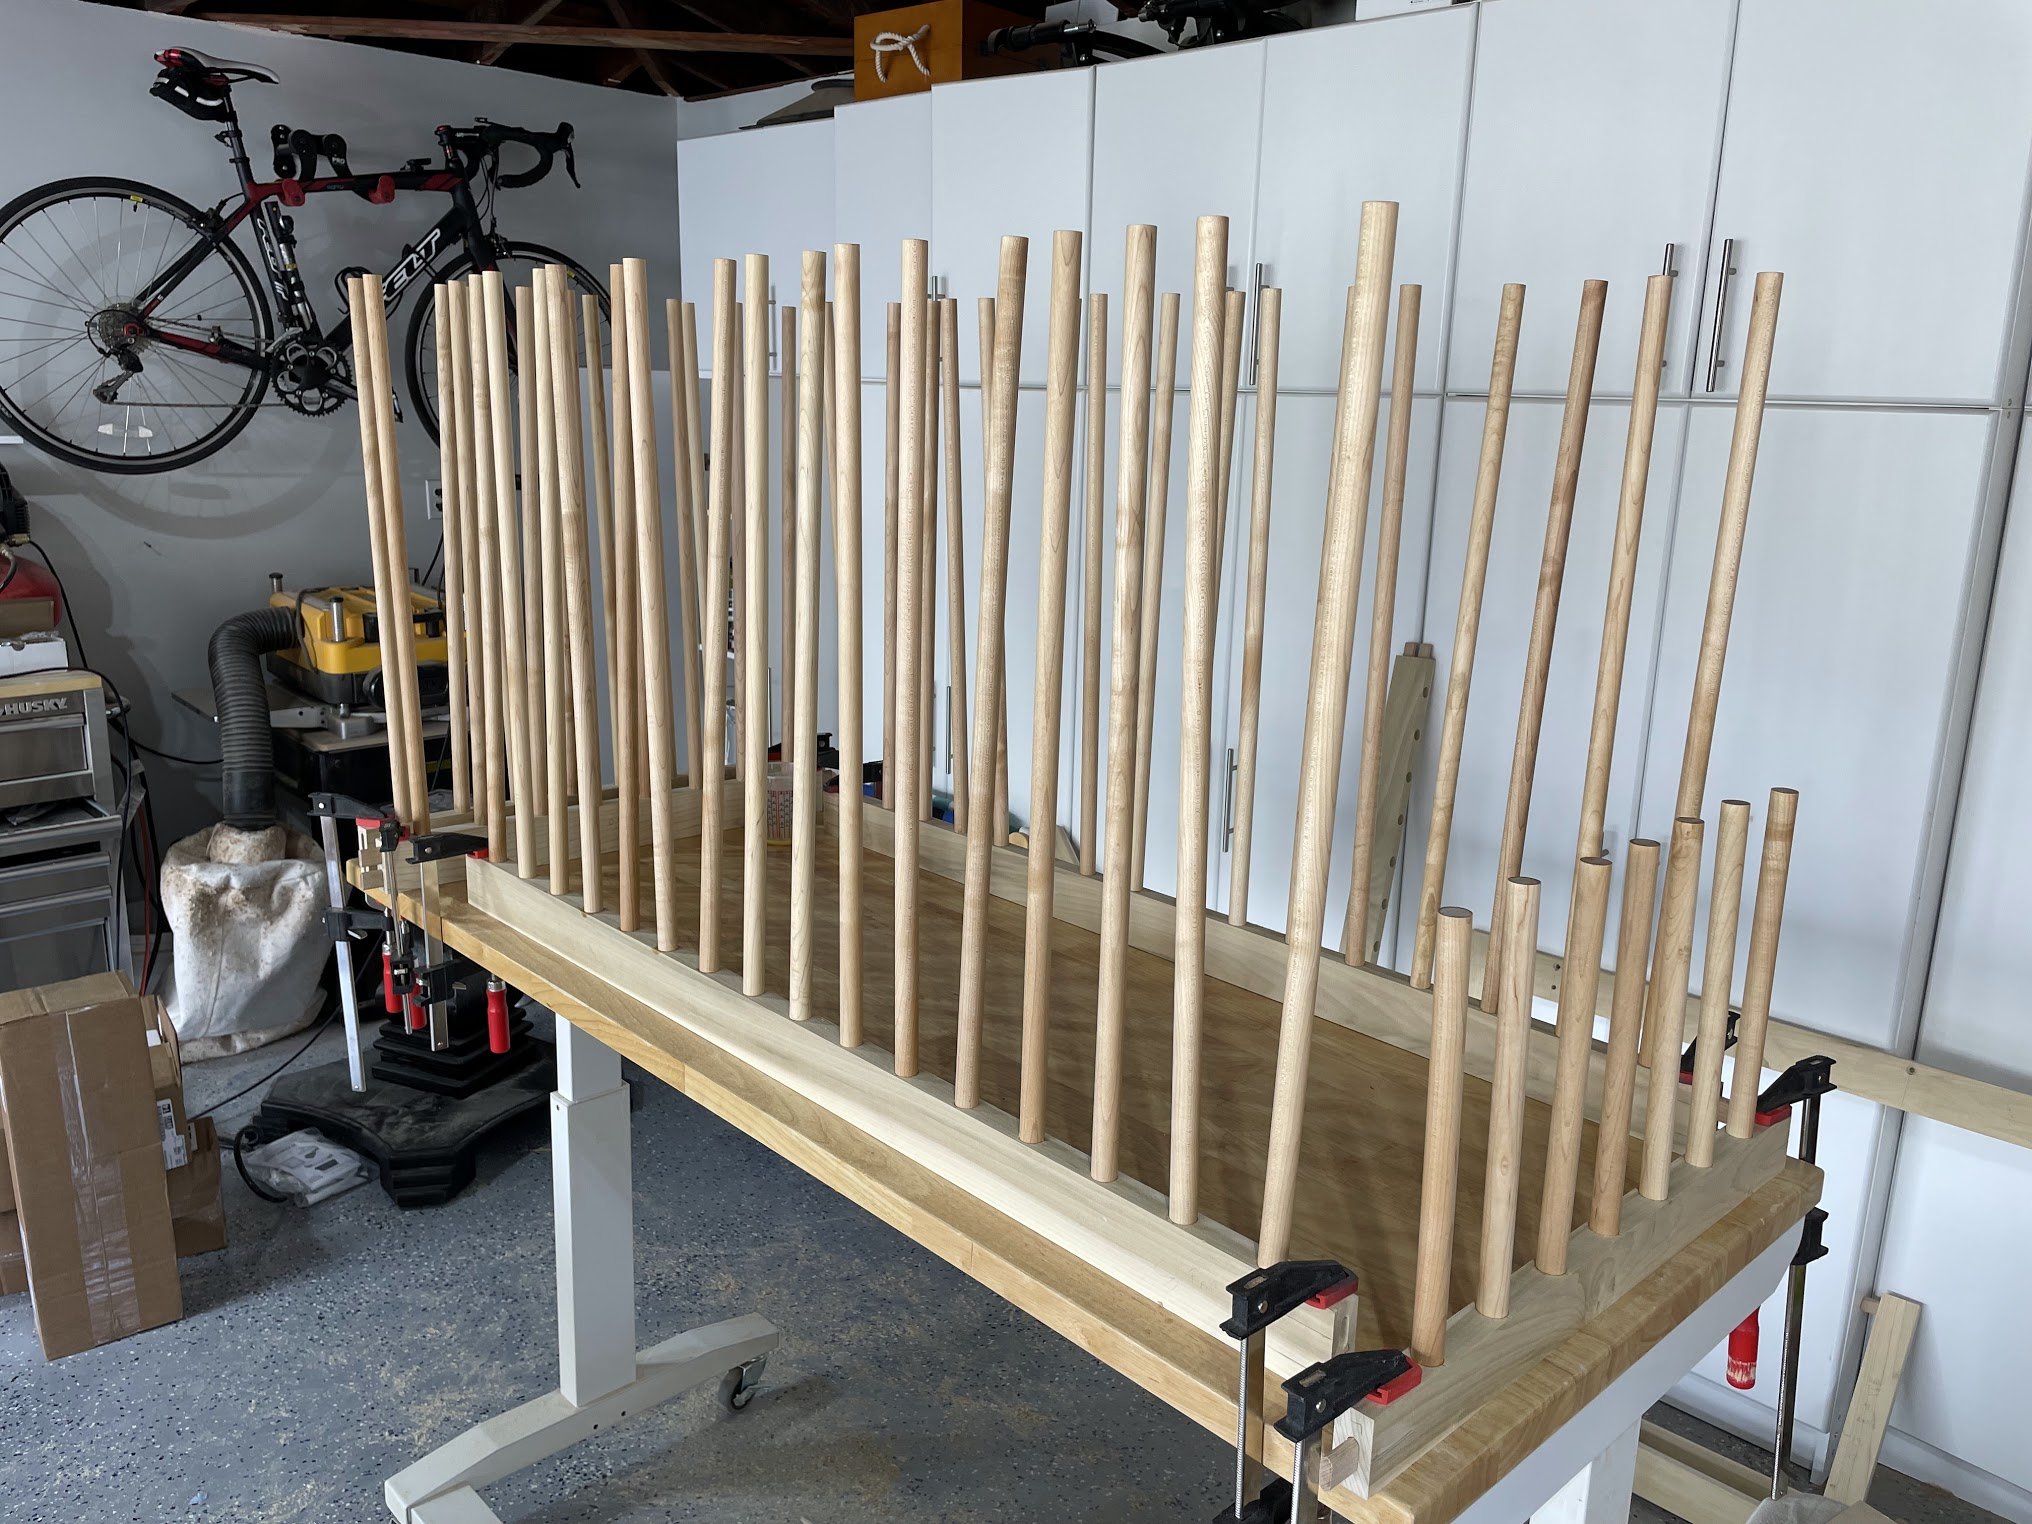
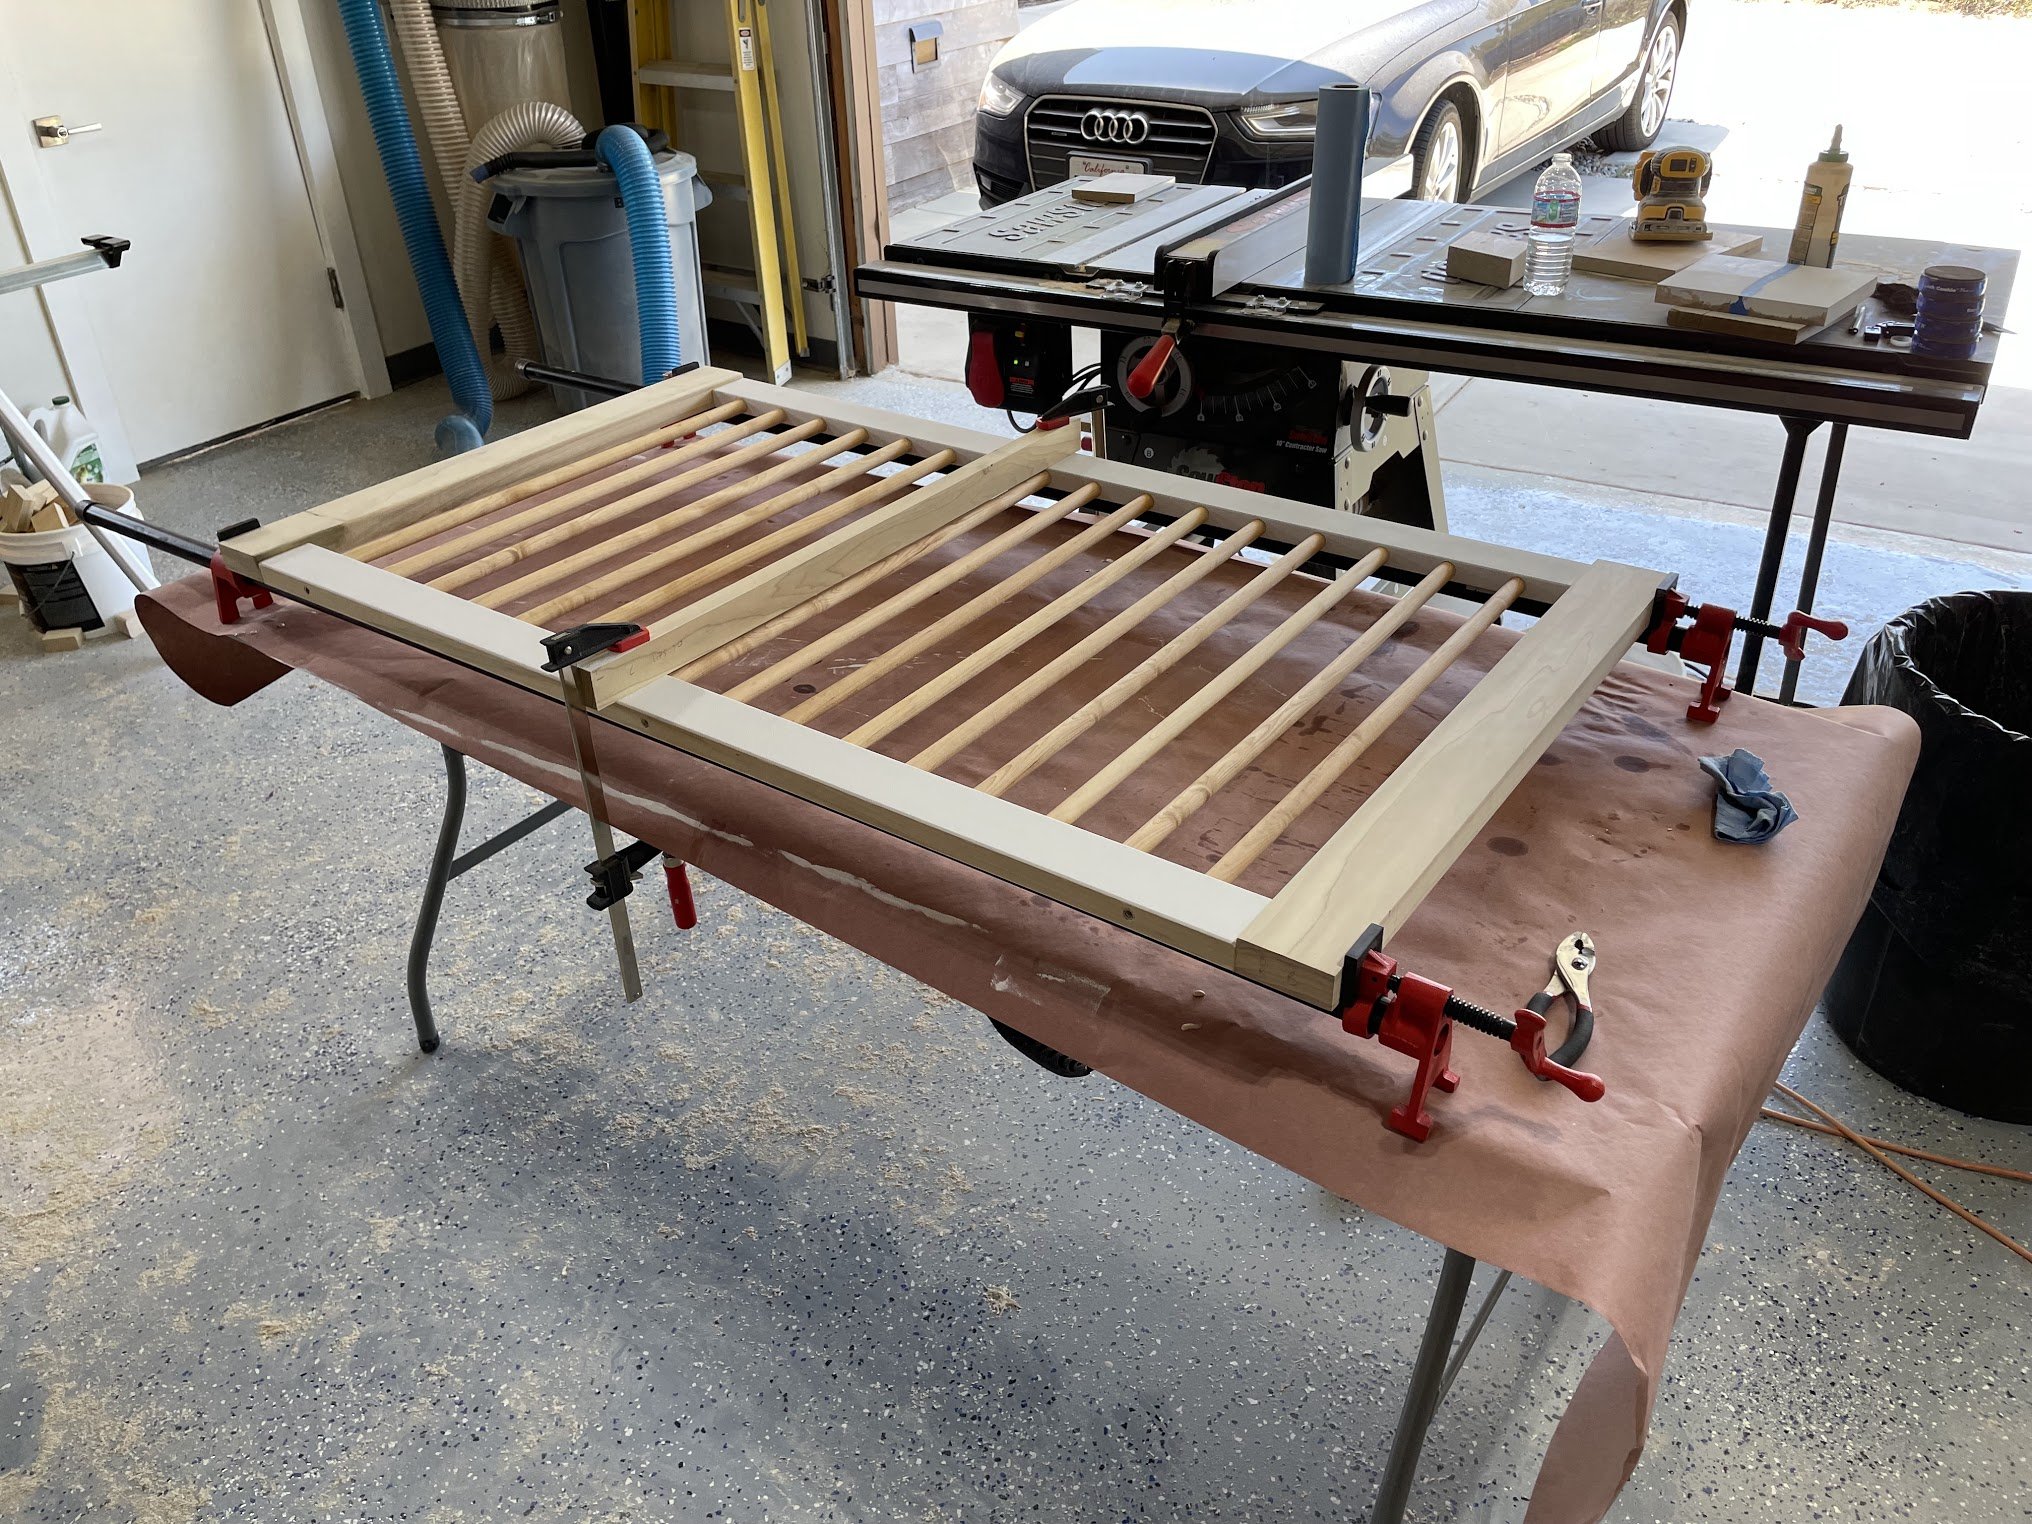
Now that I had the basic poplar frame, it was time to start working on connecting the spindles. I started by taking all 4 of the long horizontal pieces (the top and bottom from the front and back), lining them up and clamping them together. I had calculated the spacing of the spindles based on crib standards around minimum spacing and trying to figure out a reasonable number. I ended up with a plan of 16 spindles on the front/back and 7 on the sides. The spacing calculation came out with something super precise like 2-7/64, so I was not surprised to find that in practice it was very hard to get 17 equal sized spaces. Even the width of the pencil mark times 17 was enough to throw it off. So, this basically became a process of trial and error where I started making marks using my calculated distance, saw how off I was when I got to the other end of the board, and then started again with a slight adjustment. Once I had the spacing right, I used a square to draw a straight line across all 4 pieces. That way I knew that even if any given measurement was a little off, each spindle should at least be straight.
Then I did the same thing for the 4 top and bottom pieces from the side rails, and then the two top and bottom pieces from the toddler rail. To drill the holes for the spindles, I needed to head up to my dad’s workshop to use the drill press, so while I waited for that I worked on a couple of other things.
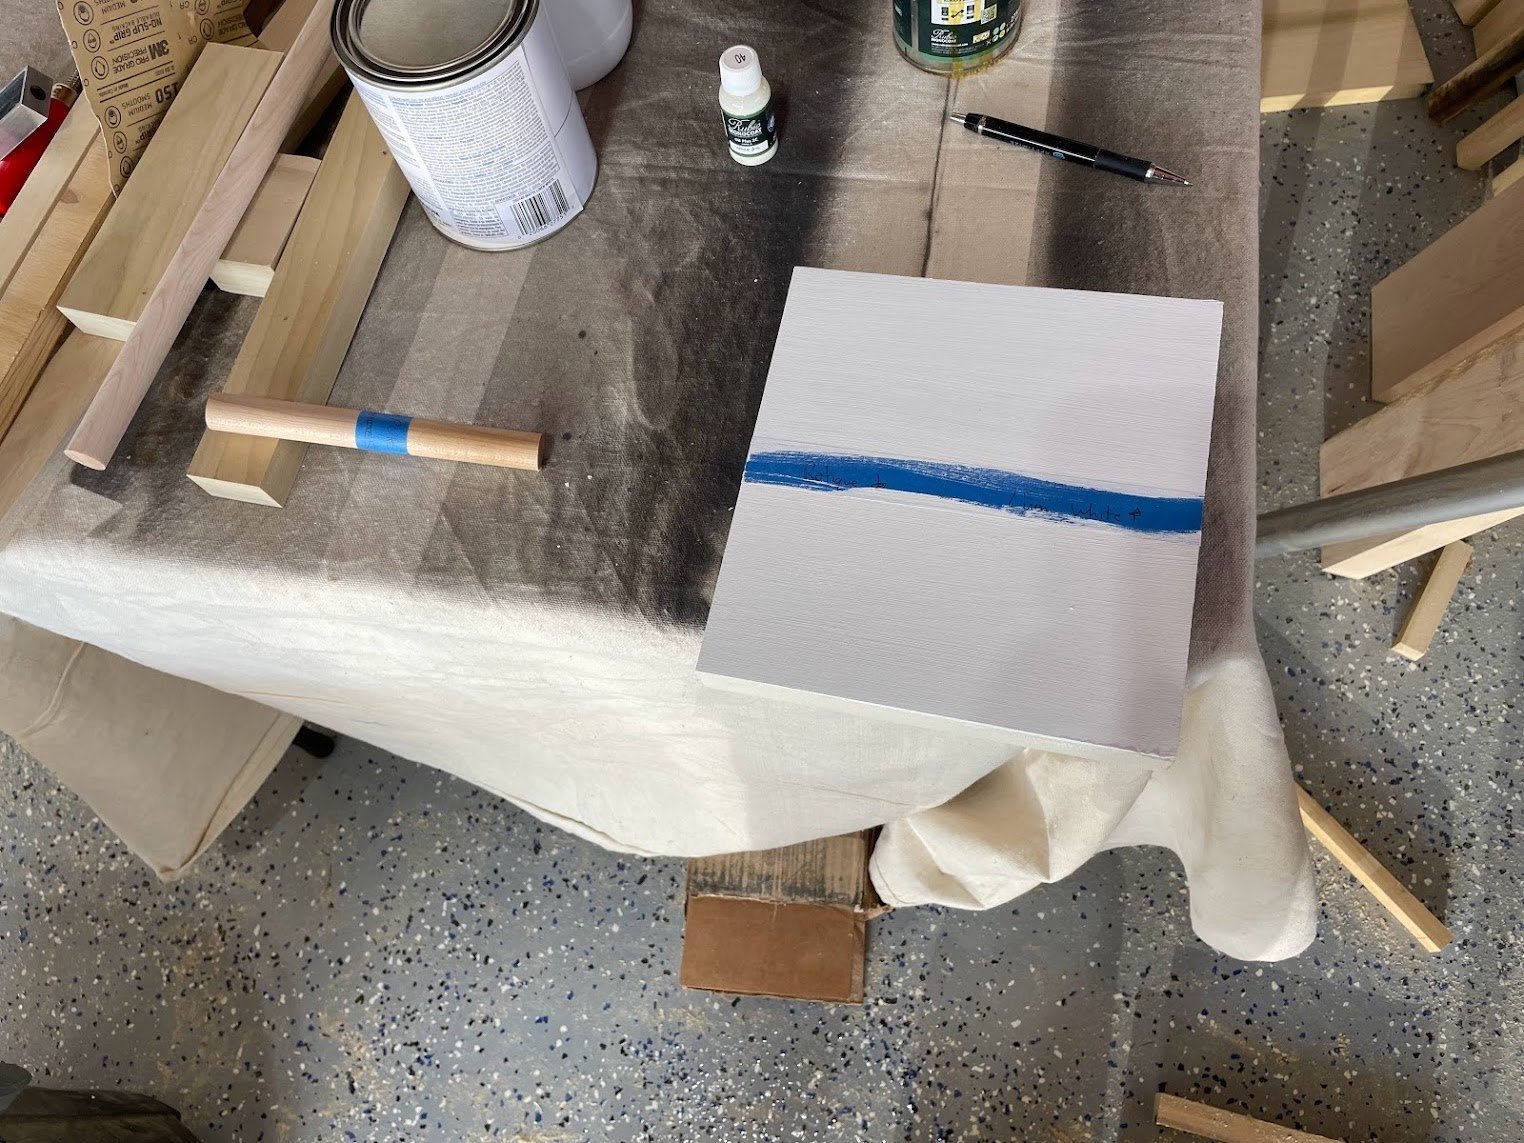
First, I did a quick test of some finishing options. On a piece of the maple spindles (which I ordered by the way, since I wanted round spindles and don’t have a lathe or that amount of patience), I tested Rubio Monocoat in both “Pure” and “White 5%”. I had used White 5% on the maple legs in my Console Table, and liked that it took some of the yellow color out of the wood. But for the crib, we wanted something more natural looking and so decided to go with Pure. For the painted portions, we tested Rust-Oleum Chalked paint in Linen White and Retique It Chalk Furniture Paint in Snow. To be honest, they looked almost identical, but we liked the texture of the Rust-Oleum a little more, so we decided to go with that.
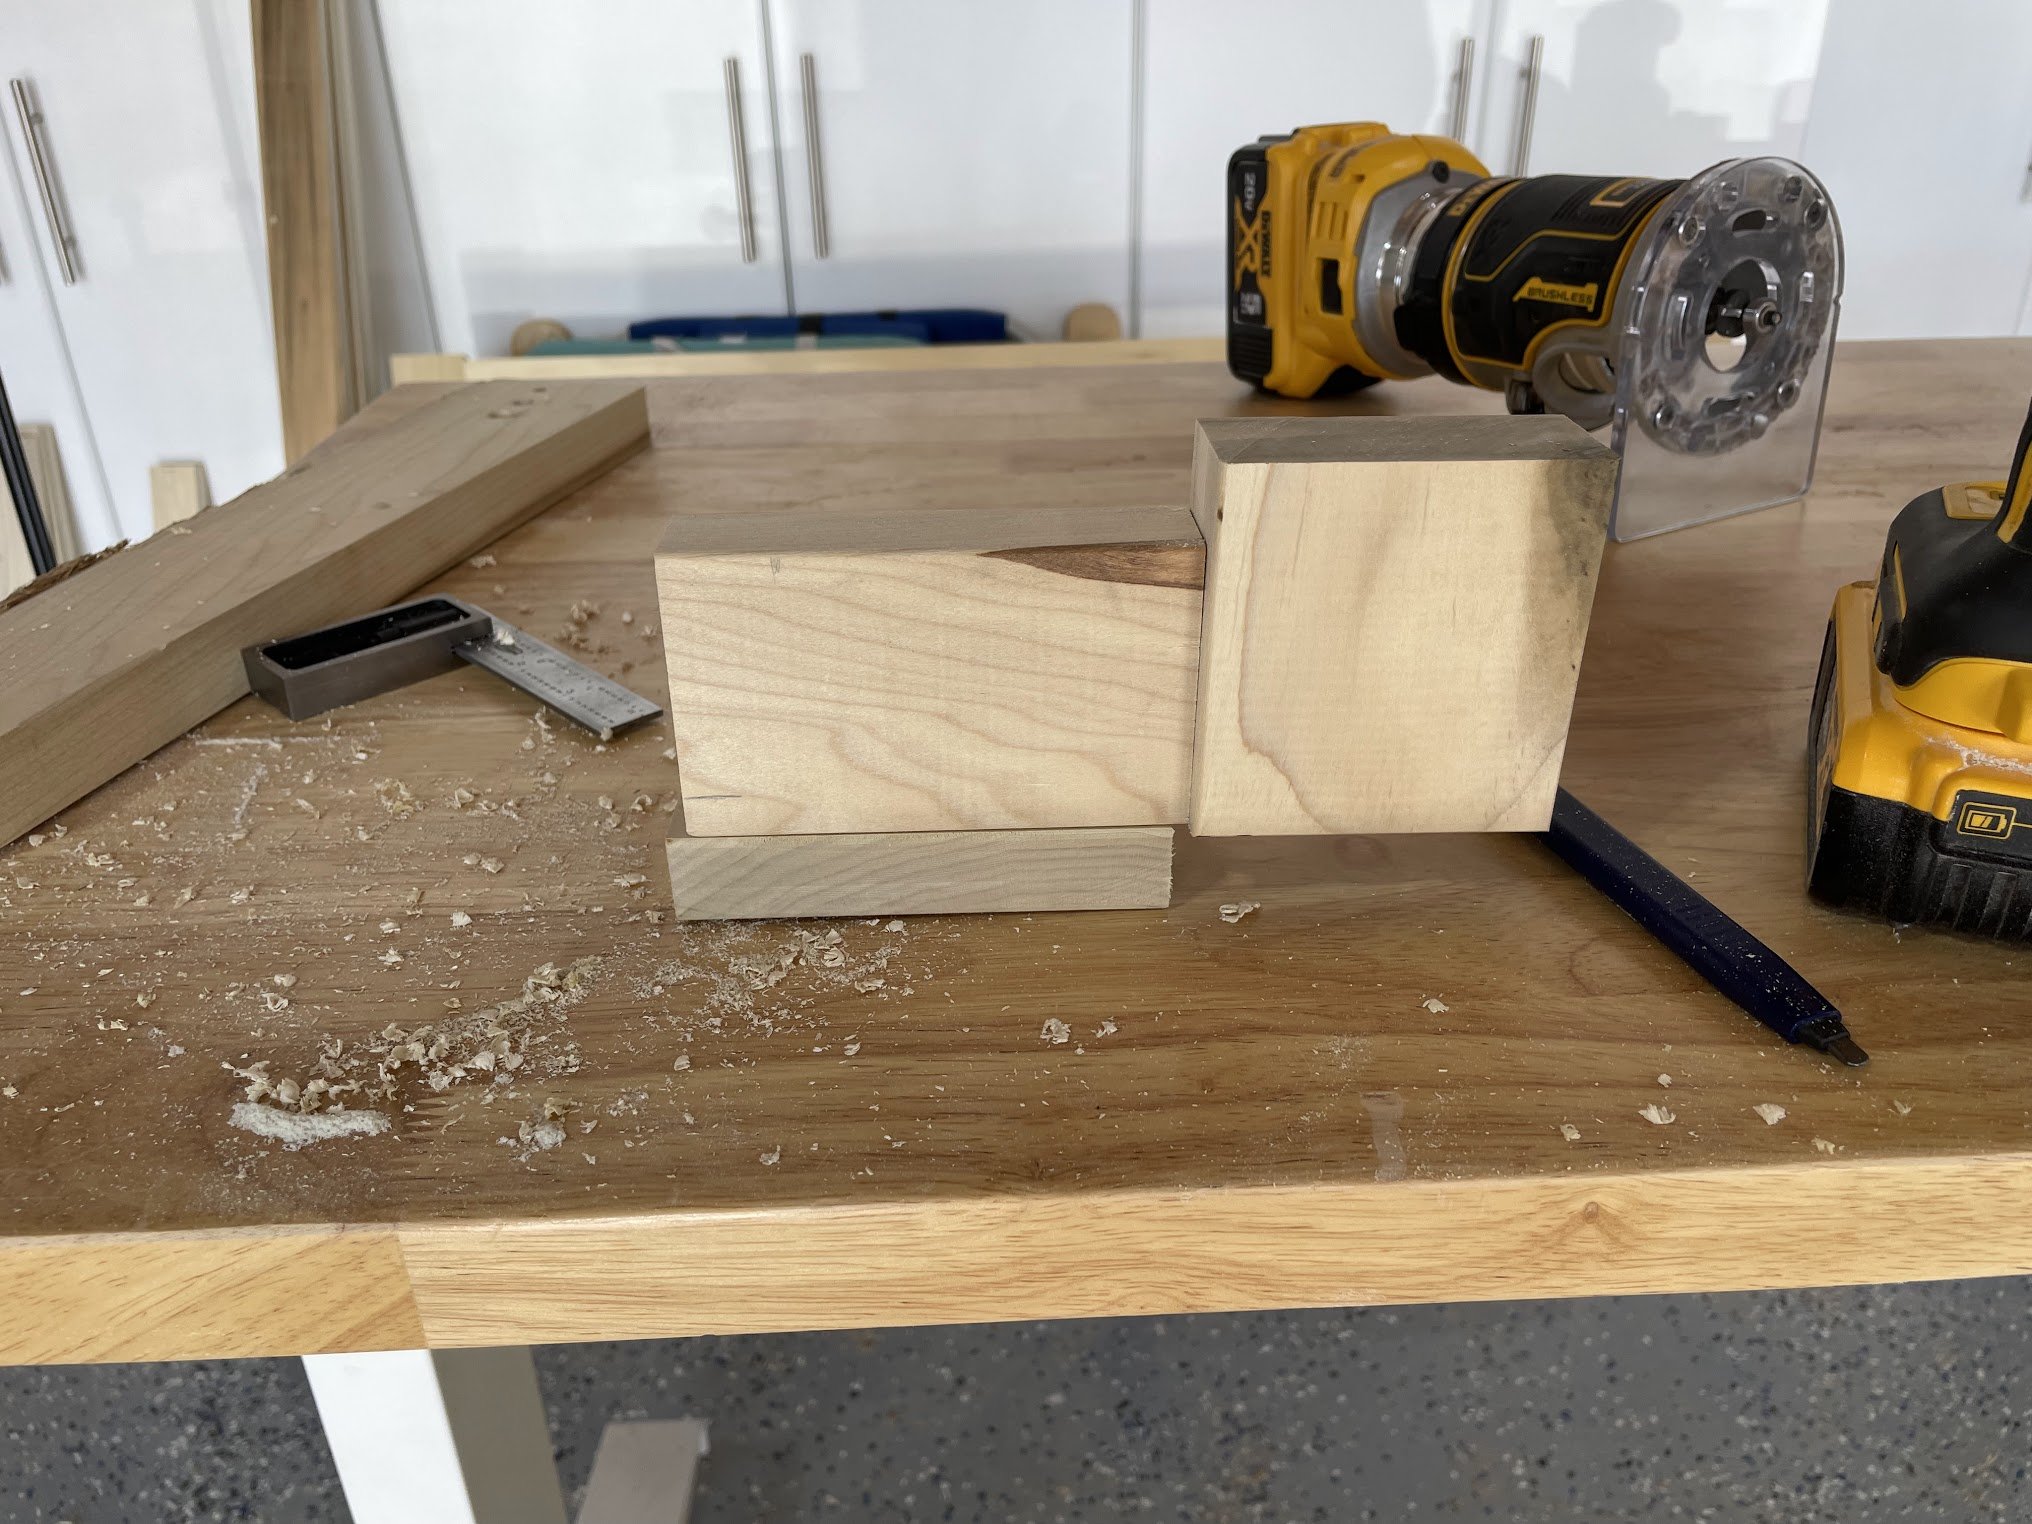
Next, I attached two offcut pieces of poplar together to mimic the joint for the horizontal and vertical rail pieces and tested what everything would look like with a 1/8 roundover on the edge. I definitely wanted to avoid any sharp edges or corners in this project, so every exposed edge would be rounded. That meant some rounded edges would be right next to each other, and I wanted to make sure that looked ok. This sample piece also showed how the offset would look. I was pretty happy with everything, so that was all good.
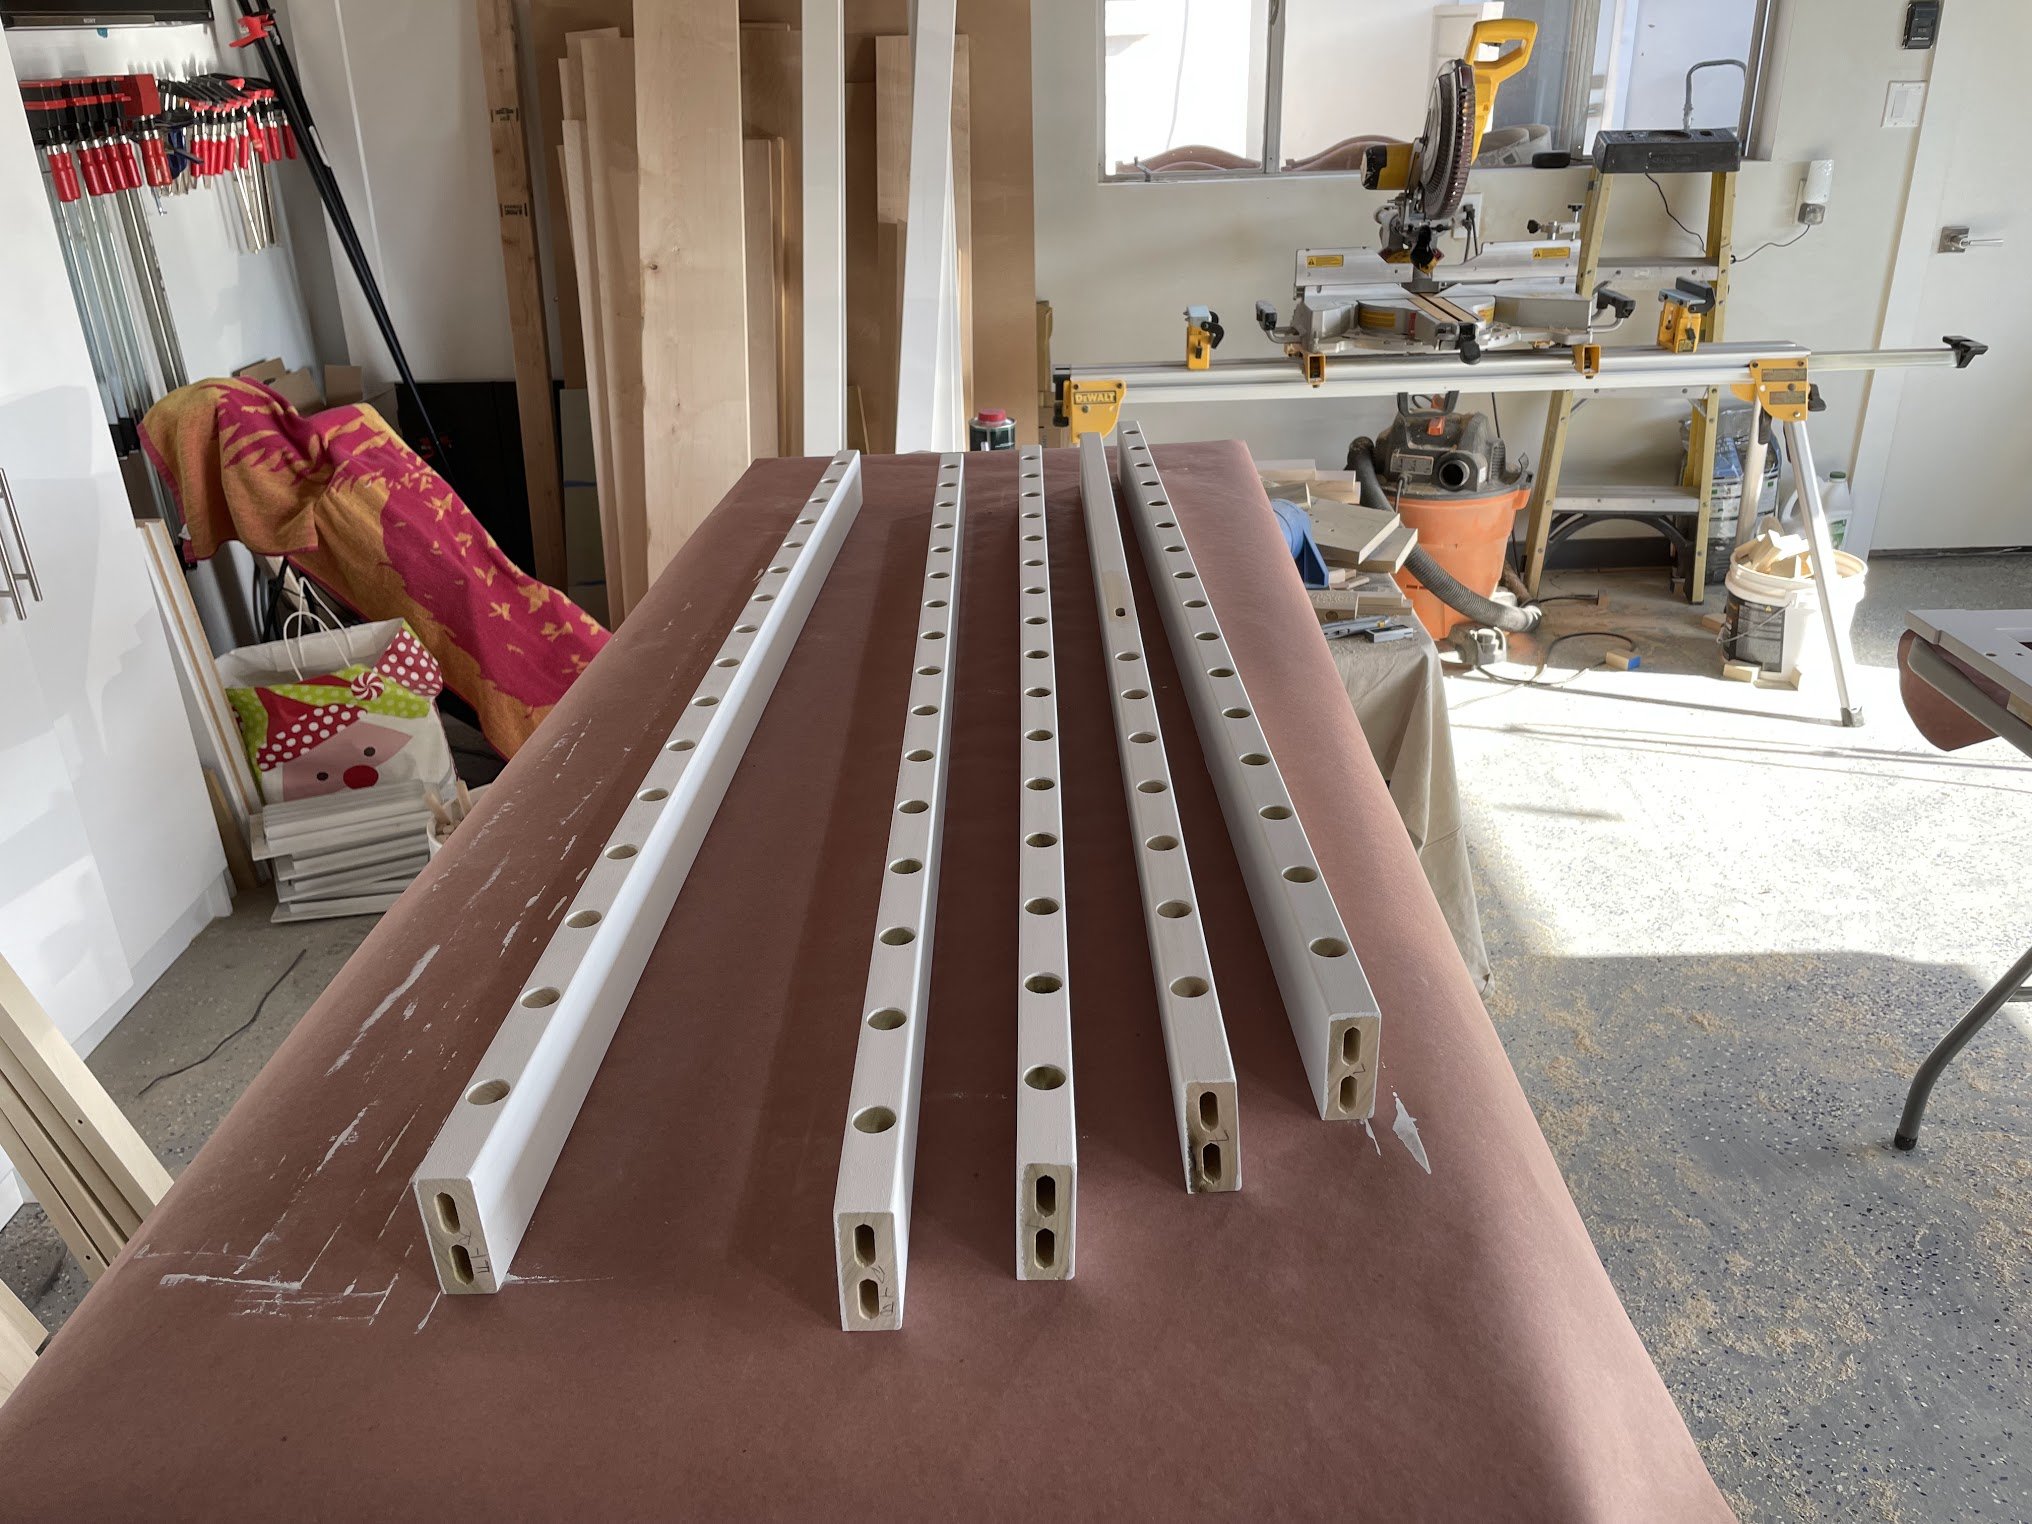
The next thing I did was to work on how the 6 different pieces of the crib would be assembled together. This needed to be a non-permanent joint, since I wanted to be able to take the crib apart easily (to get it through the doorway, and also to store between uses if needed). So for the first time, I found myself thinking like an Ikea furniture designer. I ordered and experimented with threaded inserts, and they worked really well. First, you drill a 25/64 hole in the piece of wood that will be on the receiving end of the joint, then use their installation tool to screw the inserts into the wood. On the other piece of wood, I just had to drill a bolt hole straight through, and then countersink the hole so the screws would fit flush with the wood. I used flat head socket screws of varying lengths for this.
For the front and back rails, I had 3 screws coming up from under the base to attach them to the base. For the sides, I had two. These would not be visible when the whole thing was built, which was great. Then, to hold the whole thing together, I had 3 screws coming from each side rail into the front rail, and 2 from each side into the back. The main reason for using 3 on the front was I needed one near the middle for the toddler rail.
Then, I took a big piece of 8/4 maple (so 1-3/4”) I had bought, and started to work on the legs. First I cleaned up the edges and cut the board to width on the table saw. Then I set my miter saw to 20 degrees to create the slanted shape I wanted. I wasn’t really sure how big to make these, so I had used some MDF at various lengths to test it. In the end, I just went with what felt like it looked good. I assembled the whole thing and was pretty happy. Except, at that point, I realized that I didn’t really like how the 1-inch vertical rails on the side met with the 1.25-inch vertical rails on the front and back. I had designed it that way intentionally but it just didn’t look right when I put it together. So I decided to replace the vertical side rails (4 pieces) with 1.25-inch poplar. No big deal (except for an extra trip to the lumber store, of course).

Up at the original Ings Workshop, we resumed work on the spindles. I had everything marked off for where we needed to drill the holes (not really holes since we weren’t going all the way through, but 1/2” indentations). So the question was, how do we create a jig that will ensure that the drill press does 2 things with each cut: centers the hole on the 1-inch board in the one direction, and accurately centers on my marked lines in the other. We ended up bolting a piece of wood of the same thickness to the drill press that we could push our piece up against, and adjusting it until it was well-centered on the short dimension. Once we had that right, we drew a line on that piece that was centered on the drill in the other dimension. So we’d just have to line up the marks on the real pieces with the mark on this piece. After the couple hours it took to figure that out and get it all aligned, cutting the actual holes went really smooth and easy.


Back at my shop, I cut an initial spindle to length and did a test fit. Pretty good! But after cutting 16 of them to this length for the front, I hit an issue where they were a little too tight on the side. So I decided to take 1/16 inch of my length so that there was a little more wiggle room. I knew the glue I’d use to attach the spindles should fill in any small gaps. It was a little tricky to get 16 spindles to line up so I could get a whole panel assembled, but I figured out a way to work from one end to the other that worked pretty well.


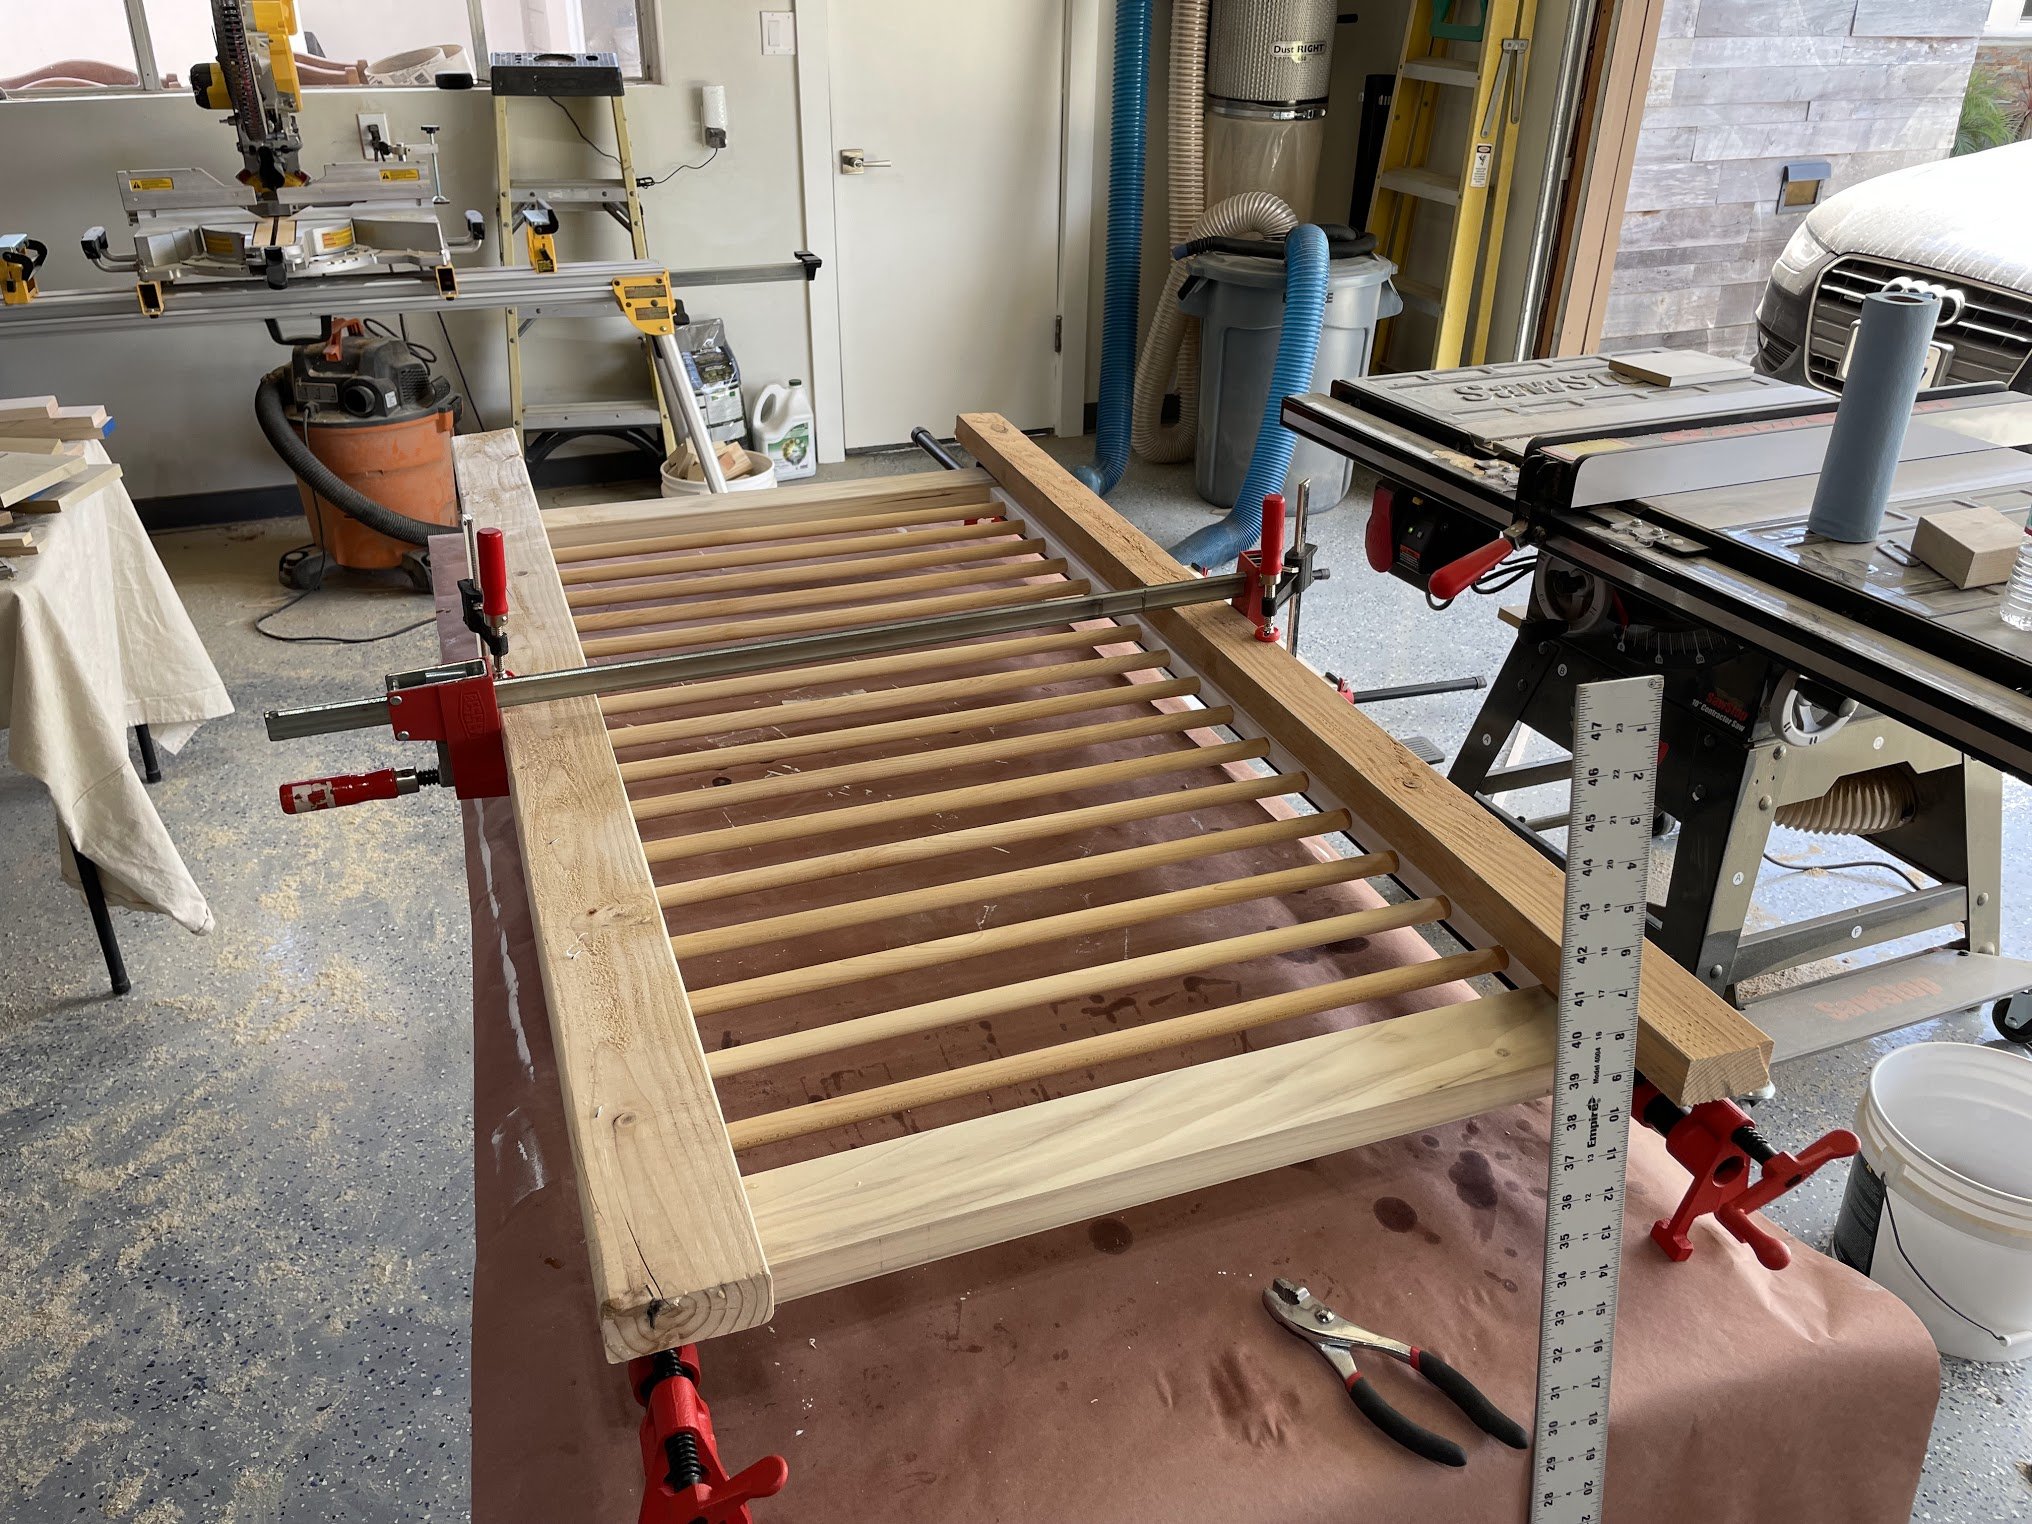
Getting close! Because of the way the vertical and horizontal rails are offset, I needed to attach a little strip of wood to part of the base so that it would match up, so I cut and glued those on. Then, I used the same steps above to add two threaded inserts to each of the legs, and two corresponding holes for each on the base. I decided to position the legs so that their outside-most point lined up with the inside of the vertical rail piece.


Then, I had to drill the holes in the vertical side pieces I had replaced, and I was finally able to put the whole thing together. First with the toddler rail, and then with the full front piece.


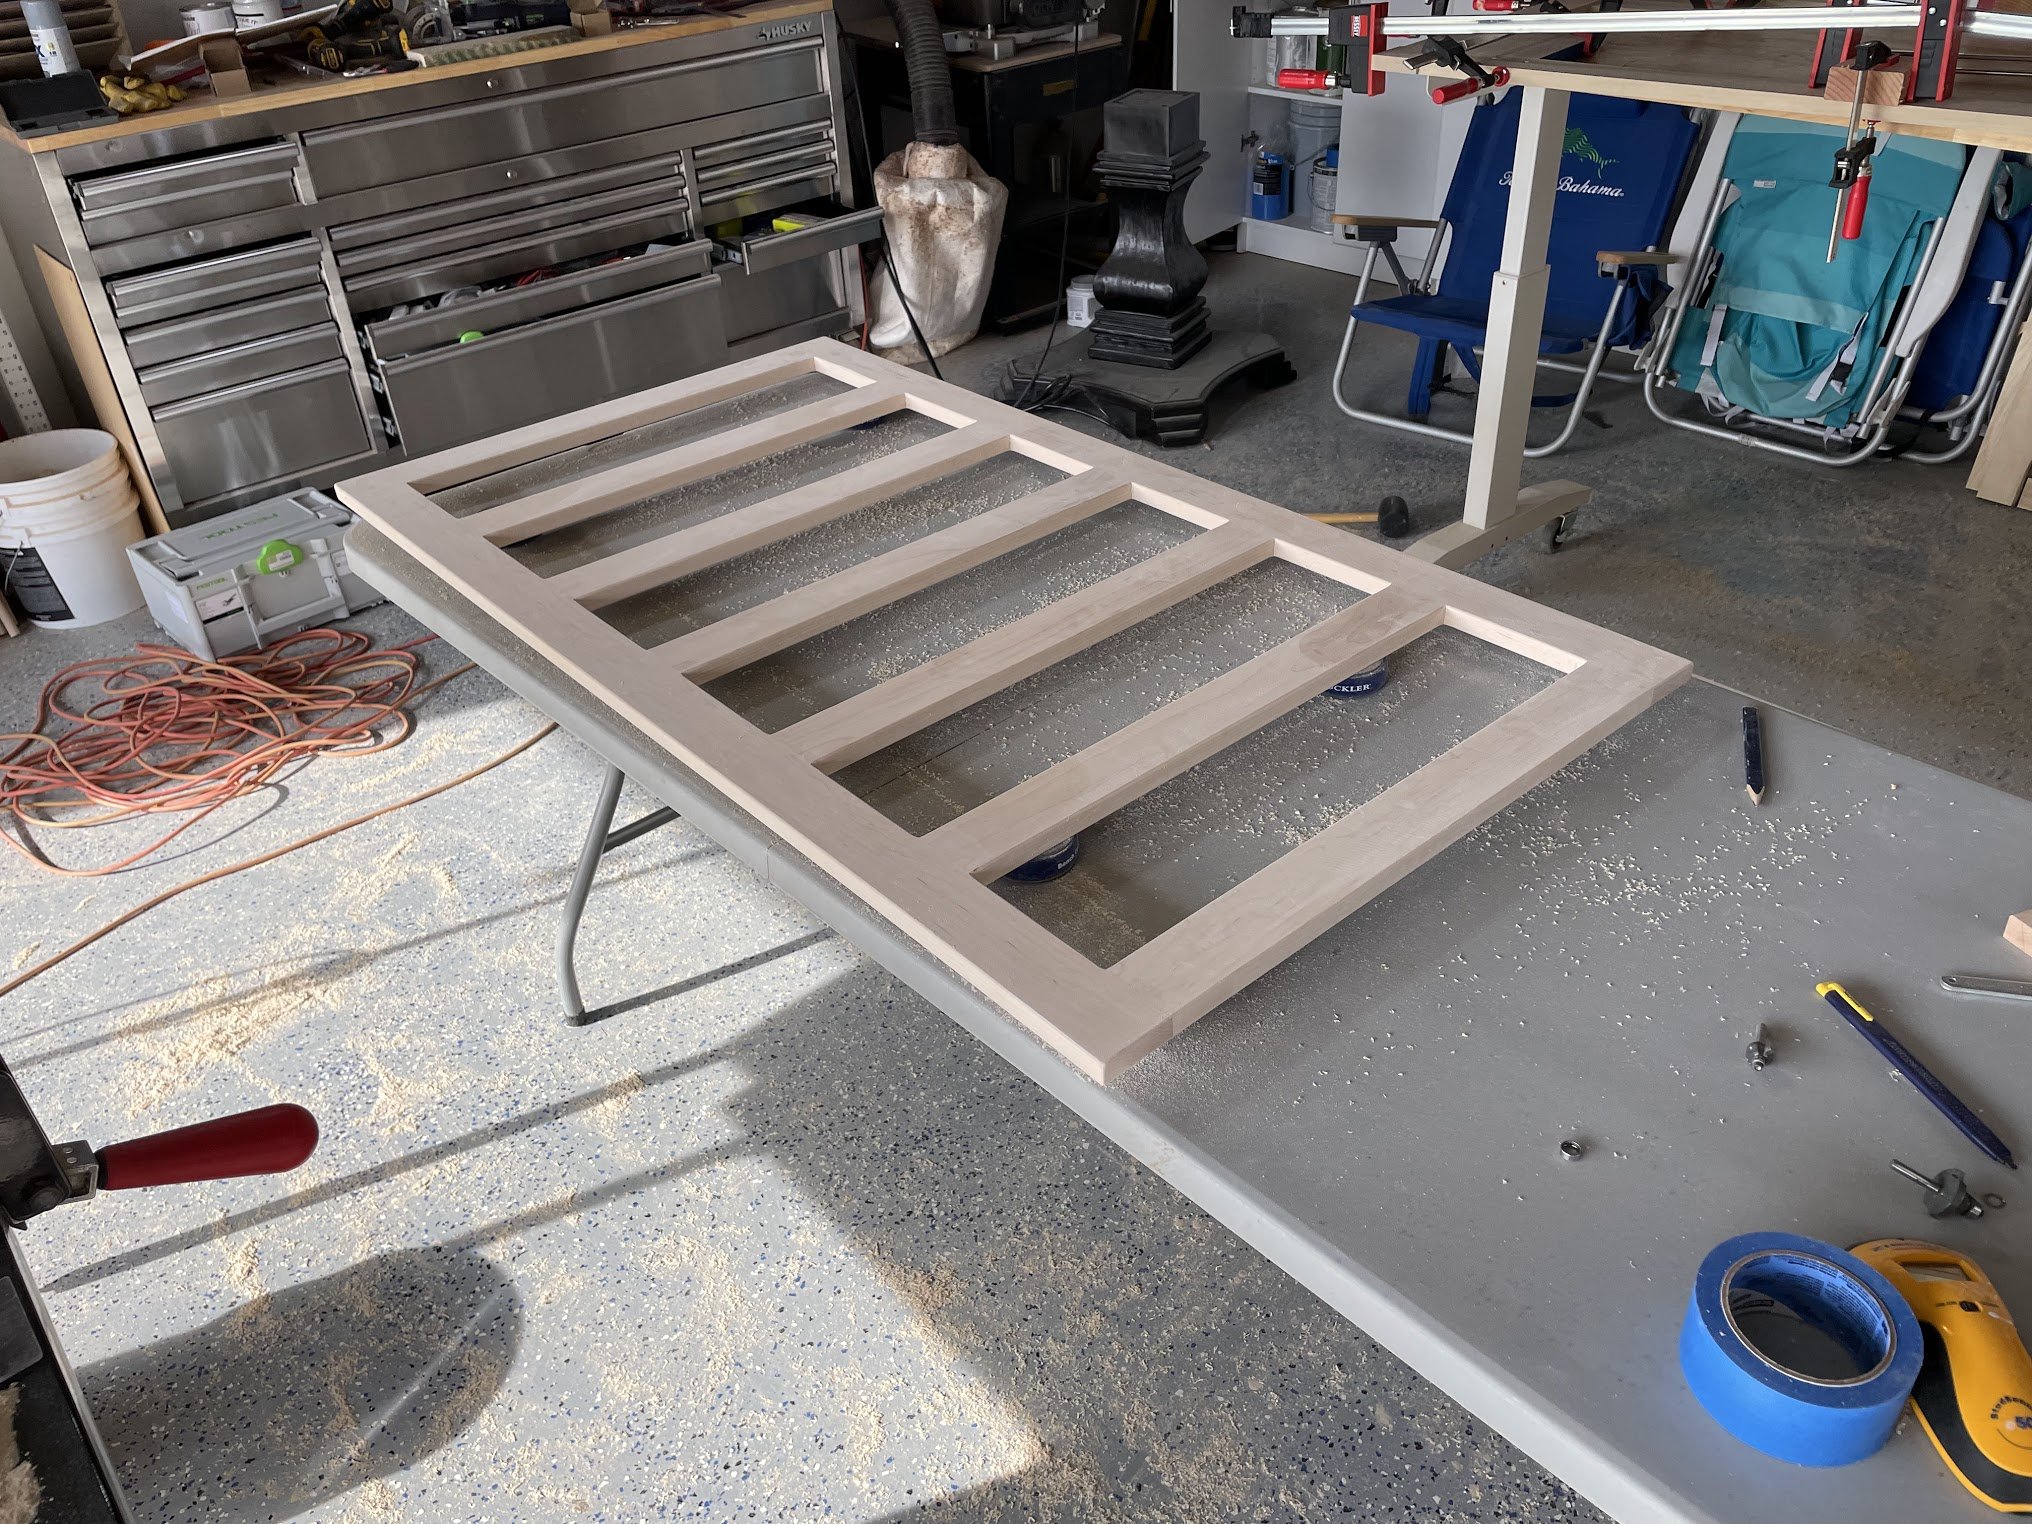
Next I built the mattress support piece. This would be a set of maple slats that would sit under the mattress at the various heights and keep everything flat and sturdy. I used 4/4 maple cut to 2.5 inch strips. Two strips ran the length of the long dimension of the crib (52”) and then 7 pieces created slats across the short dimension (28”). Once I had that glued and dried, I was able to test fit everything with the mattress. At this point I was just using clamped pieces of wood to simulate the higher height setting.

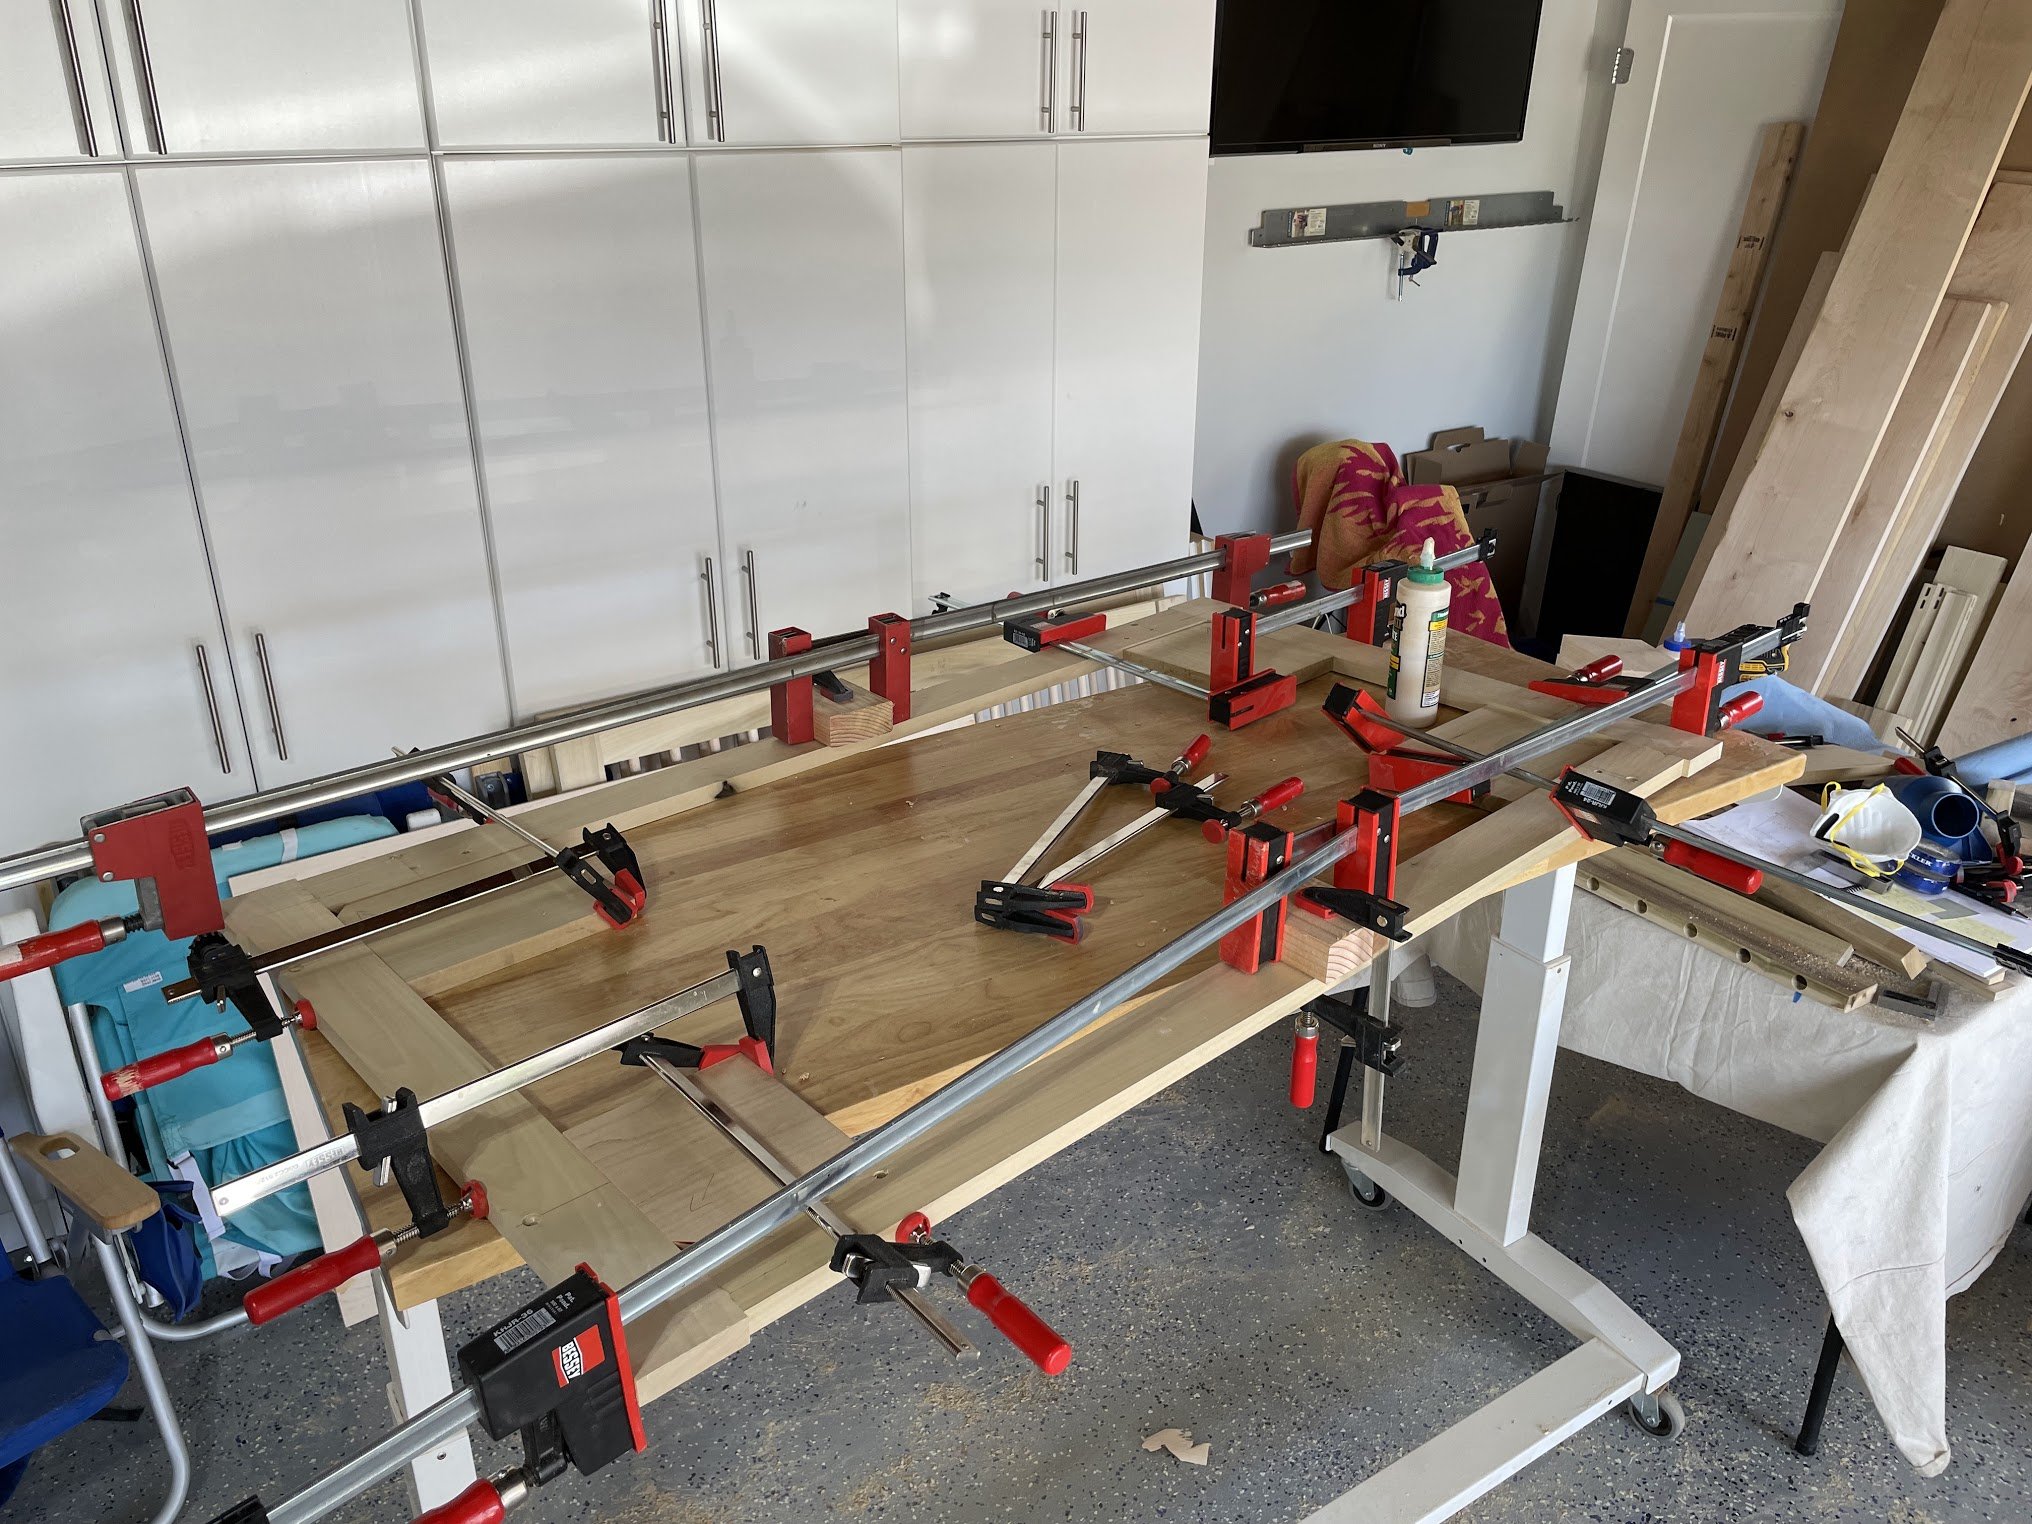
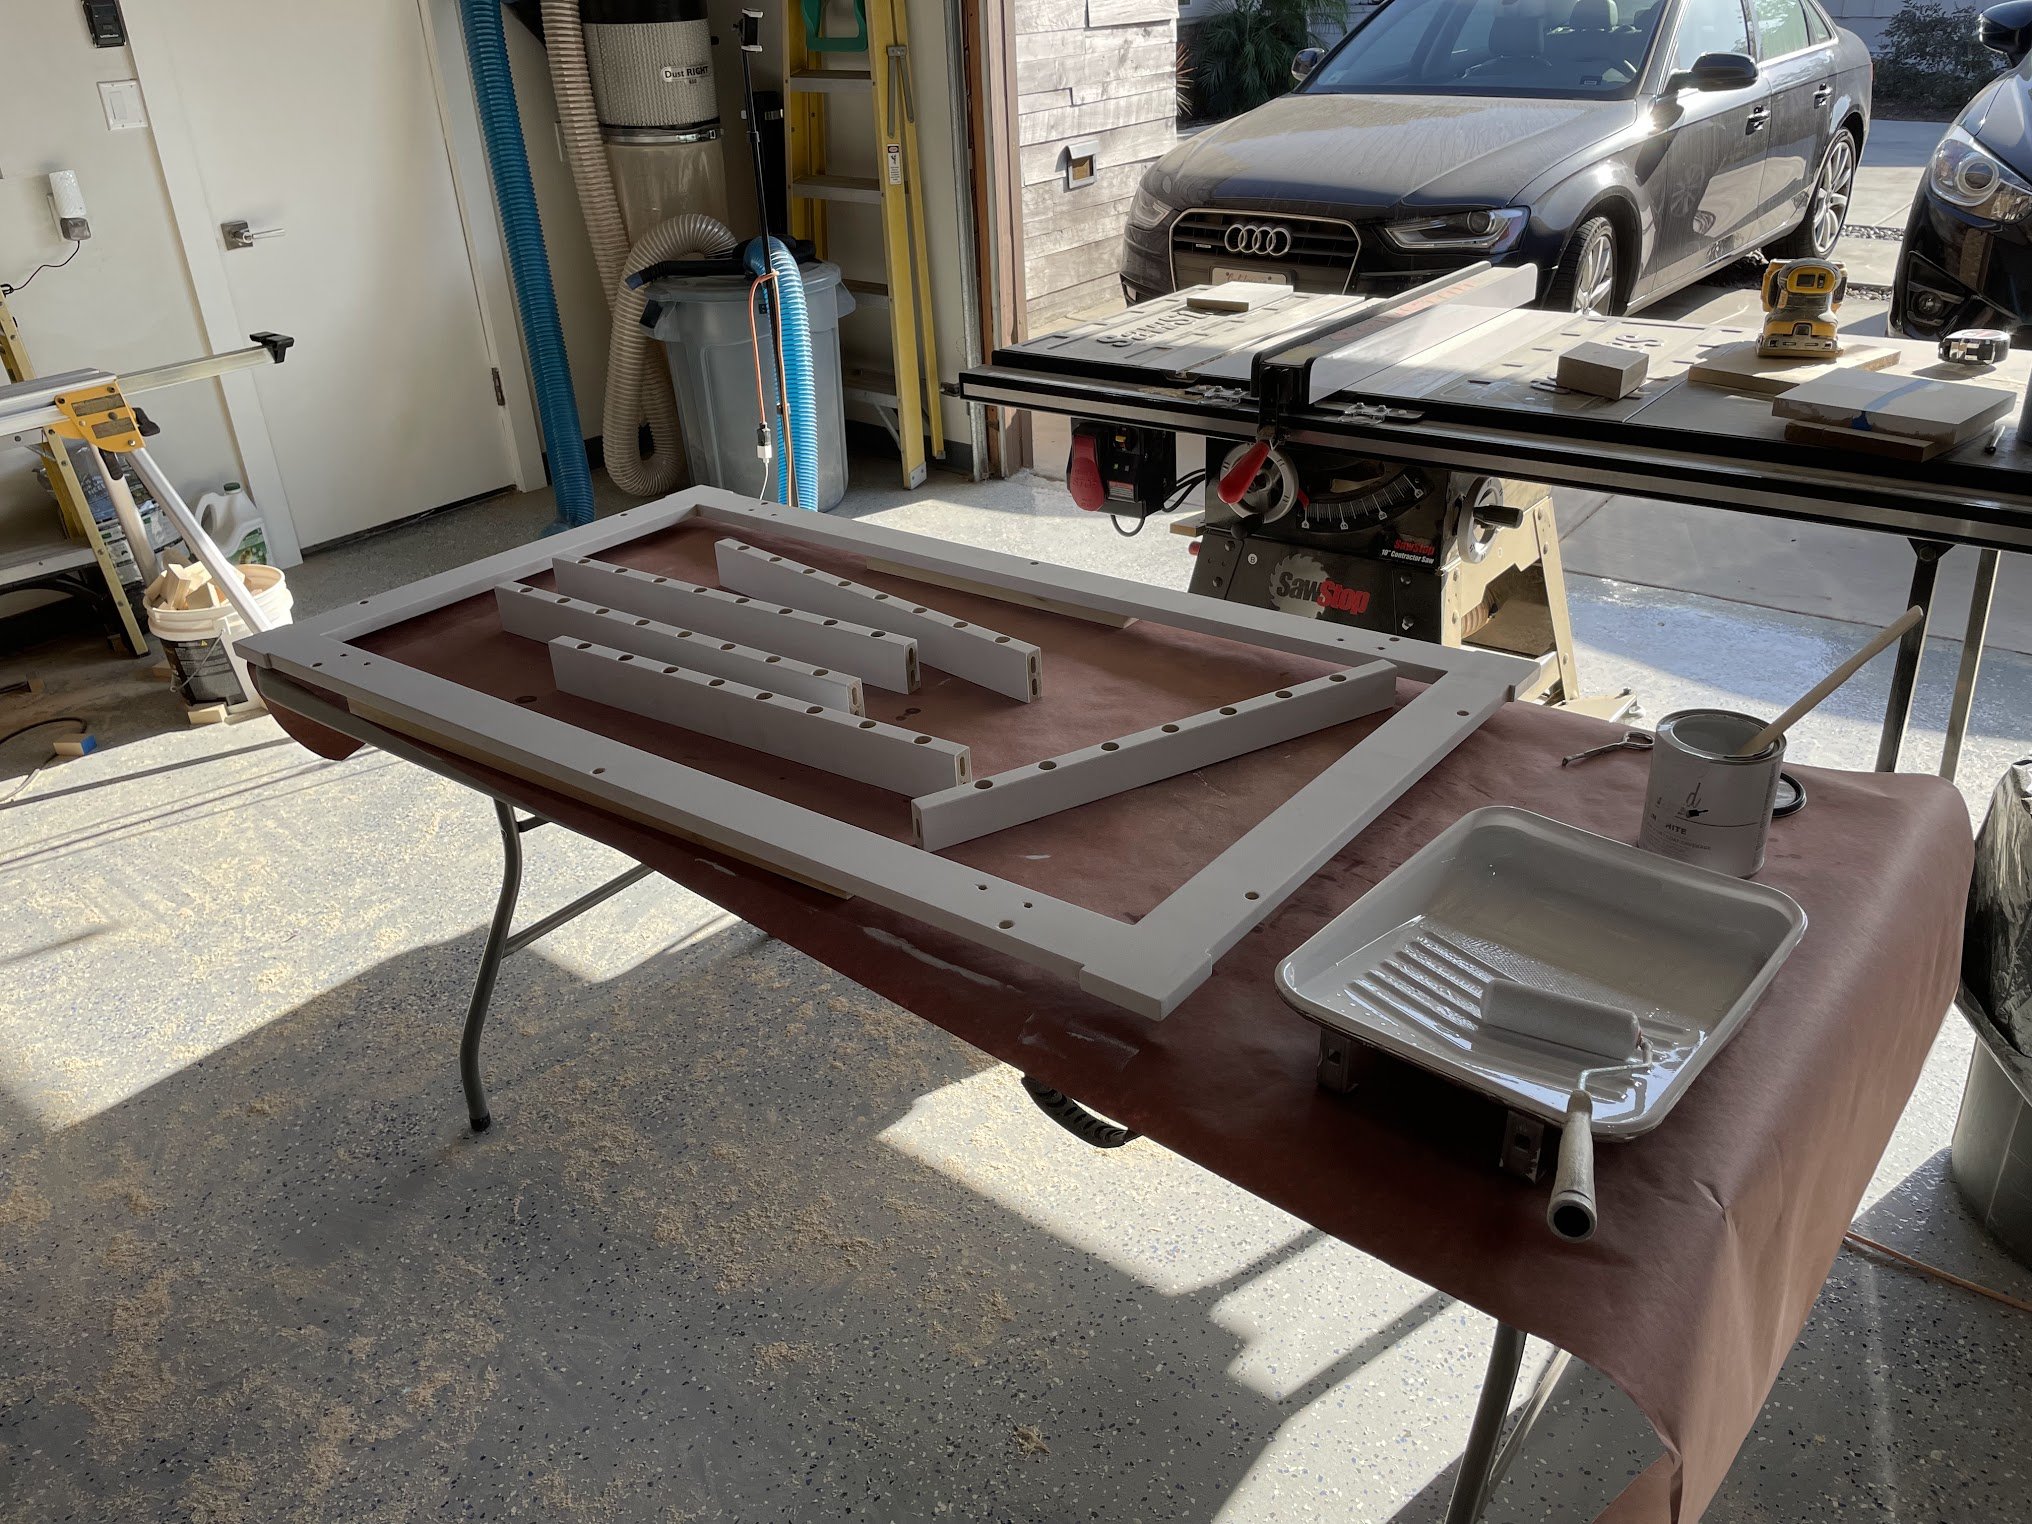
Now that I was pretty confident everything was going to fit together, it was time to move towards gluing. First, I glued up the base. As always, I strived for maximum clamp usage. I clamped some offcut boards to each of the interior corners to try to make sure all the joints were at a good 90 degrees. While that was drying, I rounded all of the edges on my mattress support piece and legs so that all of the maple stuff would be ready for finish.
I sanded all of the spindles, legs, and the mattress support to get them ready for finish, then applied the Rubio Monocoat. I wanted to finish the spindles before gluing up the rails since they are going to be right up against painted pieces. I knew it would be more difficult to paint and finish everything if I waited until it was all assembled. I used the rails themselves to hold up all my spindles while the finish dried.
Likewise, I wanted to paint the interior parts of the rails before I glued everything up so that I wasn’t worried about painting around the spindles. Instead, I could just use a roller right over the holes. So I sanded these pieces and rounded over all of the interior edges to prep, and then painted them. Since the base was all ready to go and I had the paint out, I painted it too.
Finally, I was ready for glue. One by one, I glued up each of the 5 panels. I started with the bottom piece, applied glue into each of the spindle holes, and put each spindle in. Then I put a little bit of glue on the top of each spindle, and gradually fit the top piece on. I tried as hard as I could to avoid any glue squeeze-out since my pieces already had finish and paint on them. Once the top and bottom were together, I used my dominos and glue to join the vertical pieces. I used clamps to apply substantial pressure on the joints between the vertical and horizontal pieces, but didn’t apply much pressure (if at all) between the top and the bottom pieces. Since the spindles were intentionally cut 1/16” short, if I applied too much pressure in the center, I could have ended up with a dip in the rails.

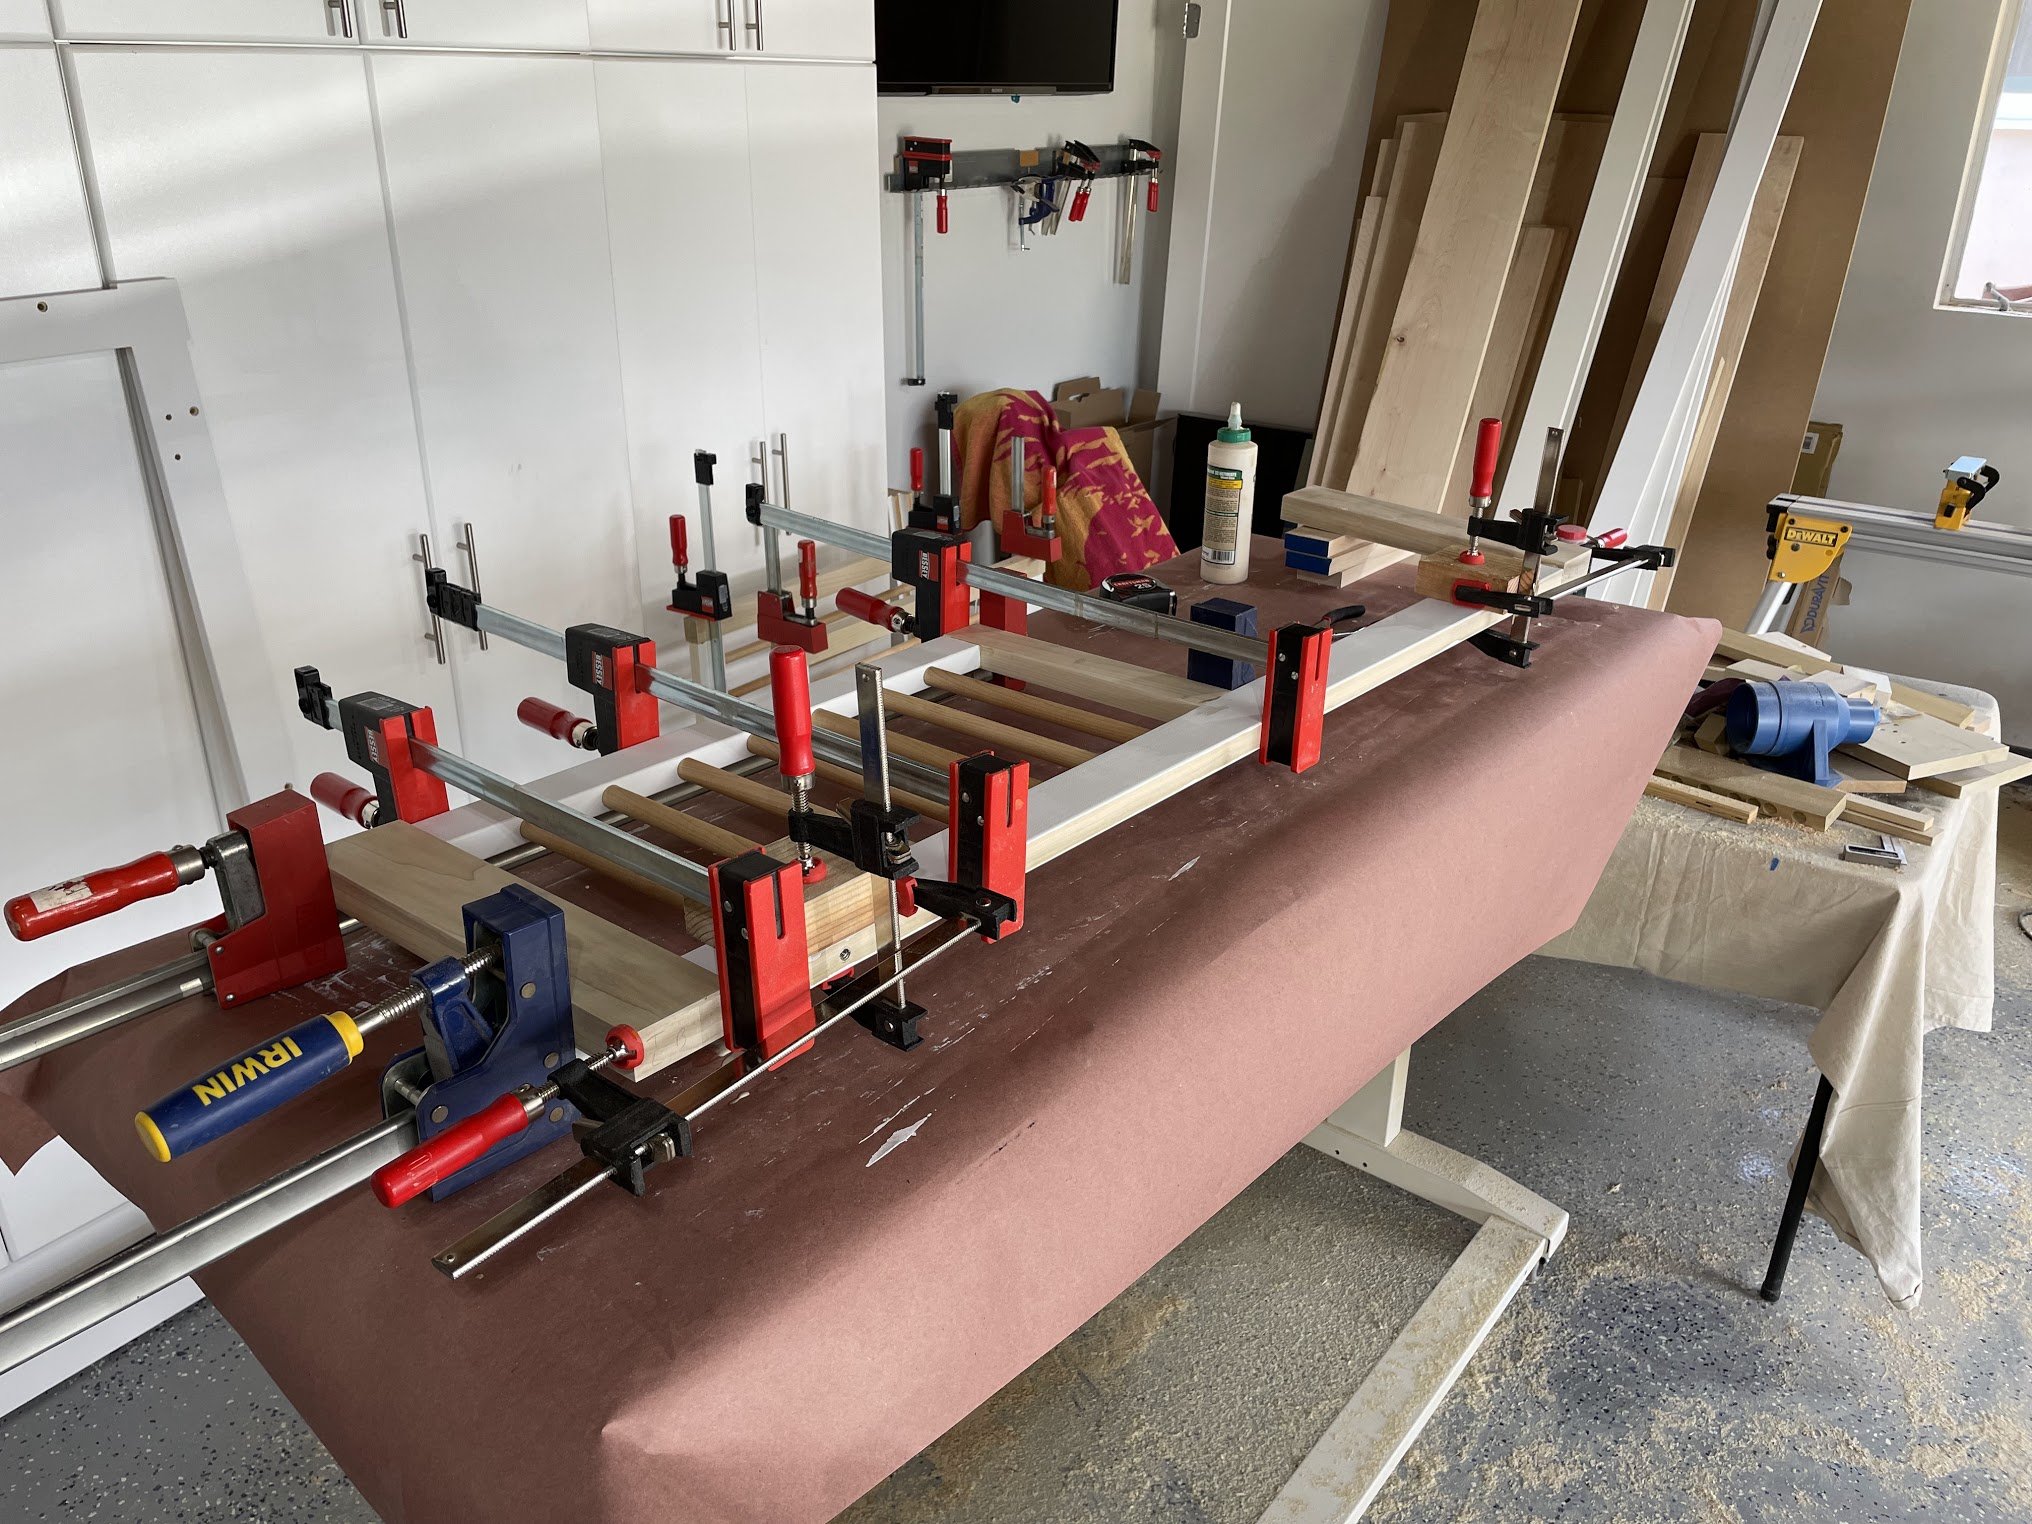
Glue-ups are always stressful given the time pressure, but everything turned out great! For the front and back pieces, I ended up clamping some long boards to the horizontal rails just to make sure the pressure being applied in that direction didn’t cause any bowing. Once the clamps were off, I sanded all the joints to get everything nice and smooth, used wood filler for any gaps or imperfections, and then rounded all of the exterior edges.
Then, it was time for paint. I taped up all of the spindle edges, and then put three coats of paint and two coats of clear topcoat on each piece. My garage workshop is pretty small, so I had to get creative with surfaces so that I could do all the painting at once. The base piece was strung across two folding card table chairs, and the toddler piece thrown over two folding camping stools. Whatever works!

Finally, I took all the pieces inside, took off all the tape, and assembled the full finished crib for the first time! Everything came together pretty well. There were a few screw holes that were suddenly not perfectly aligned with their receiving bolt partners, but with a little force I was able to get everything together. The last thing I did was to get out my paint one last time and paint over the screw heads as well as a couple of touch-up areas that hadn’t come out perfectly in the paint process.
