
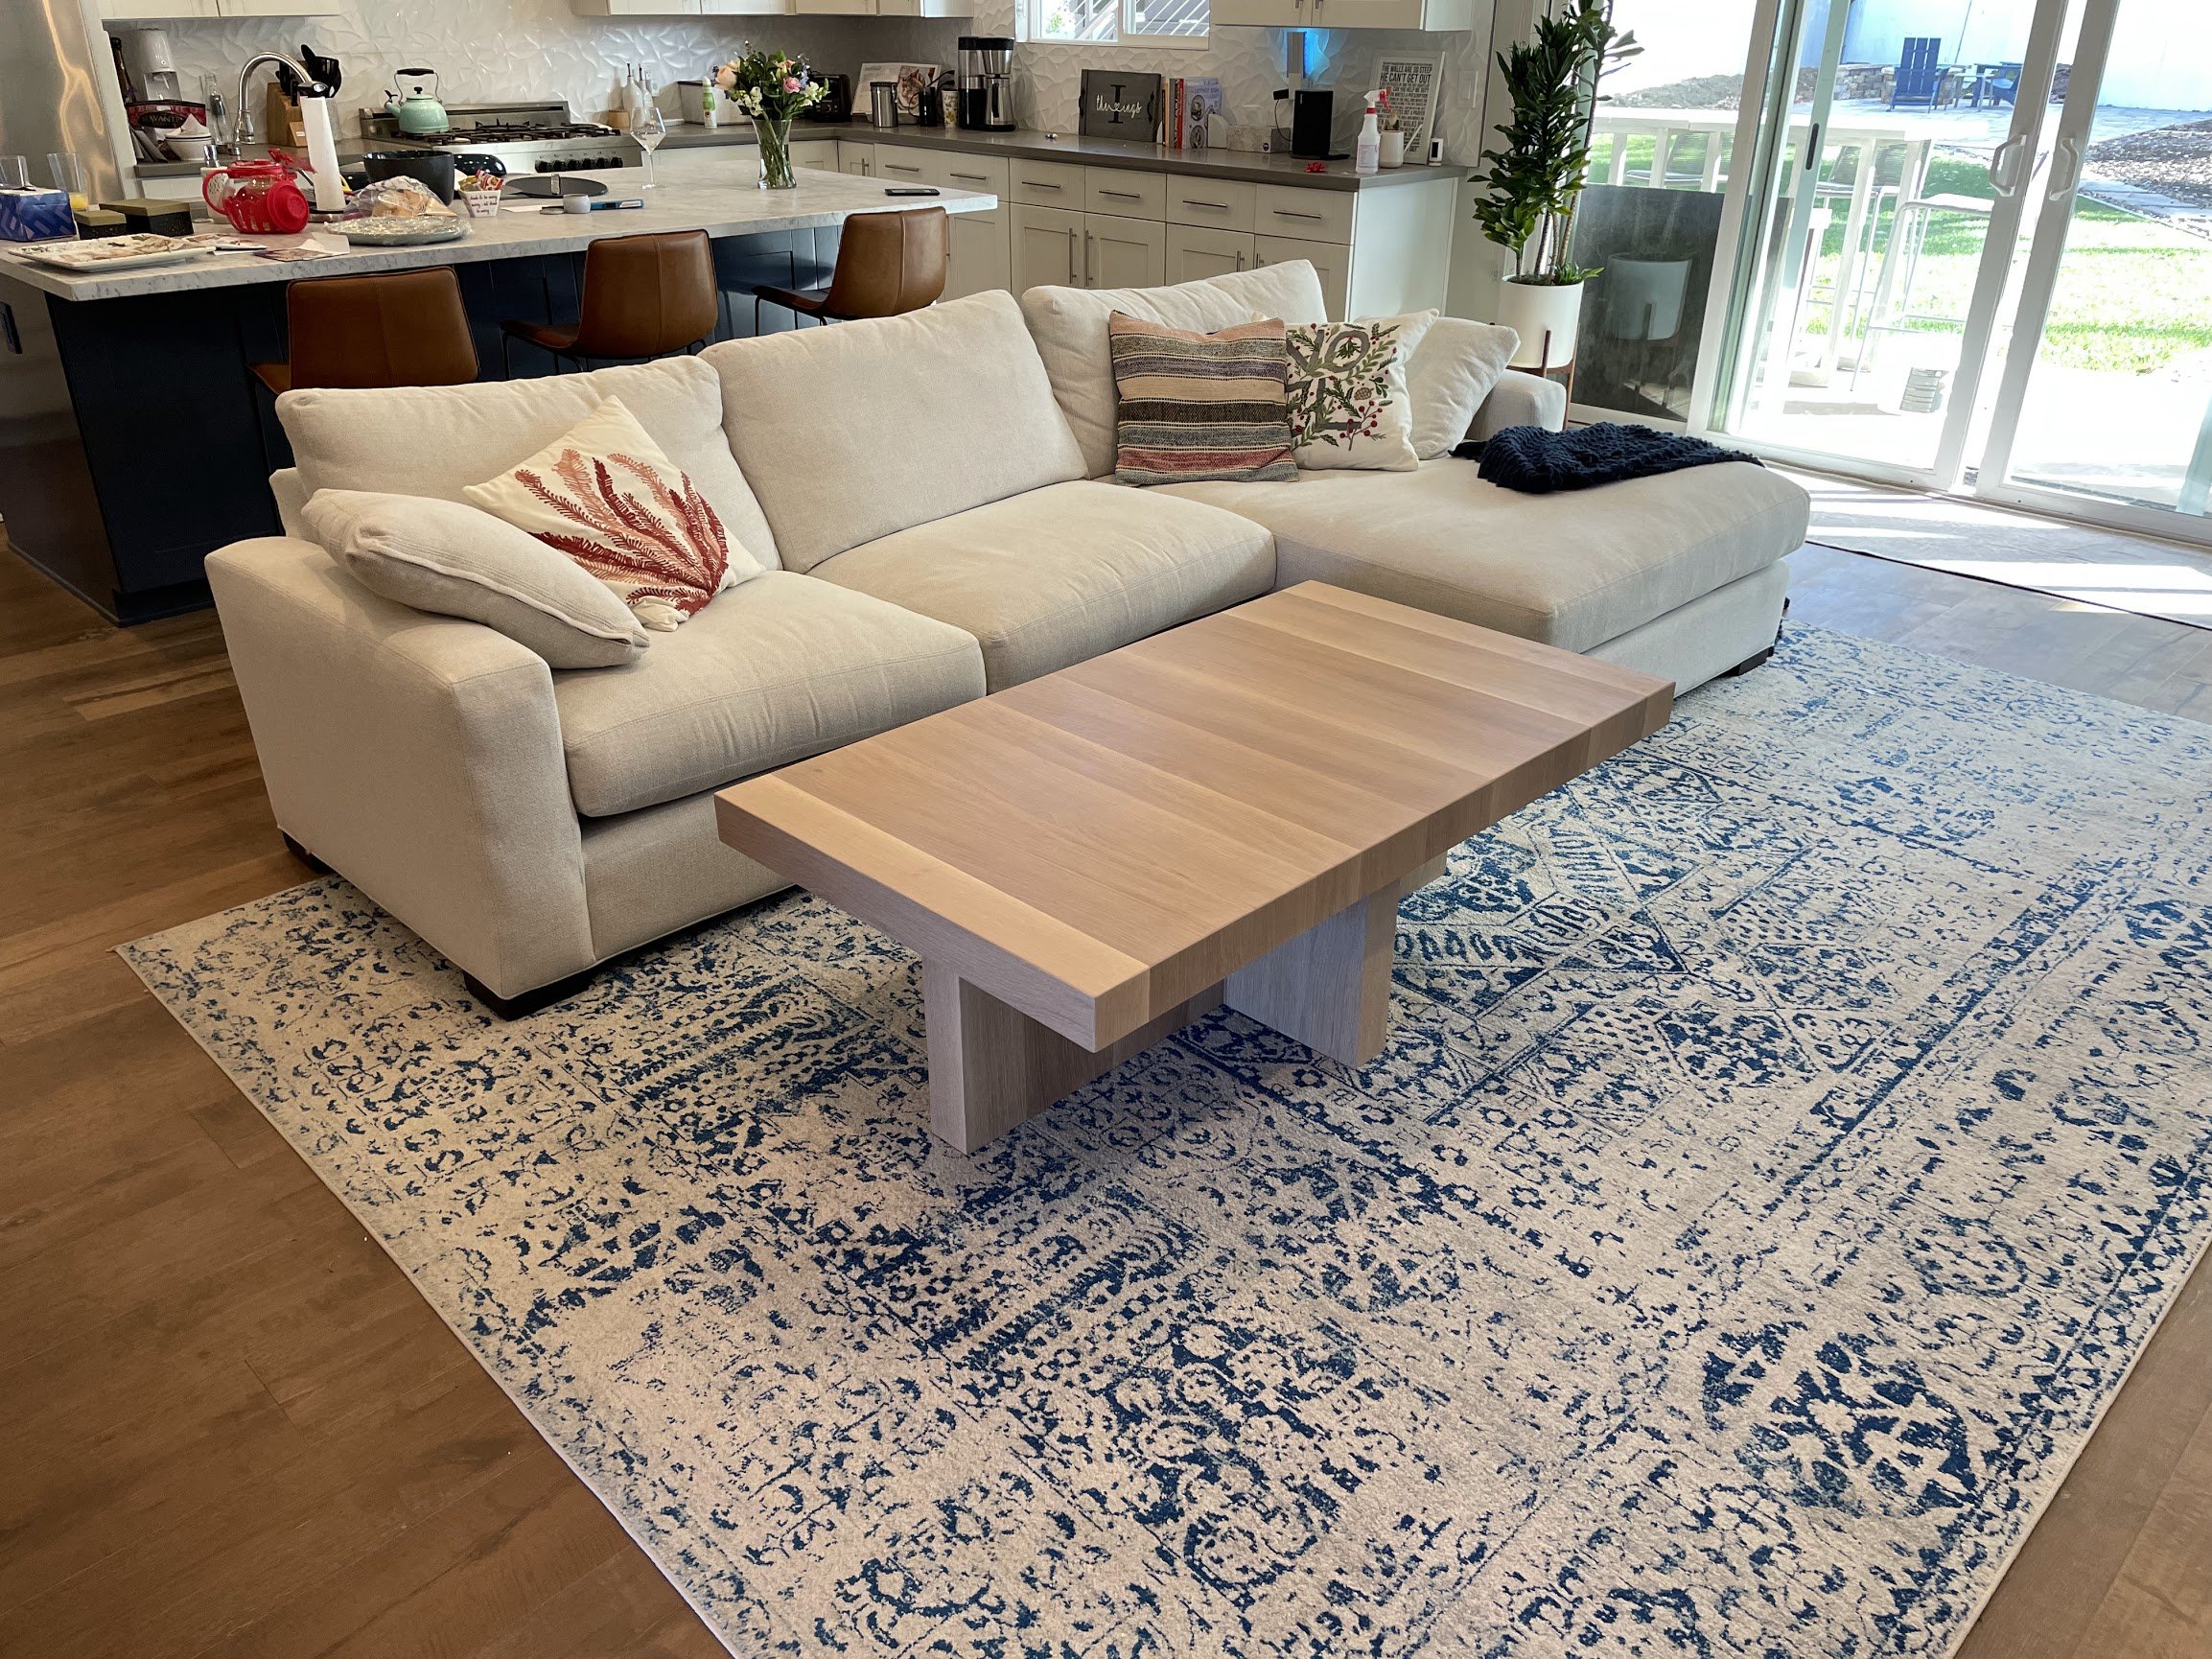
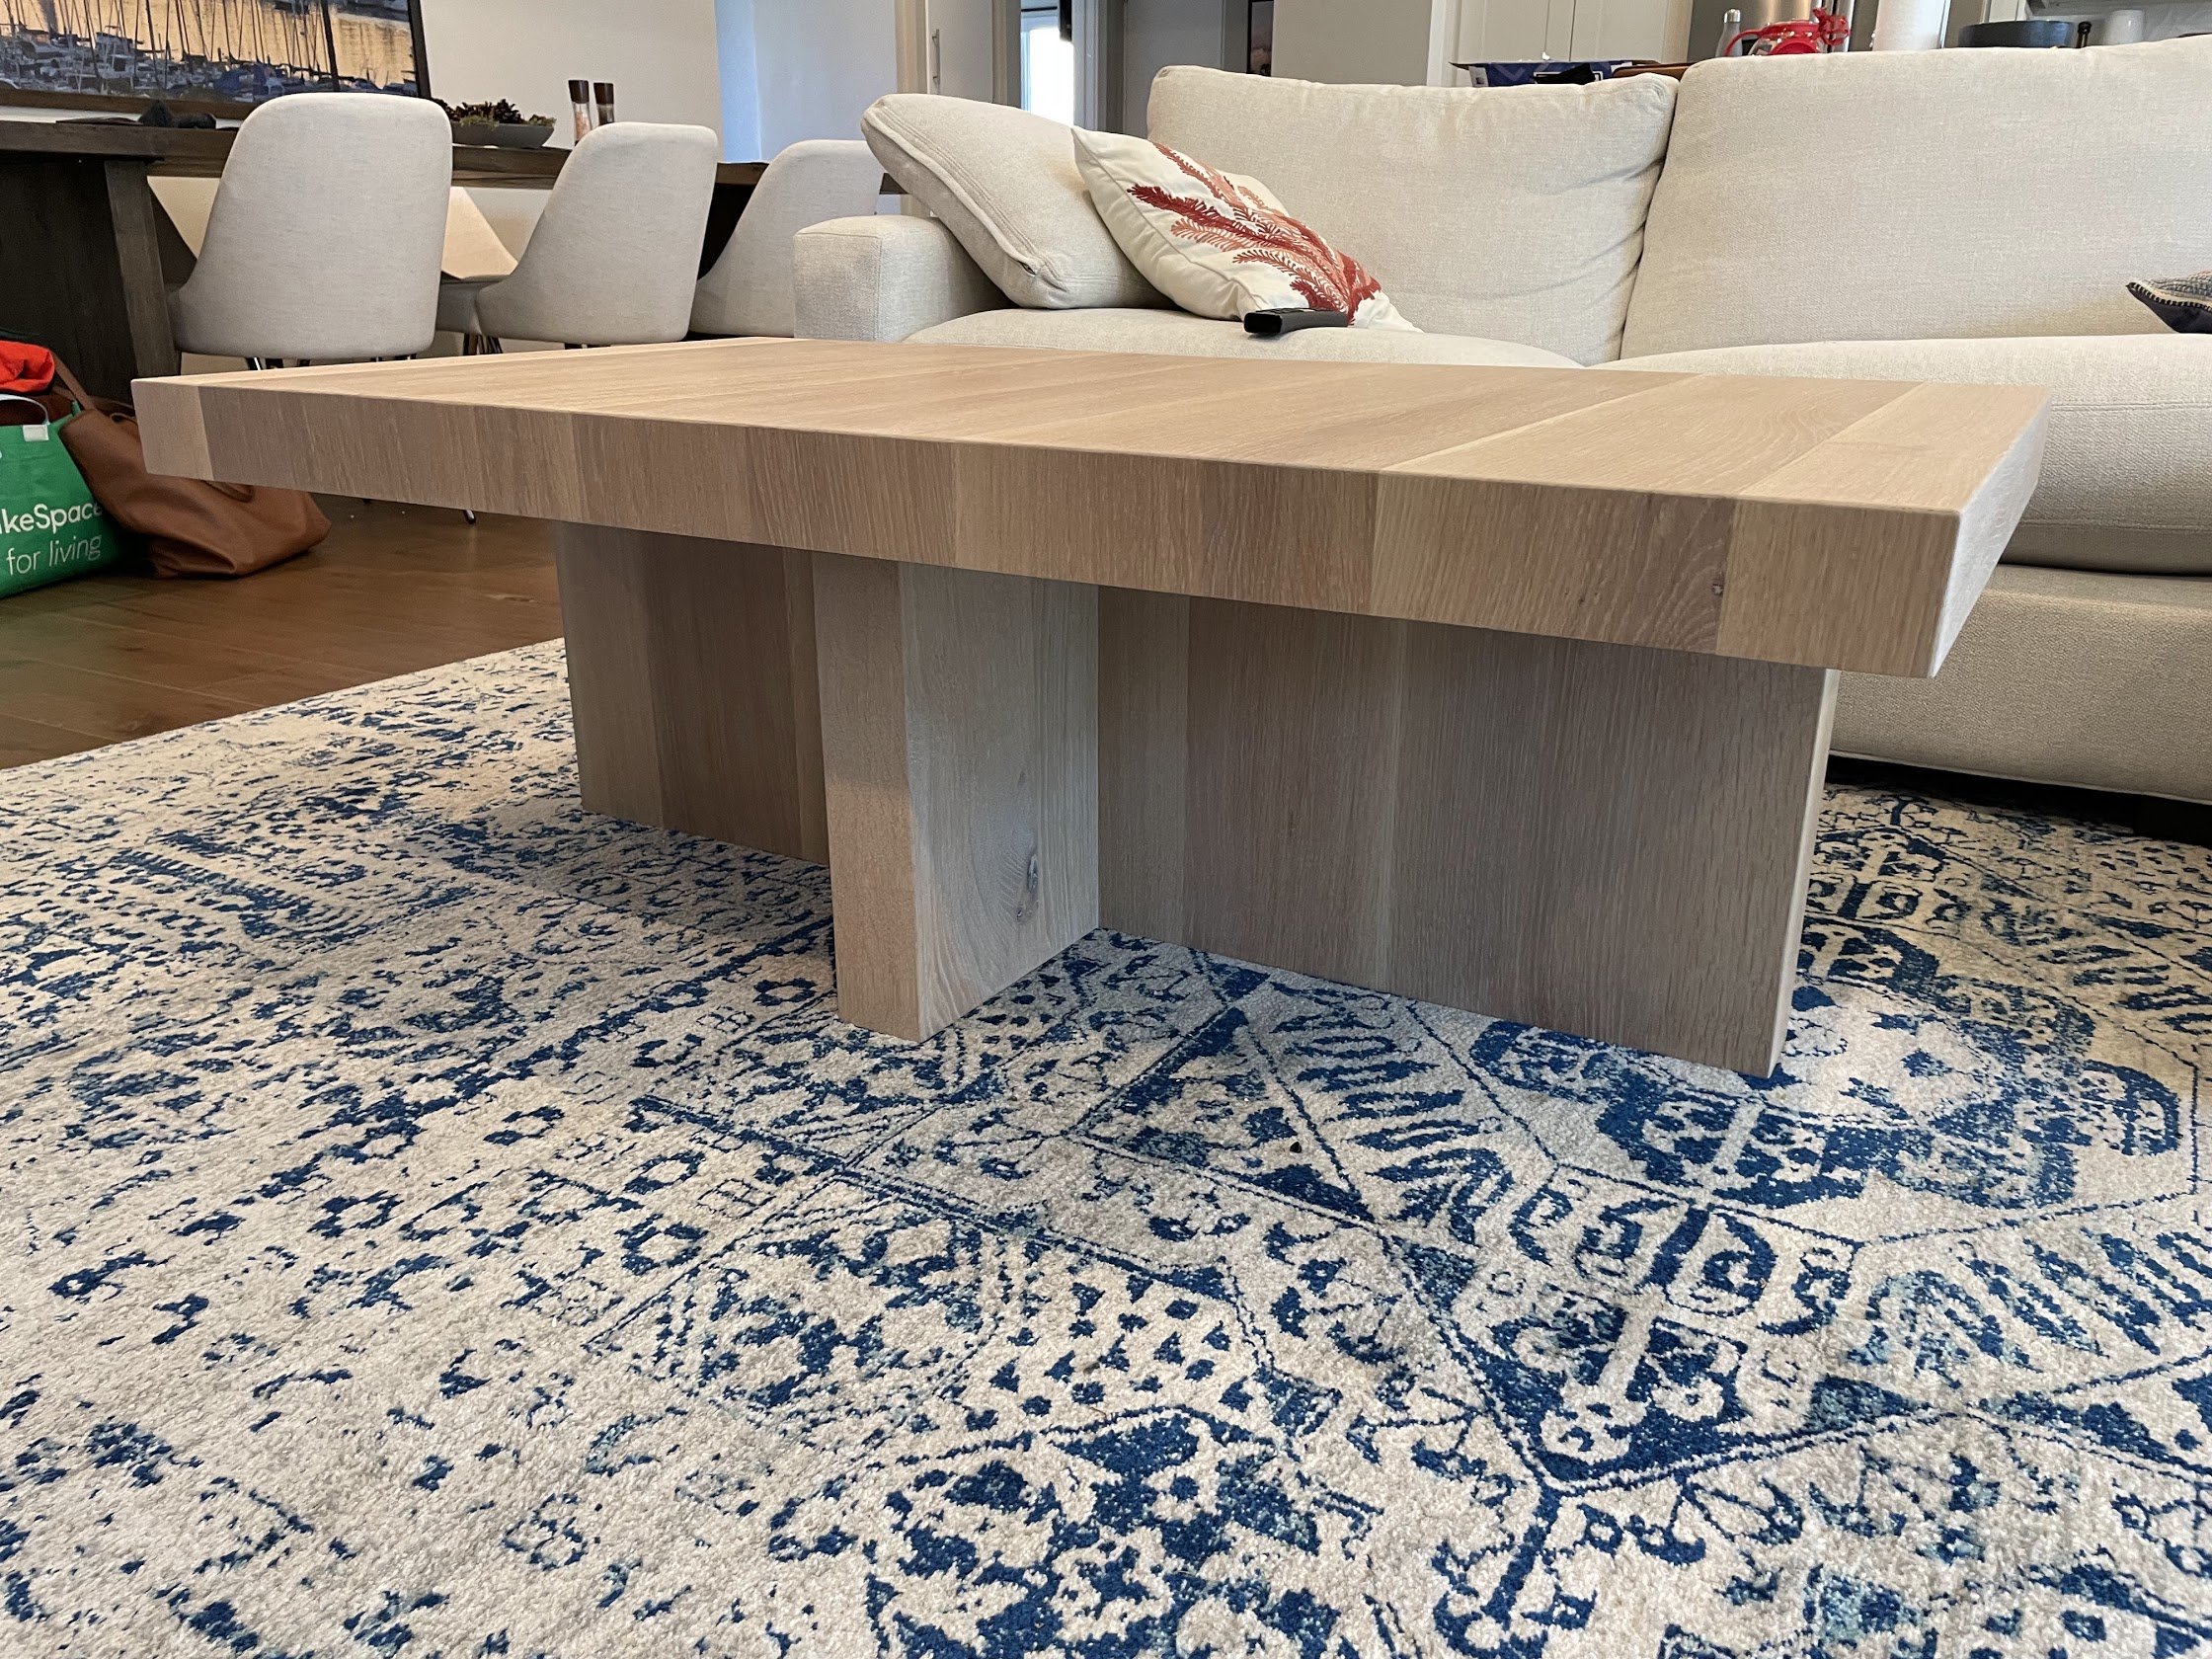
Oak Waterfall Coffee Table
My dad and I built this coffee table out of rift-sawn white oak. The original plan was to use thick 3-inch pieces to create a simple, chunky design. But after having trouble finding wood that thickness, we switched to using 1-inch boards and 45-degree miter joins to create a “waterfall” effect with the grain and make it look like bigger pieces of wood. I designed the table after seeing a couple of different designs at furniture retailers that I liked some aspects of, but not others. It’s finished with Rubio Monocoat in “smoke,” which largely kept the natural, unfinished look of the oak, but added some white and gray to the grain.
The Process
As mentioned above, I based the design off of two different coffee tables we had seen while shopping around at Serena & Lily and Arhaus. We liked the thickness and wood style of both, but I didn’t like that neither of them had room to put your feet under the table. Since we sometimes eat at the coffee table, I thought that would be too bulky and uncomfortable. And when we went to look at these, despite being advertised as “solid wood,” it seemed to us like it was actually a thin veneer on top of something like plywood. At $2,000-$3,000 and 8+ weeks, neither seemed like a great purchase. And we were looking for a new project…
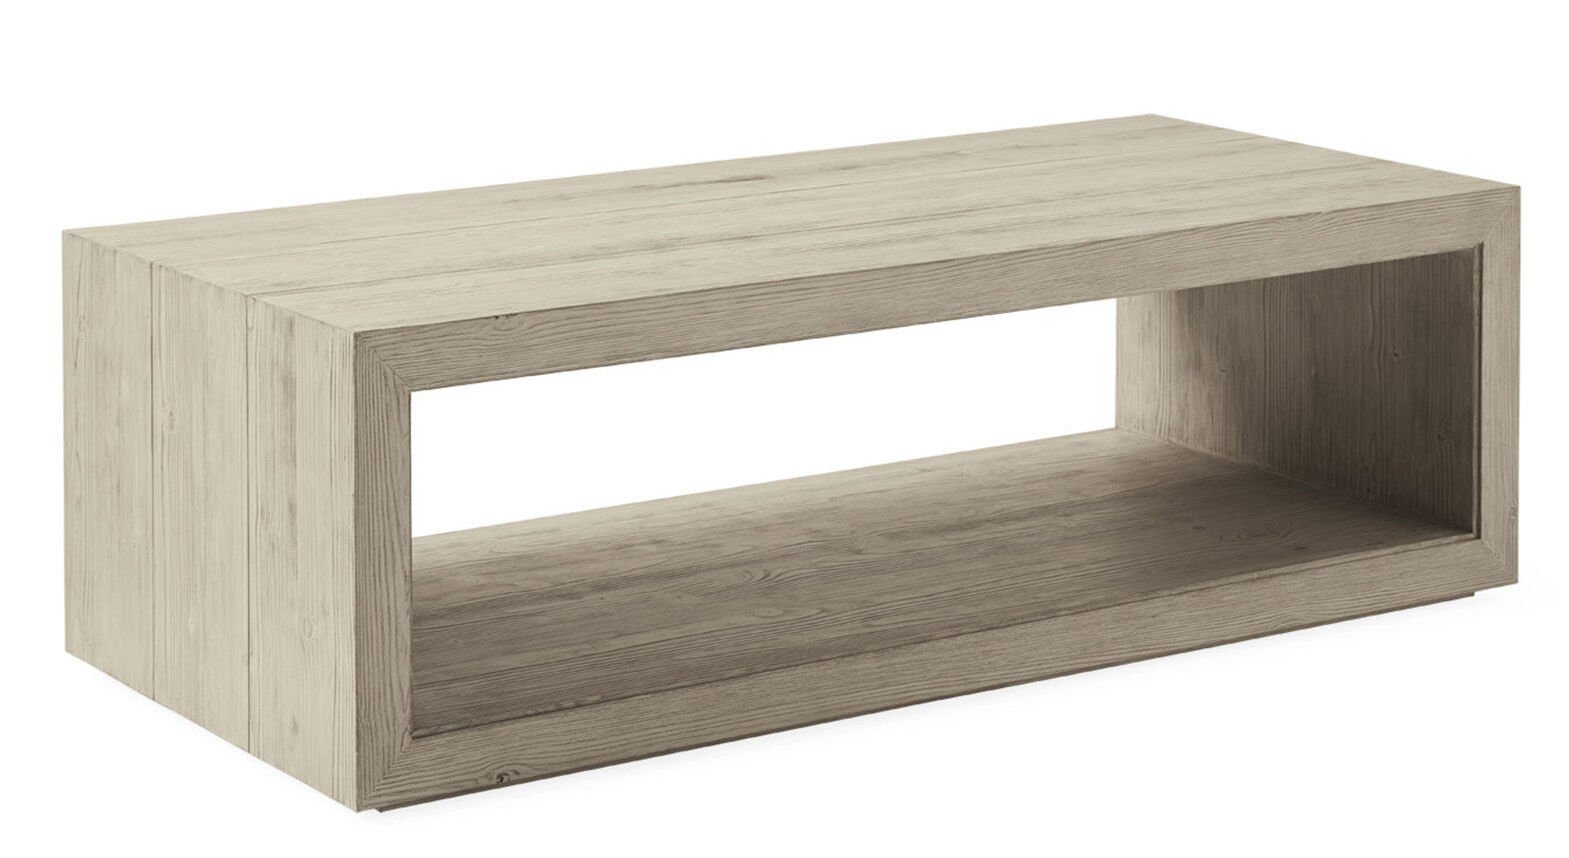
“Atelier” Table from Serena & Lily
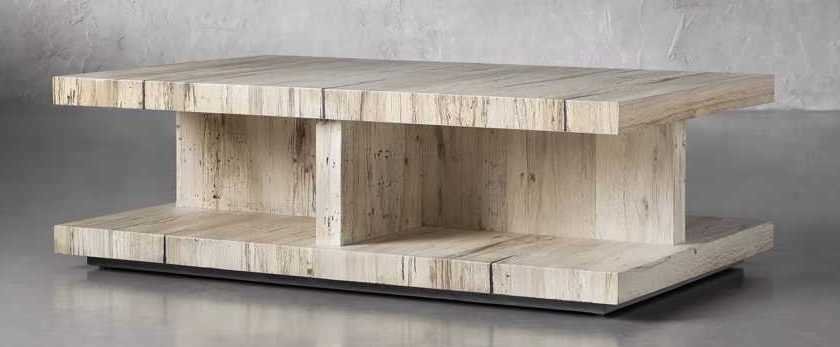
“Leandro” Table from Arhaus
I hadn’t used SketchUp before but had seen other woodworkers using it so I decided to give it a try for this project. After some trial and a lot of error, I eventually came up with this design.


The design assumed we’d use thick, 3-inch pieces of either pine or white oak. We’d join 8-10 pieces together with the grain running along the short side of the rectangle to make the top, and build similar pieces to create the big block legs. But when we went to look for the lumber, we found almost nothing that was in 3-inch thickness. What little we did find wasn’t super high quality and weighed (and cost) a ton. So day 1 and the plan was already completely out the window. Pretty standard for our projects.
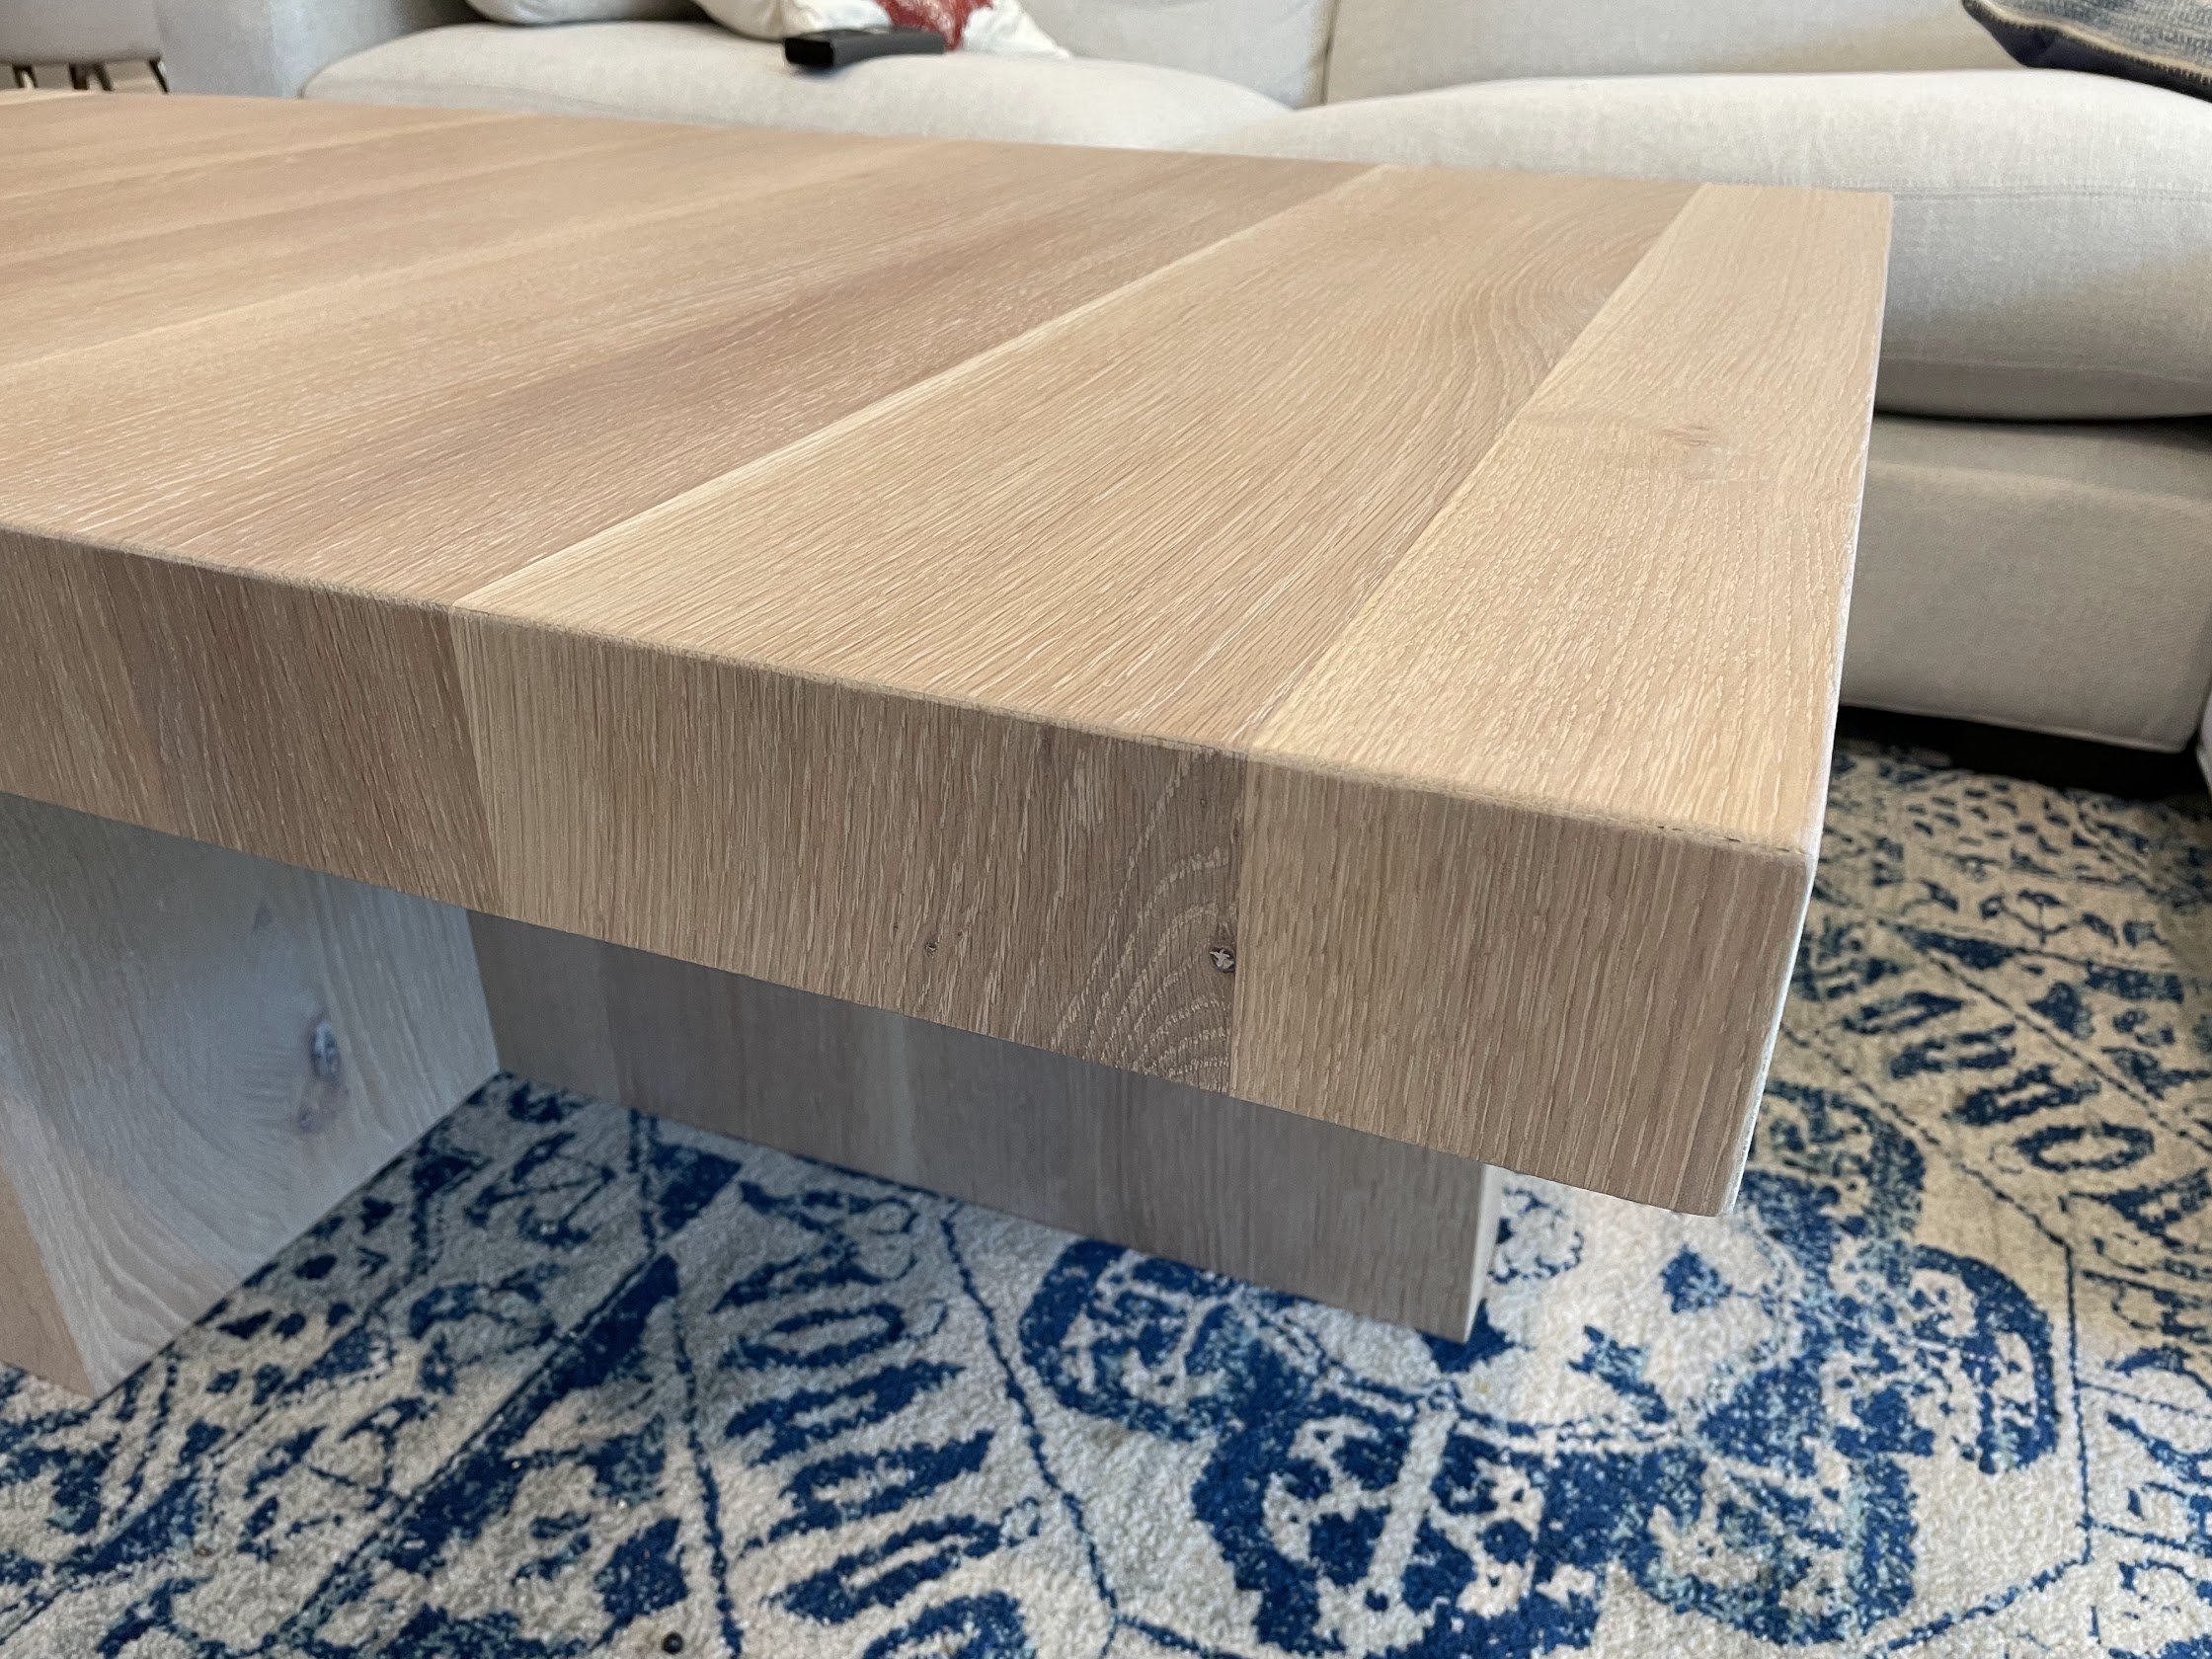
Since we were close to some of these furniture retailers, we actually went and looked at a couple of these tables in person. We found that in both cases, while they were made to look like solid 2-3 inch pieces of wood, they were actually not. They used a “waterfall” edge to create the impression of a continuous piece. You can think of this like taking a flat board and “bending” it 90 degrees downward. Since the grain pattern will be continuous across the bend, it can look like a single solid piece. So this became our new plan. The upside was that it would make it much easier to get the lumber and would make the final product much lighter. The downside was that the design would now require a whole ton of 45-degree miter joins, which neither of us felt super comfortable with.
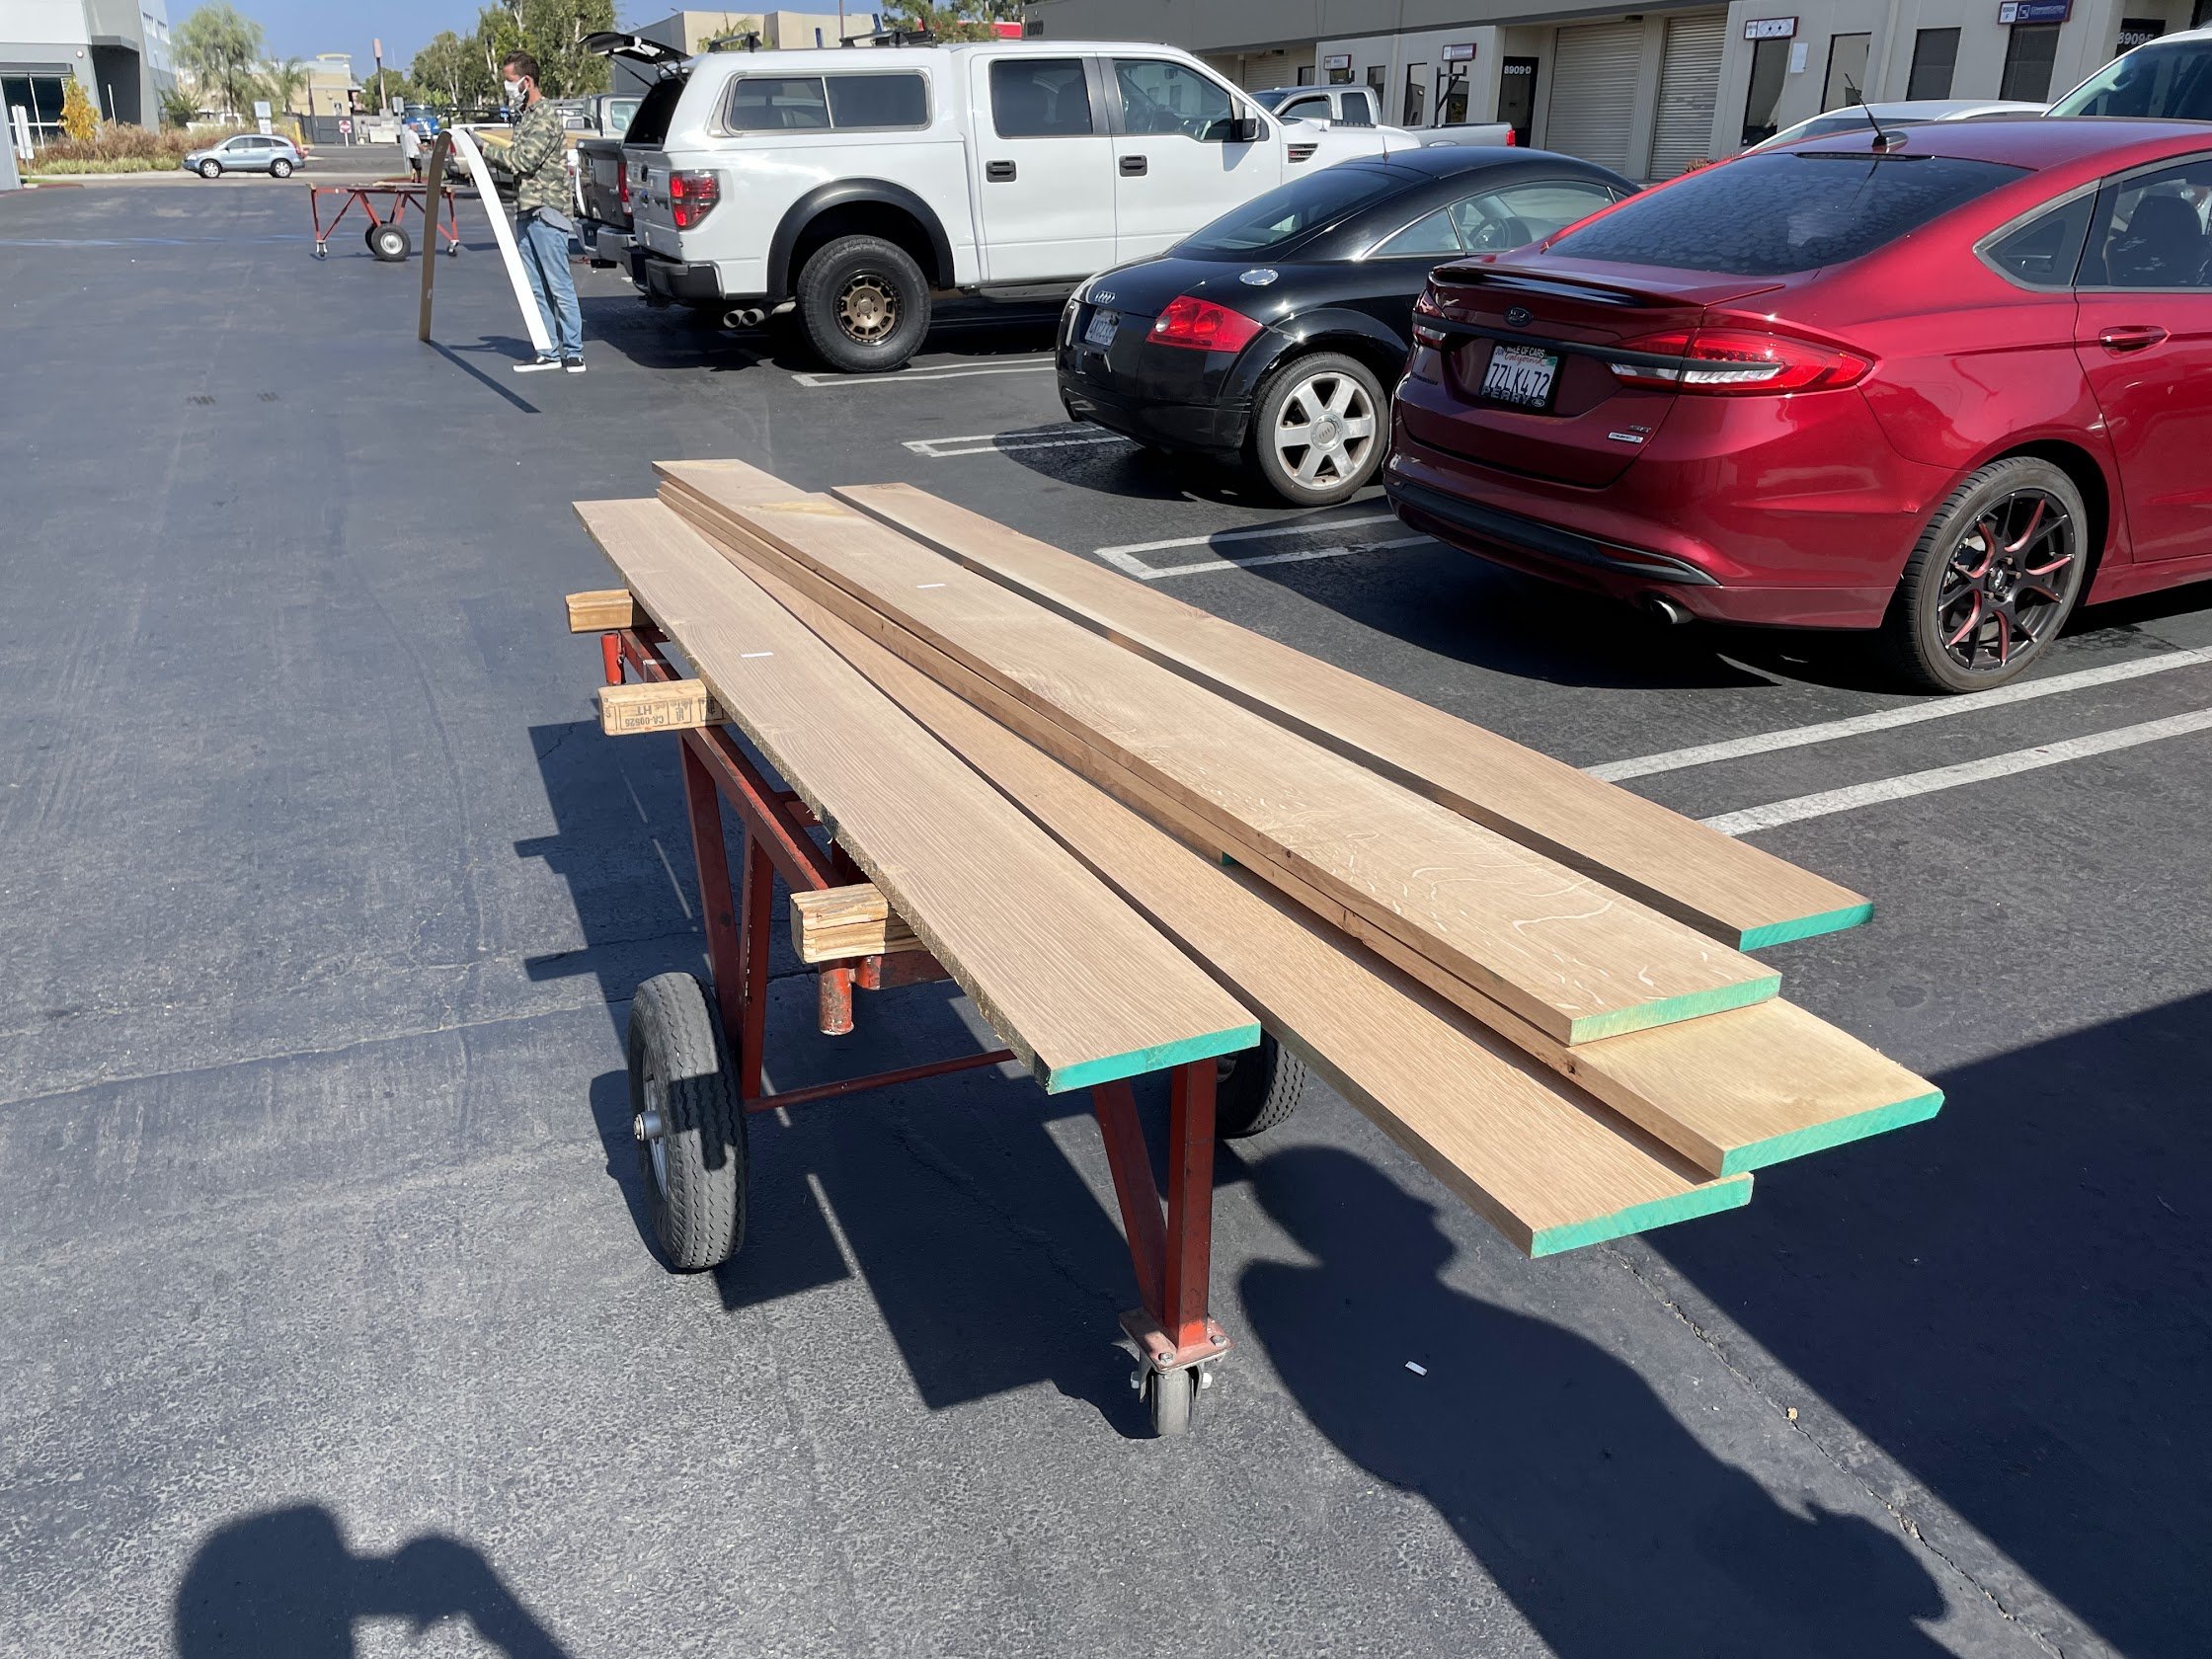

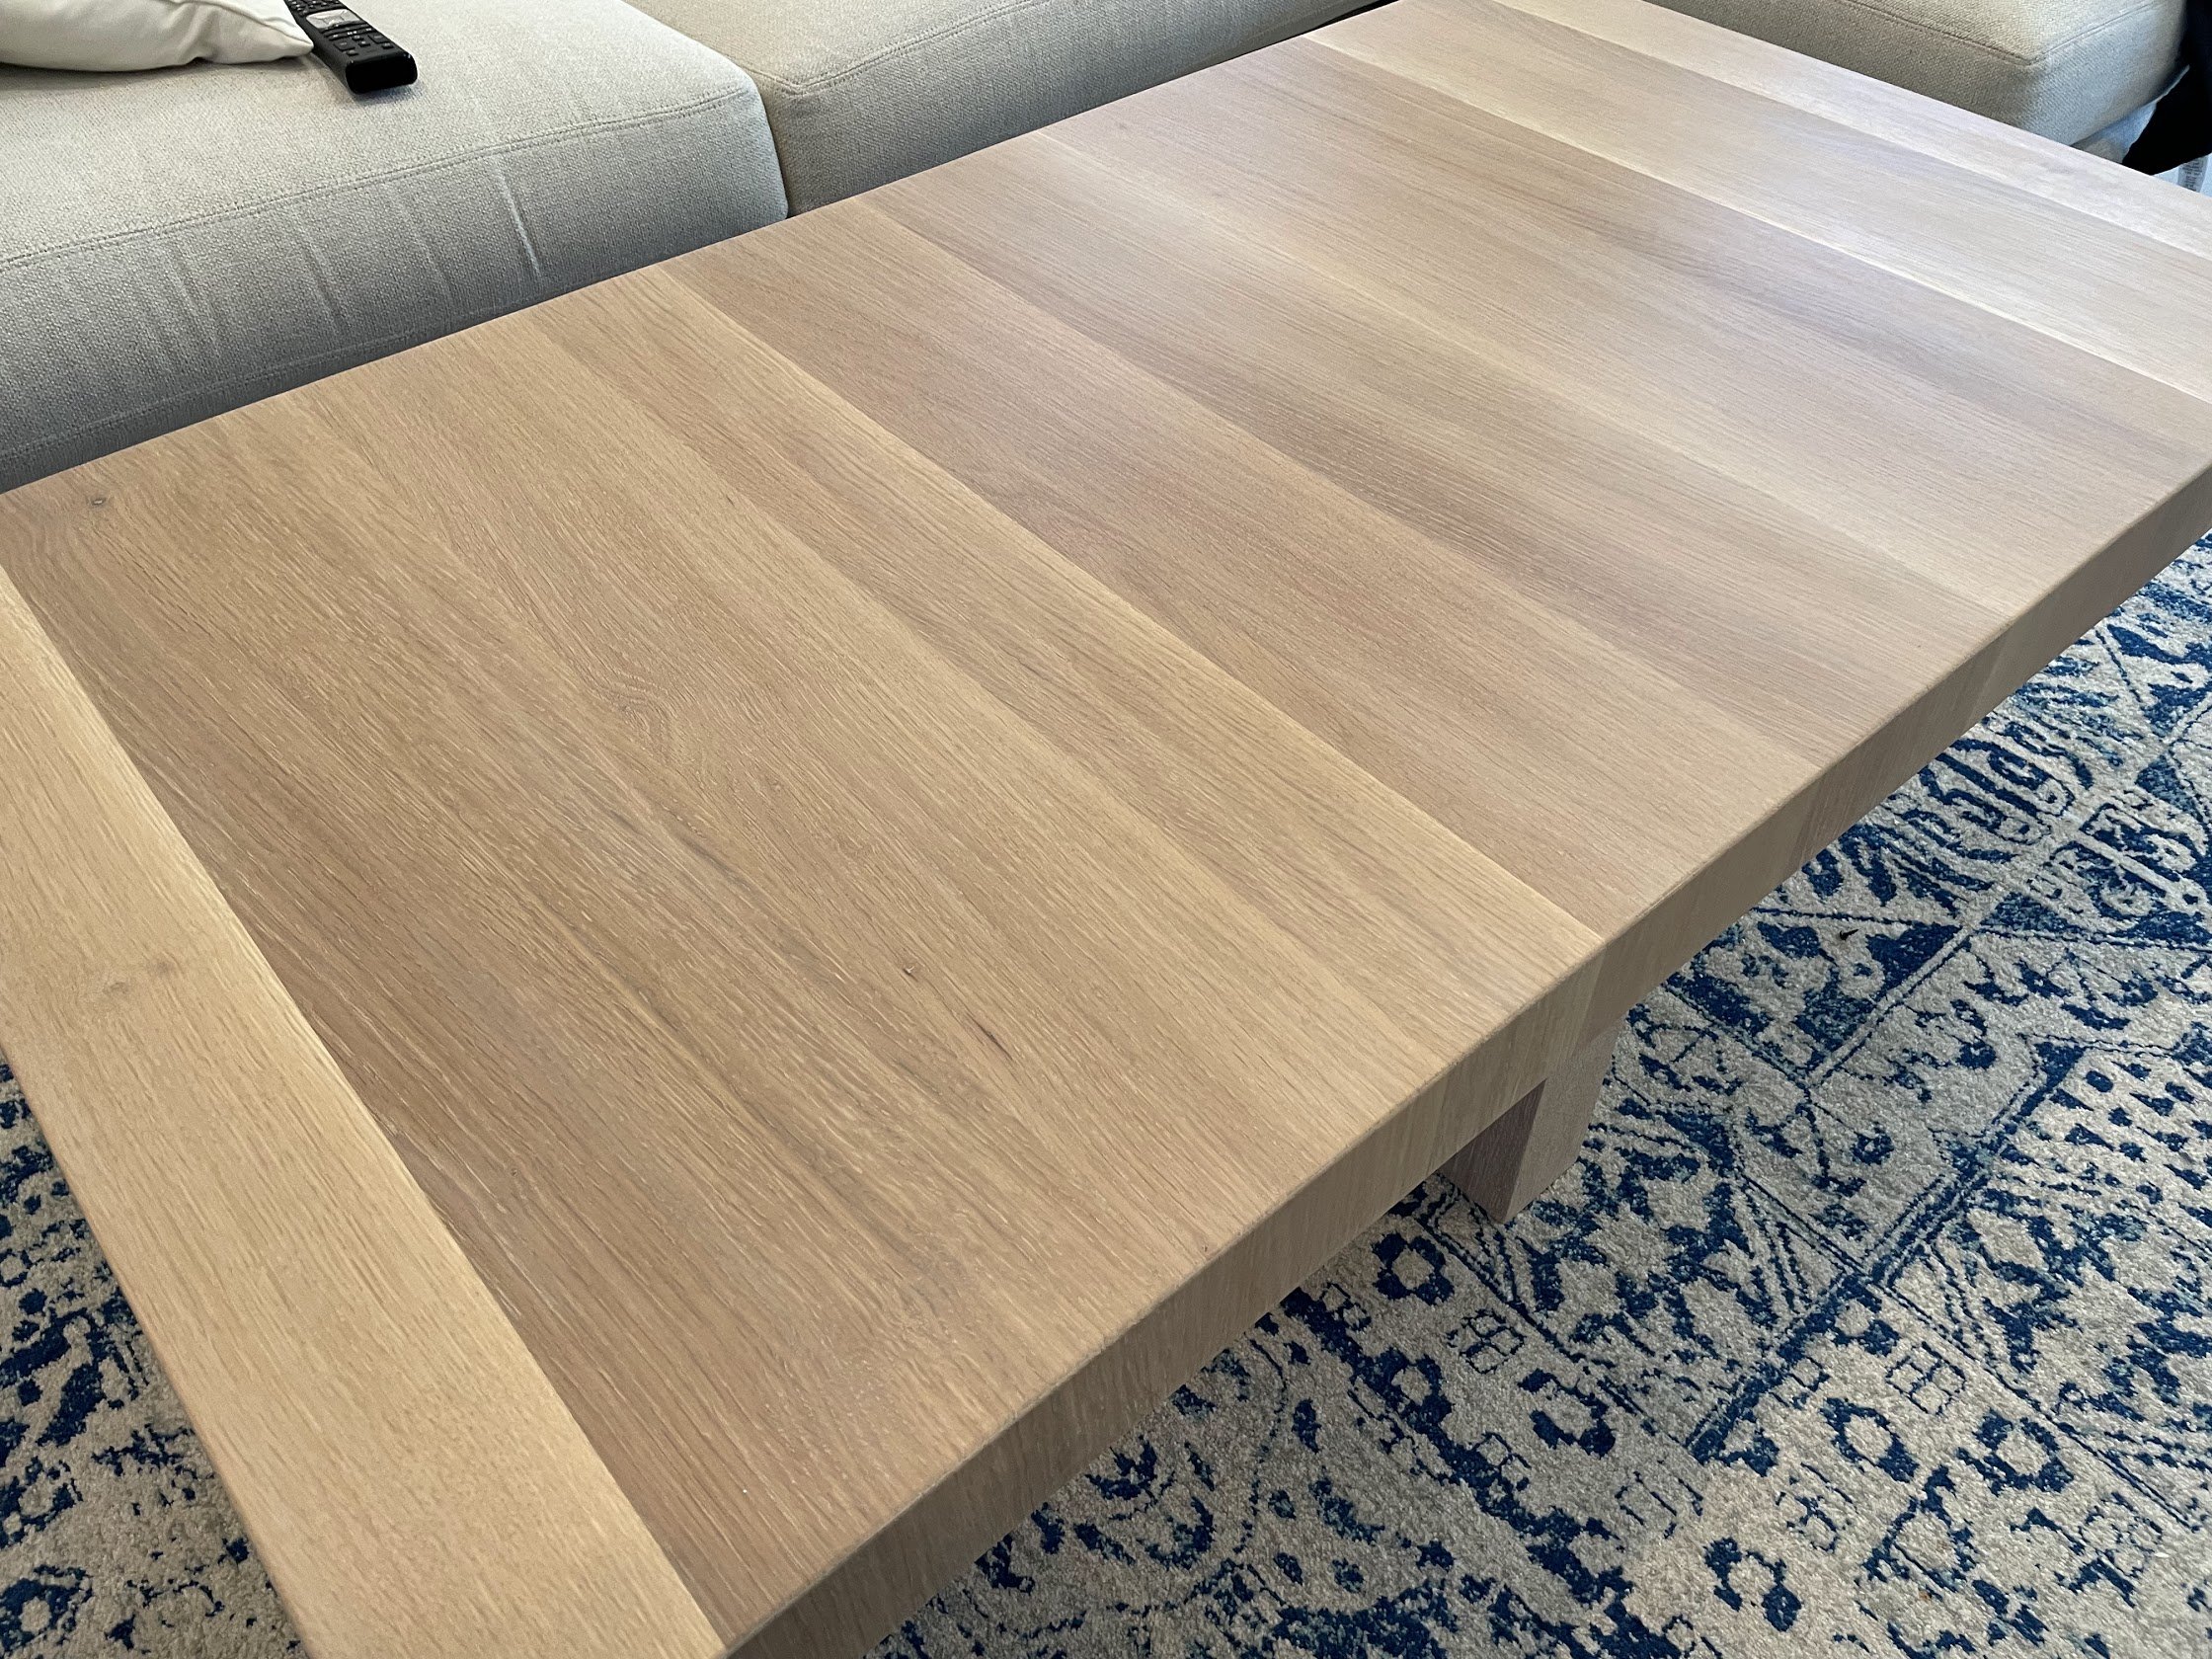
We went back to our favorite lumber store (Th&H) and bought a bunch of pieces of rift-sawn white oak in 1-inch thickness. Buying the rift-sawn pieces was actually a happy (albeit expensive) accident. It was the first white oak that we saw and we didn’t realize that we had “upgraded” from plain-sawn and quarter-sawn. All of these terms refer to the way the wood planks are cut from the tree and the resulting grain pattern. It turns out rift-sawn creates very long, parallel grain lines along the face of the boards that are great for furniture and ended up fitting this design really well. Of course we knew none of this at the time.
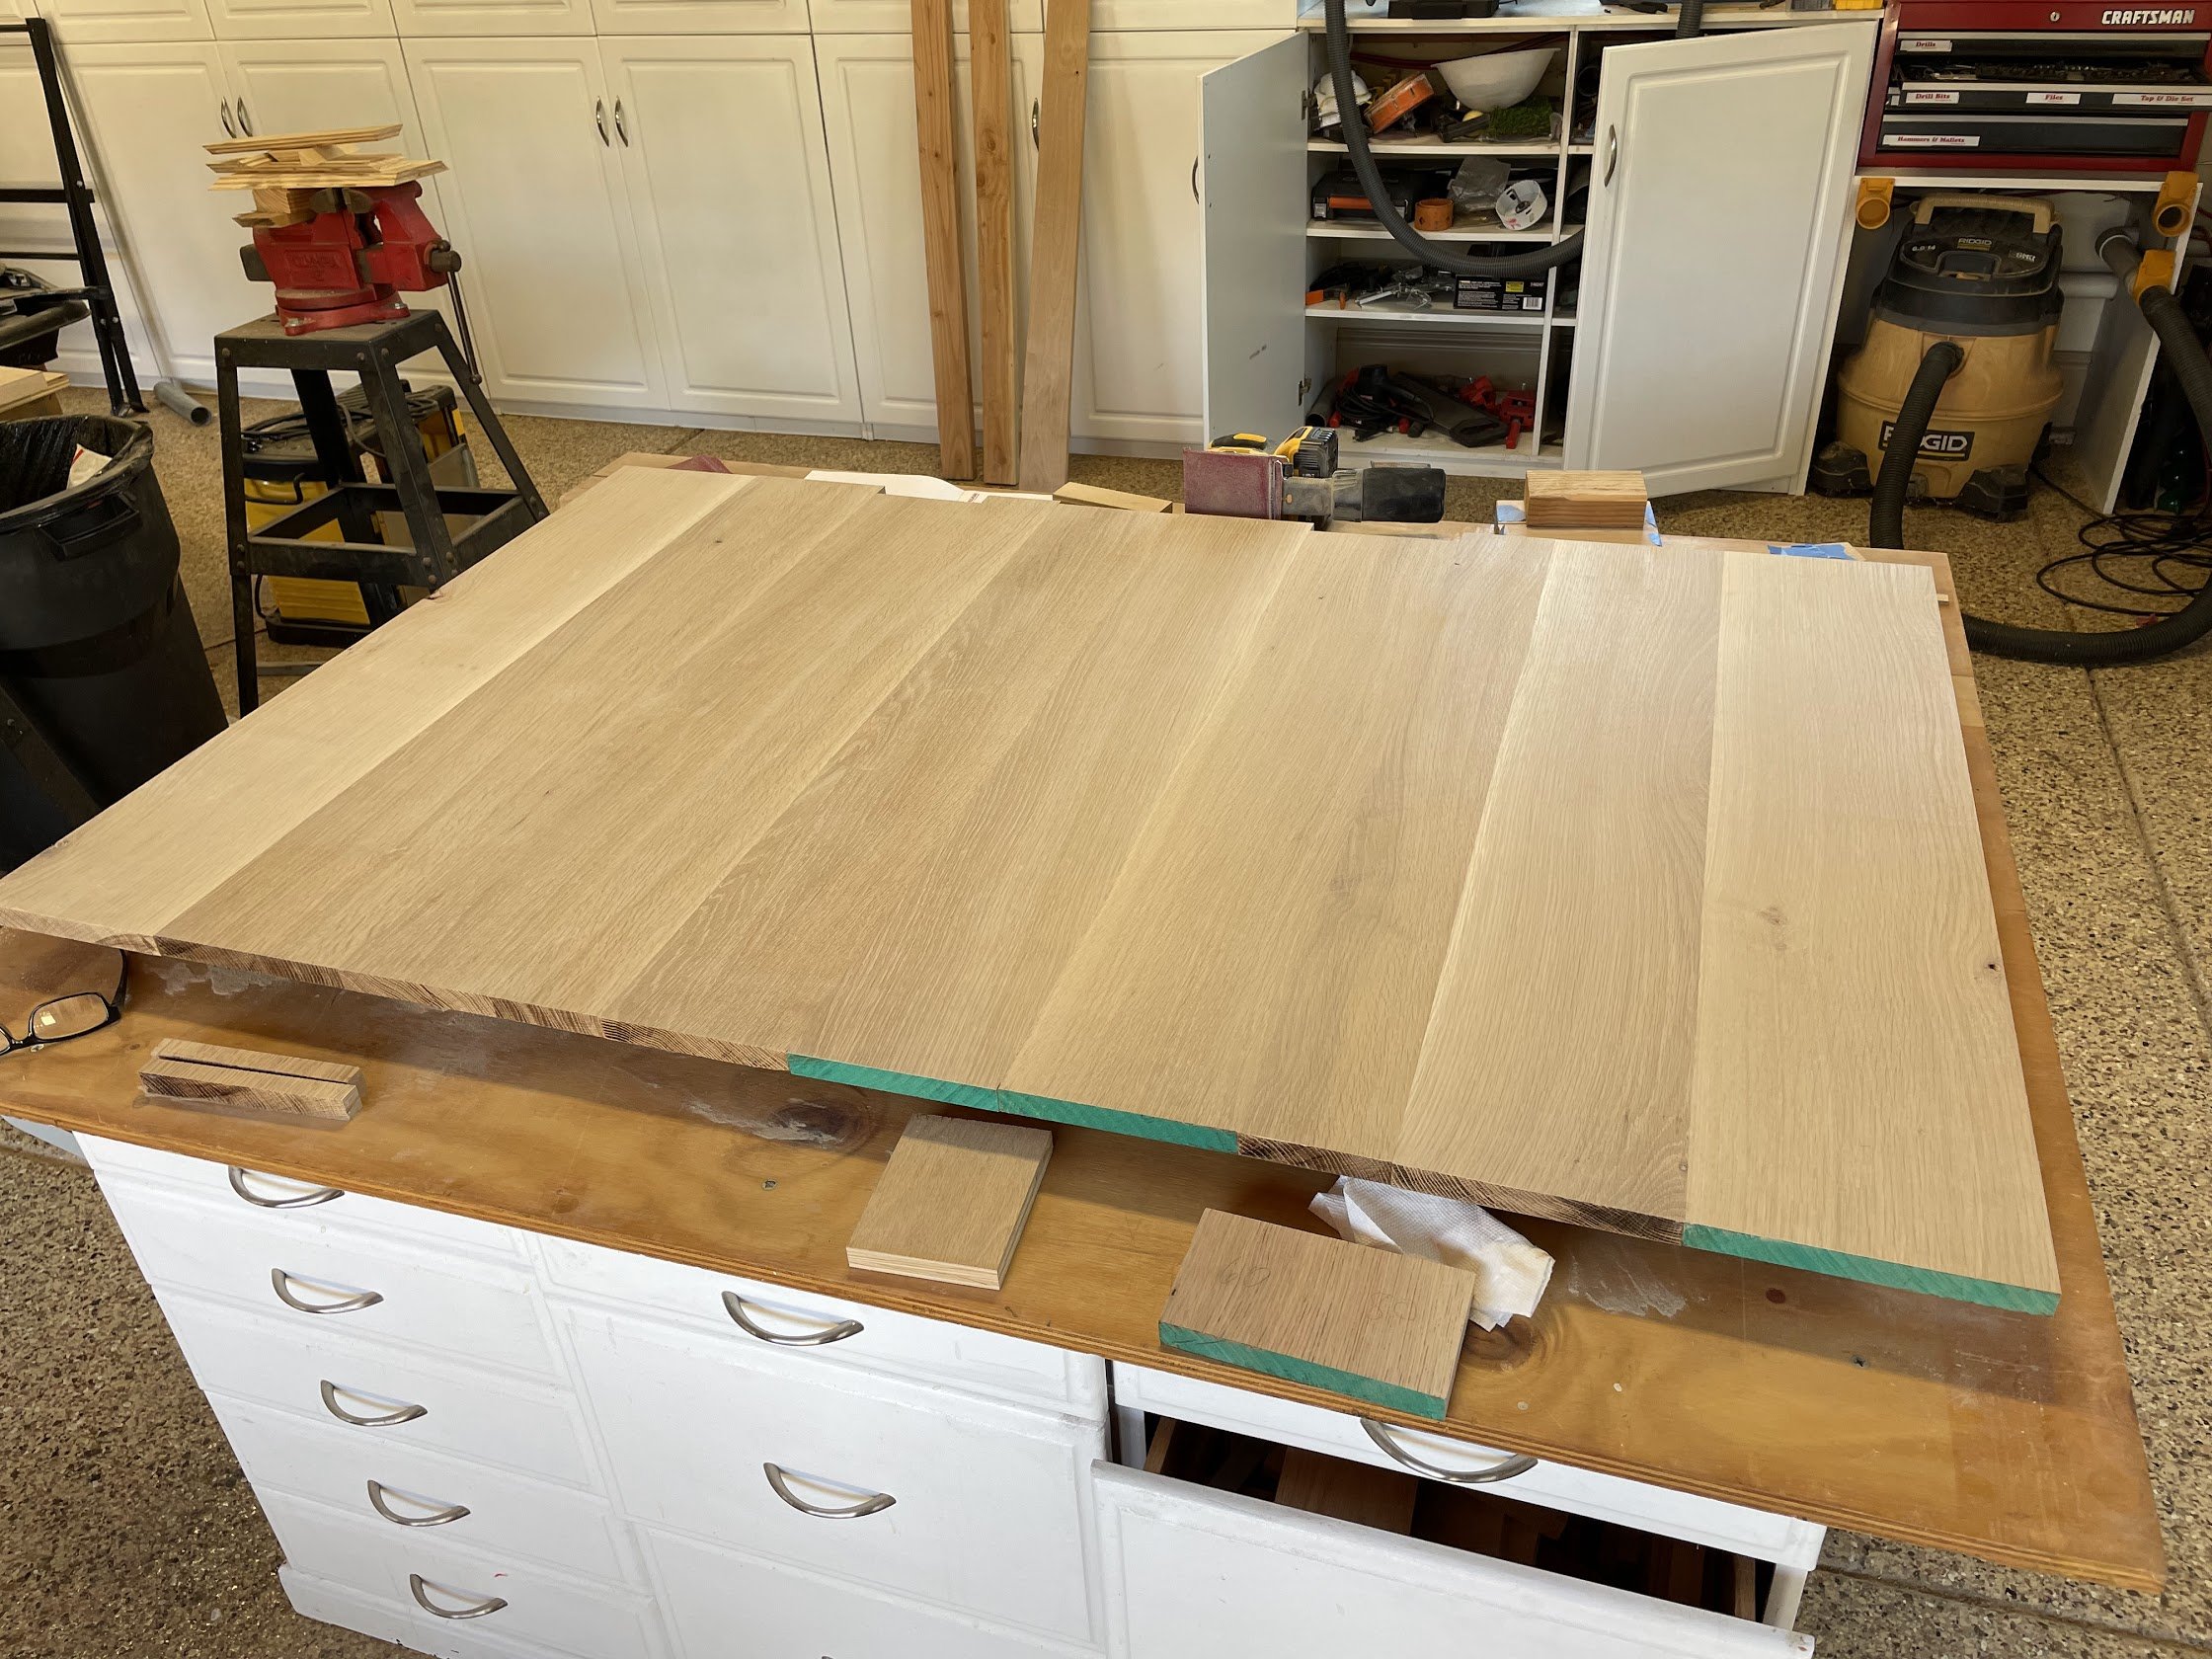
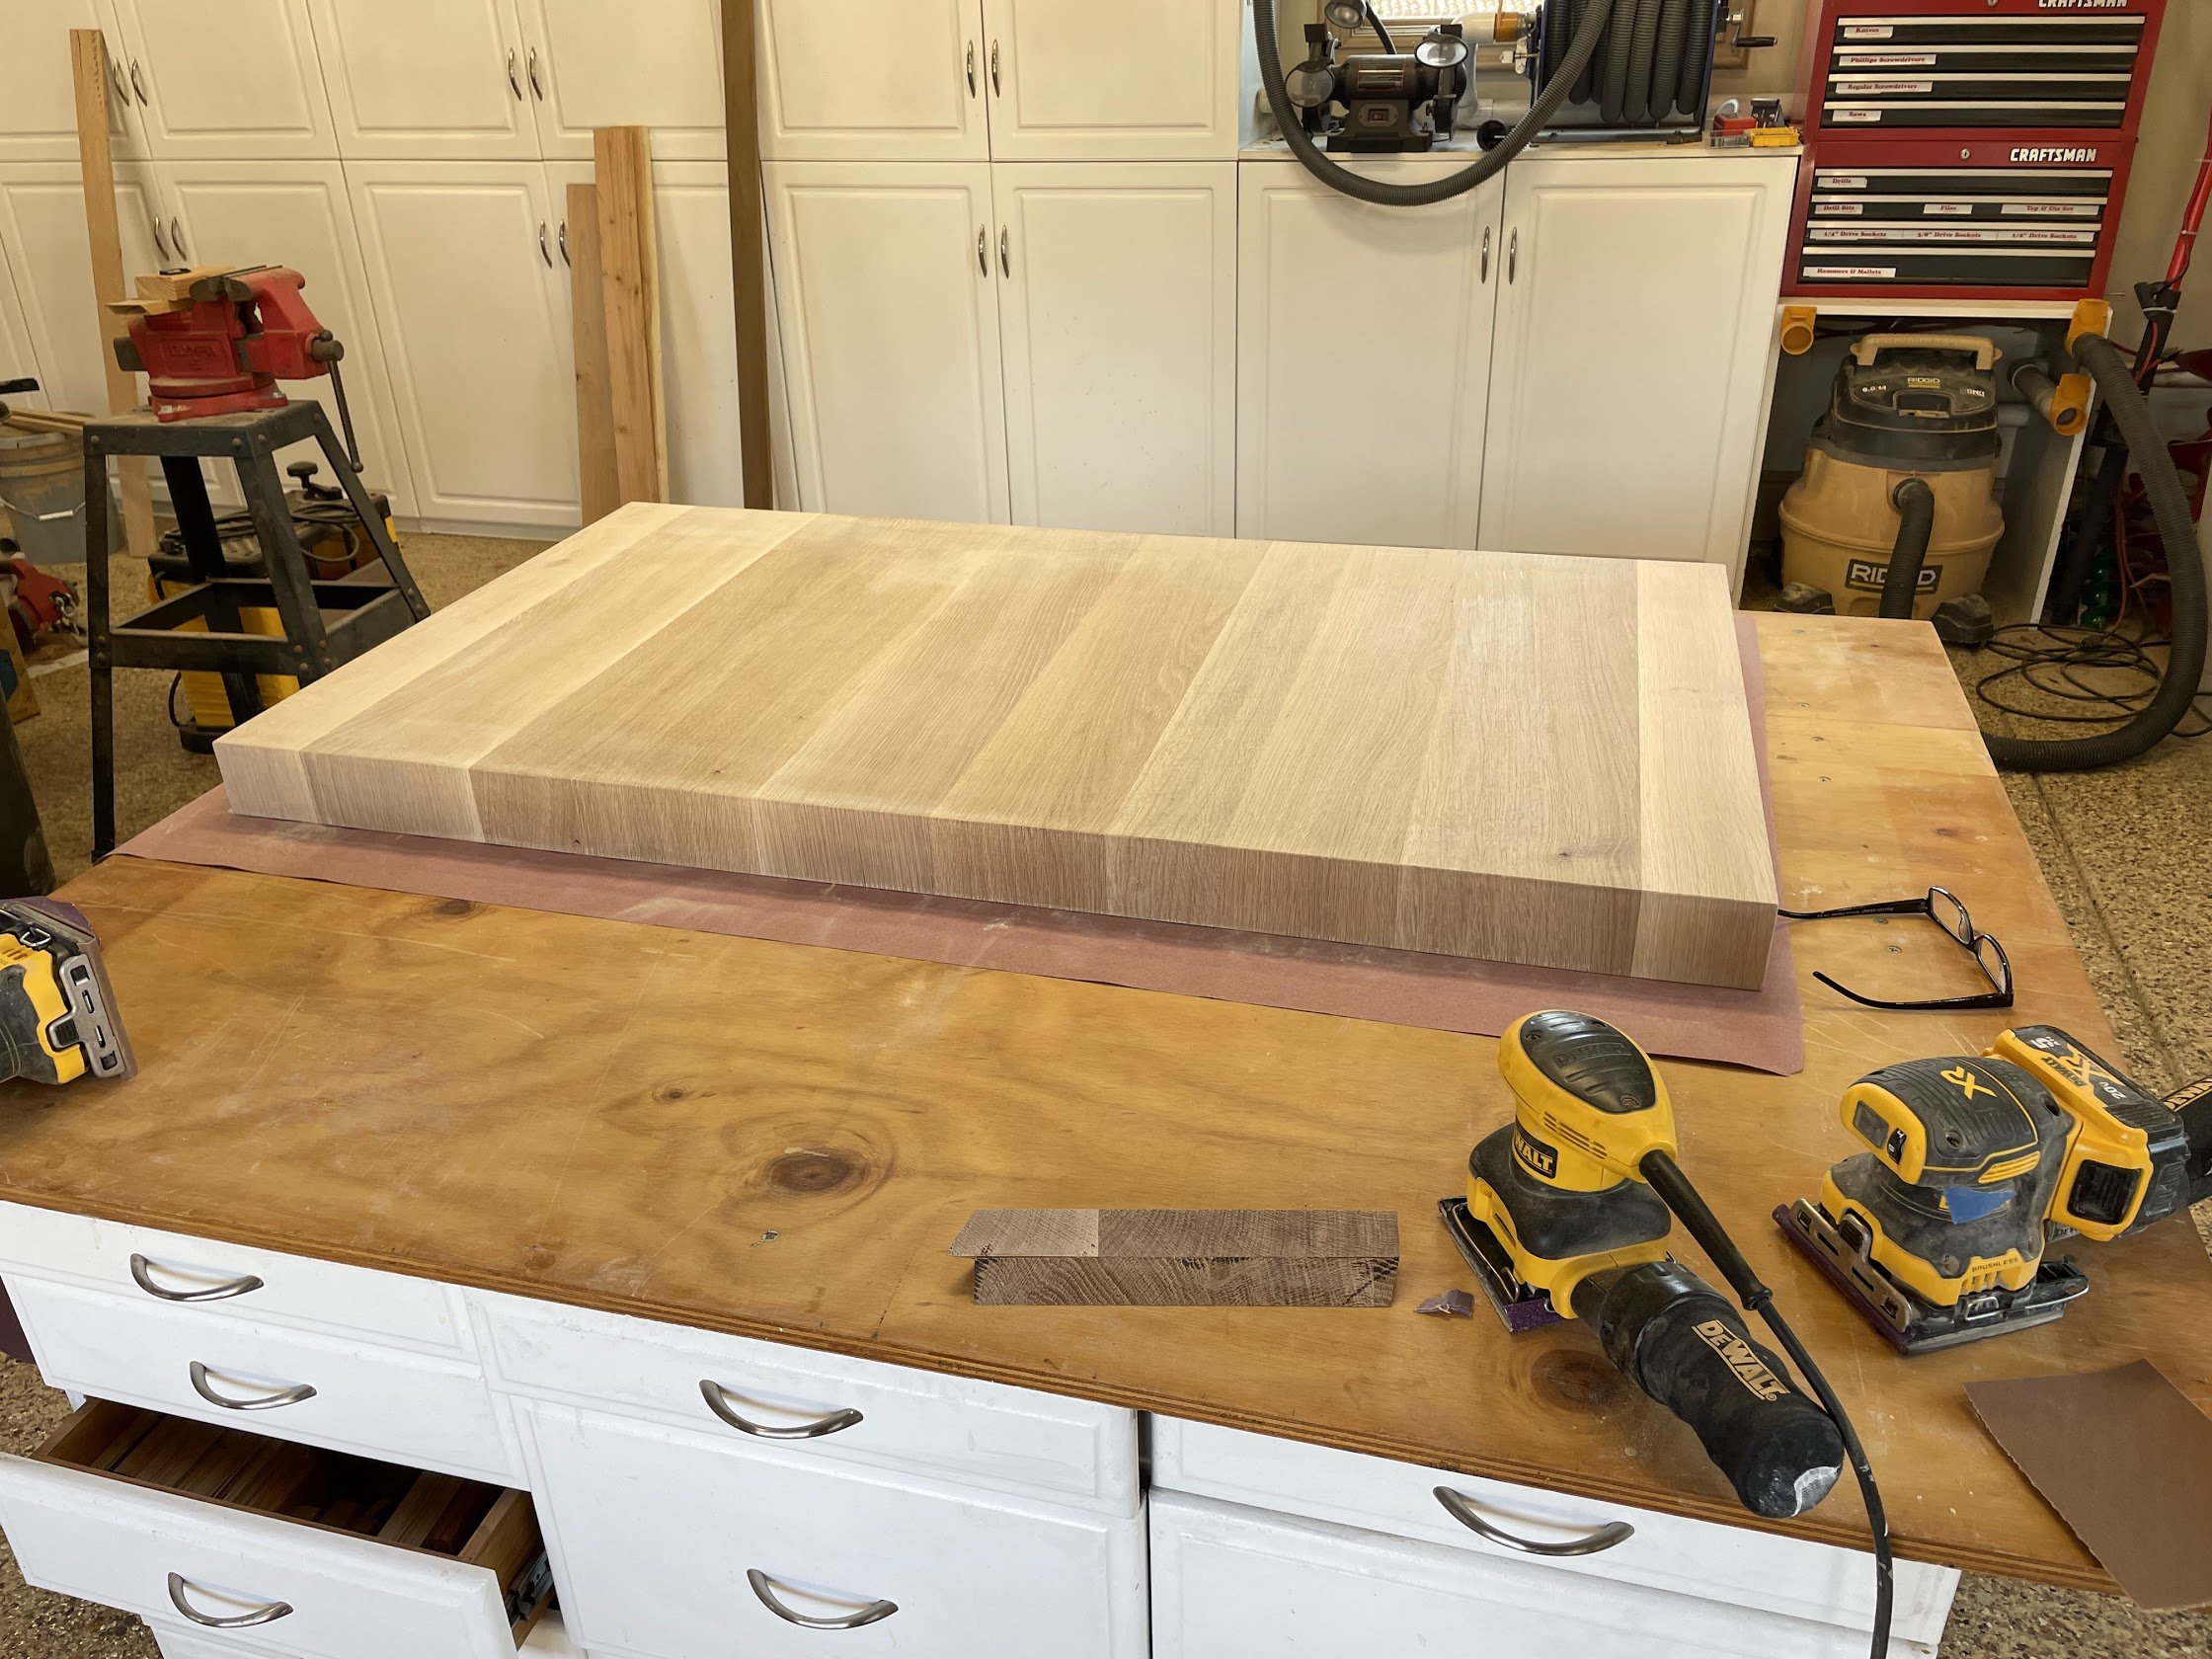
With the wood purchased, we cut boards to about 40 inches in length (our table width of 30” plus 3” for each side plus some wiggle room), cleaned up the edges, and started to lay out the top of the table. We tried to get the pattern the way we wanted and narrowed a few of the boards so we’d have some variation in widths and a total width of about 62 inches (54” for the length of the table, plus 3” for each side and some wiggle room).


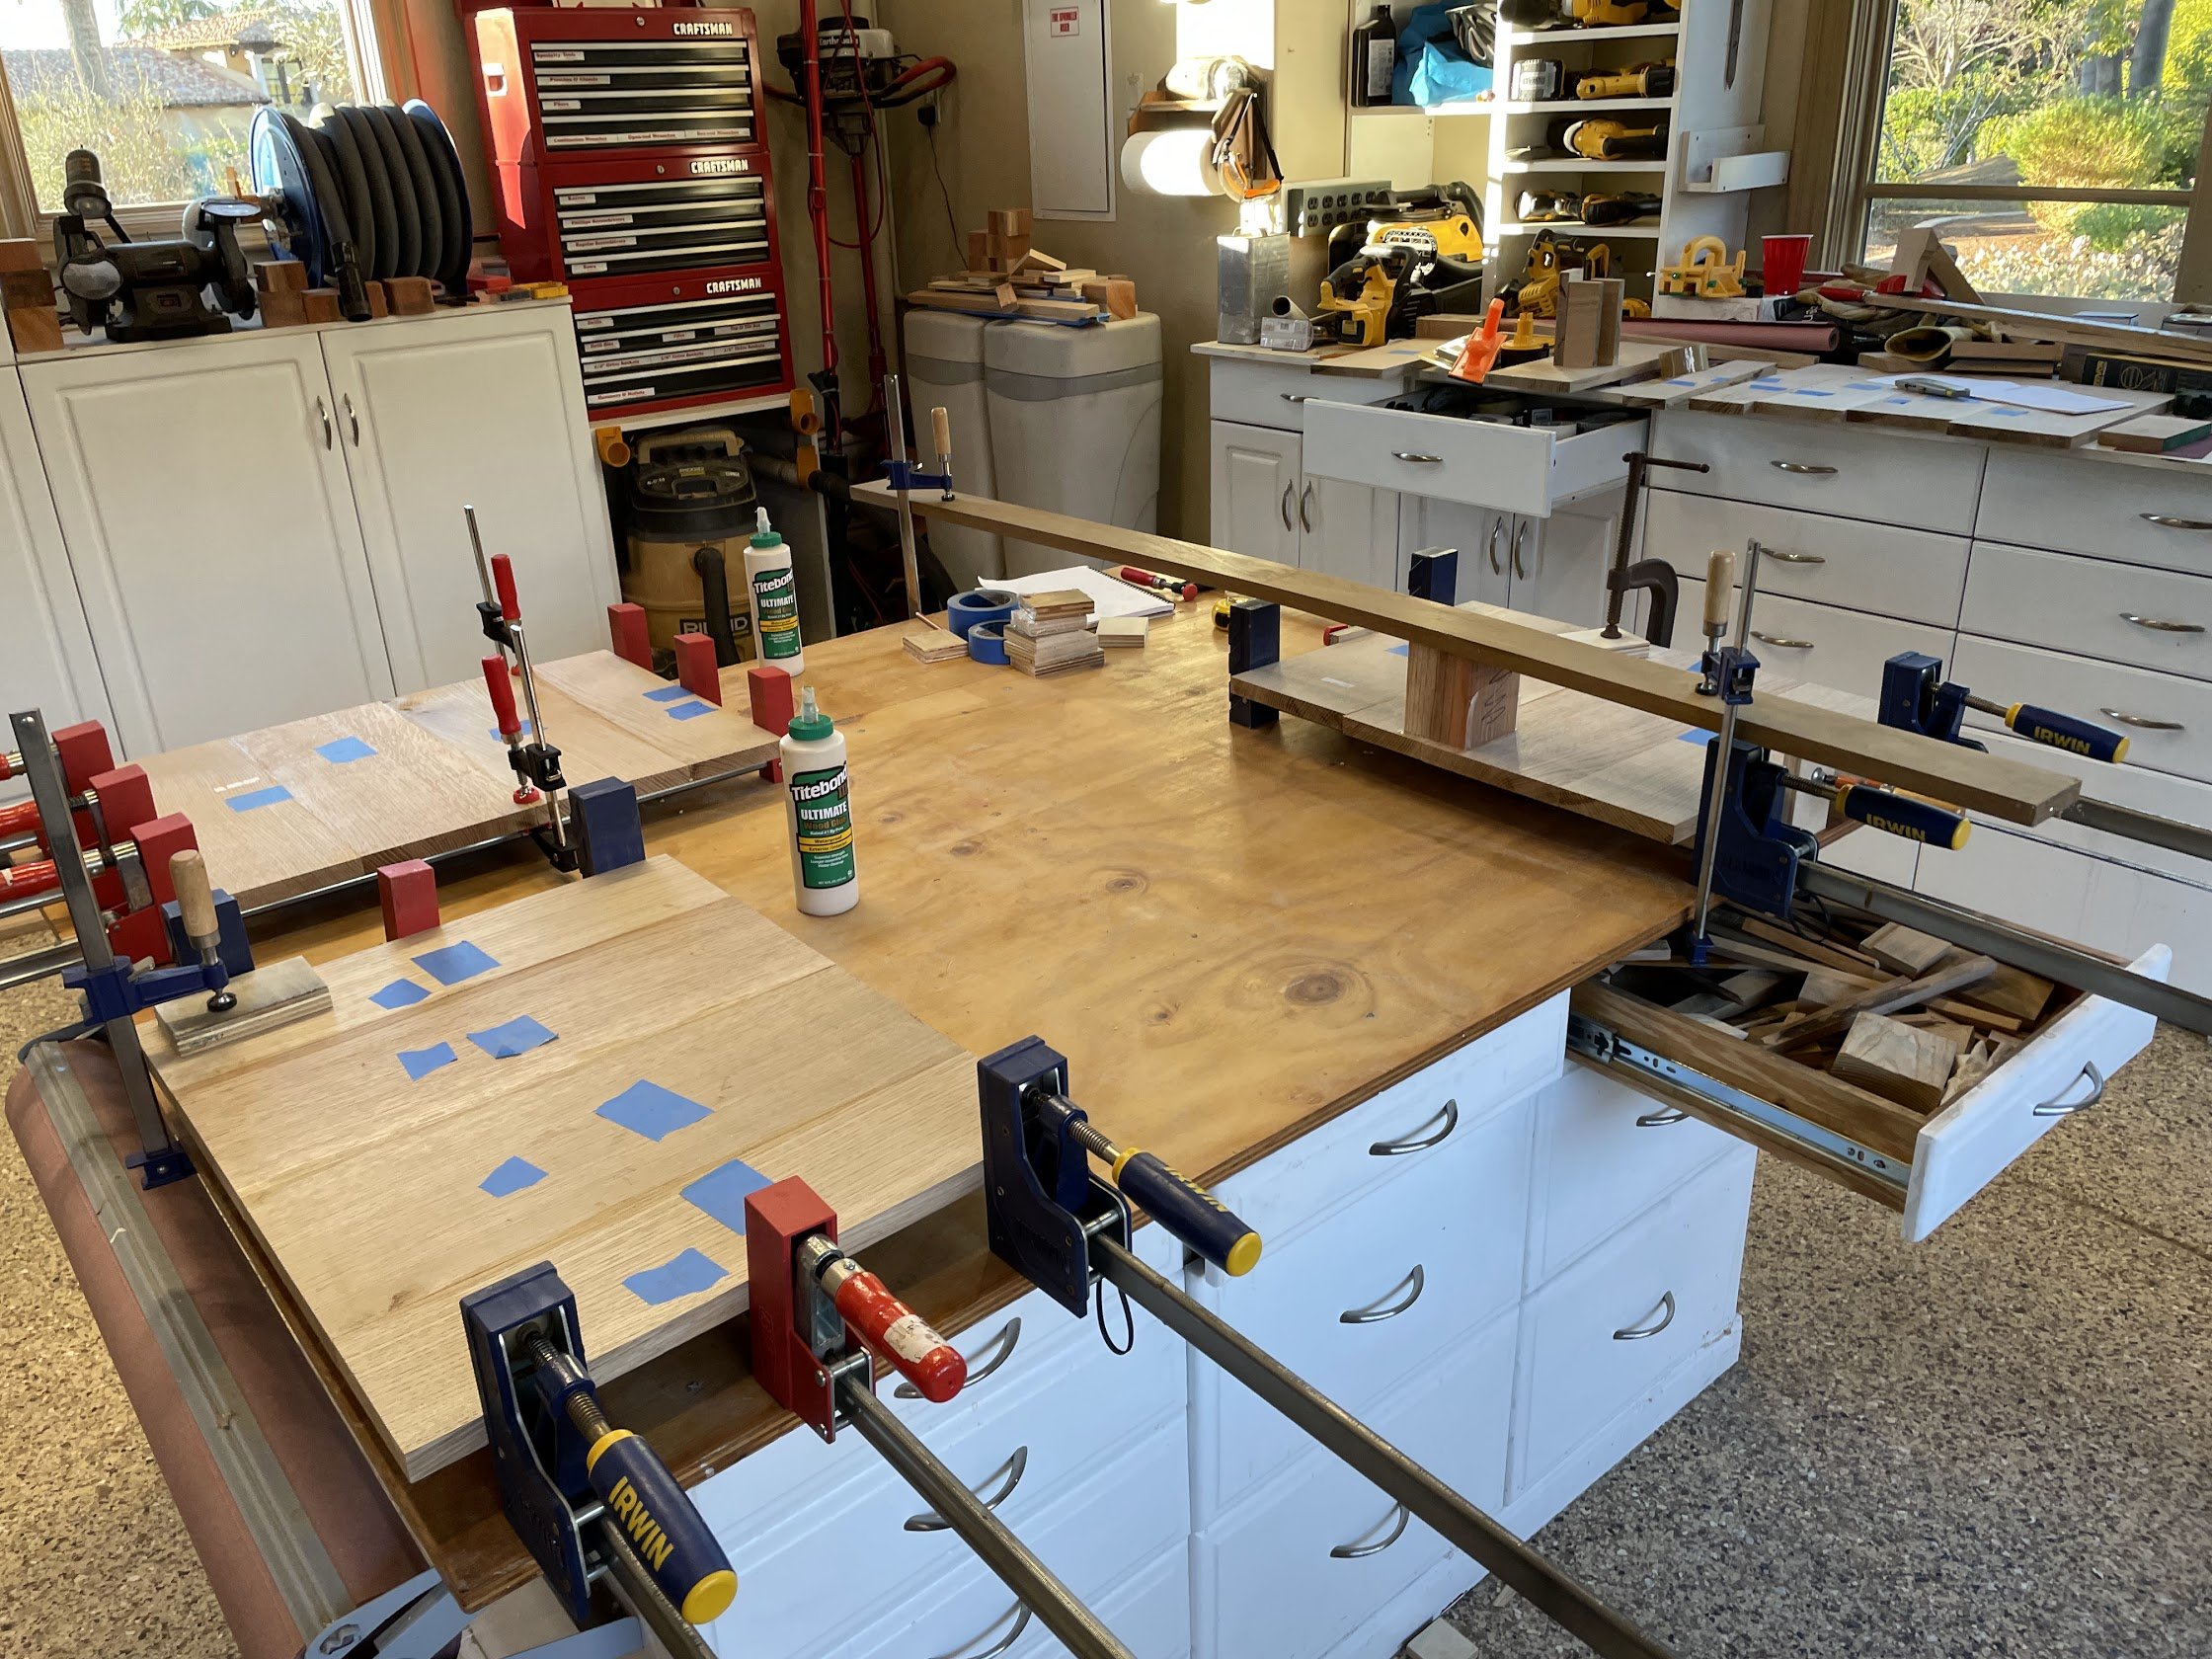
We then glued up our table top one half at a time (to fit our clamps and make the whole thing a little more manageable). Once those dried, we glued the two halves together.
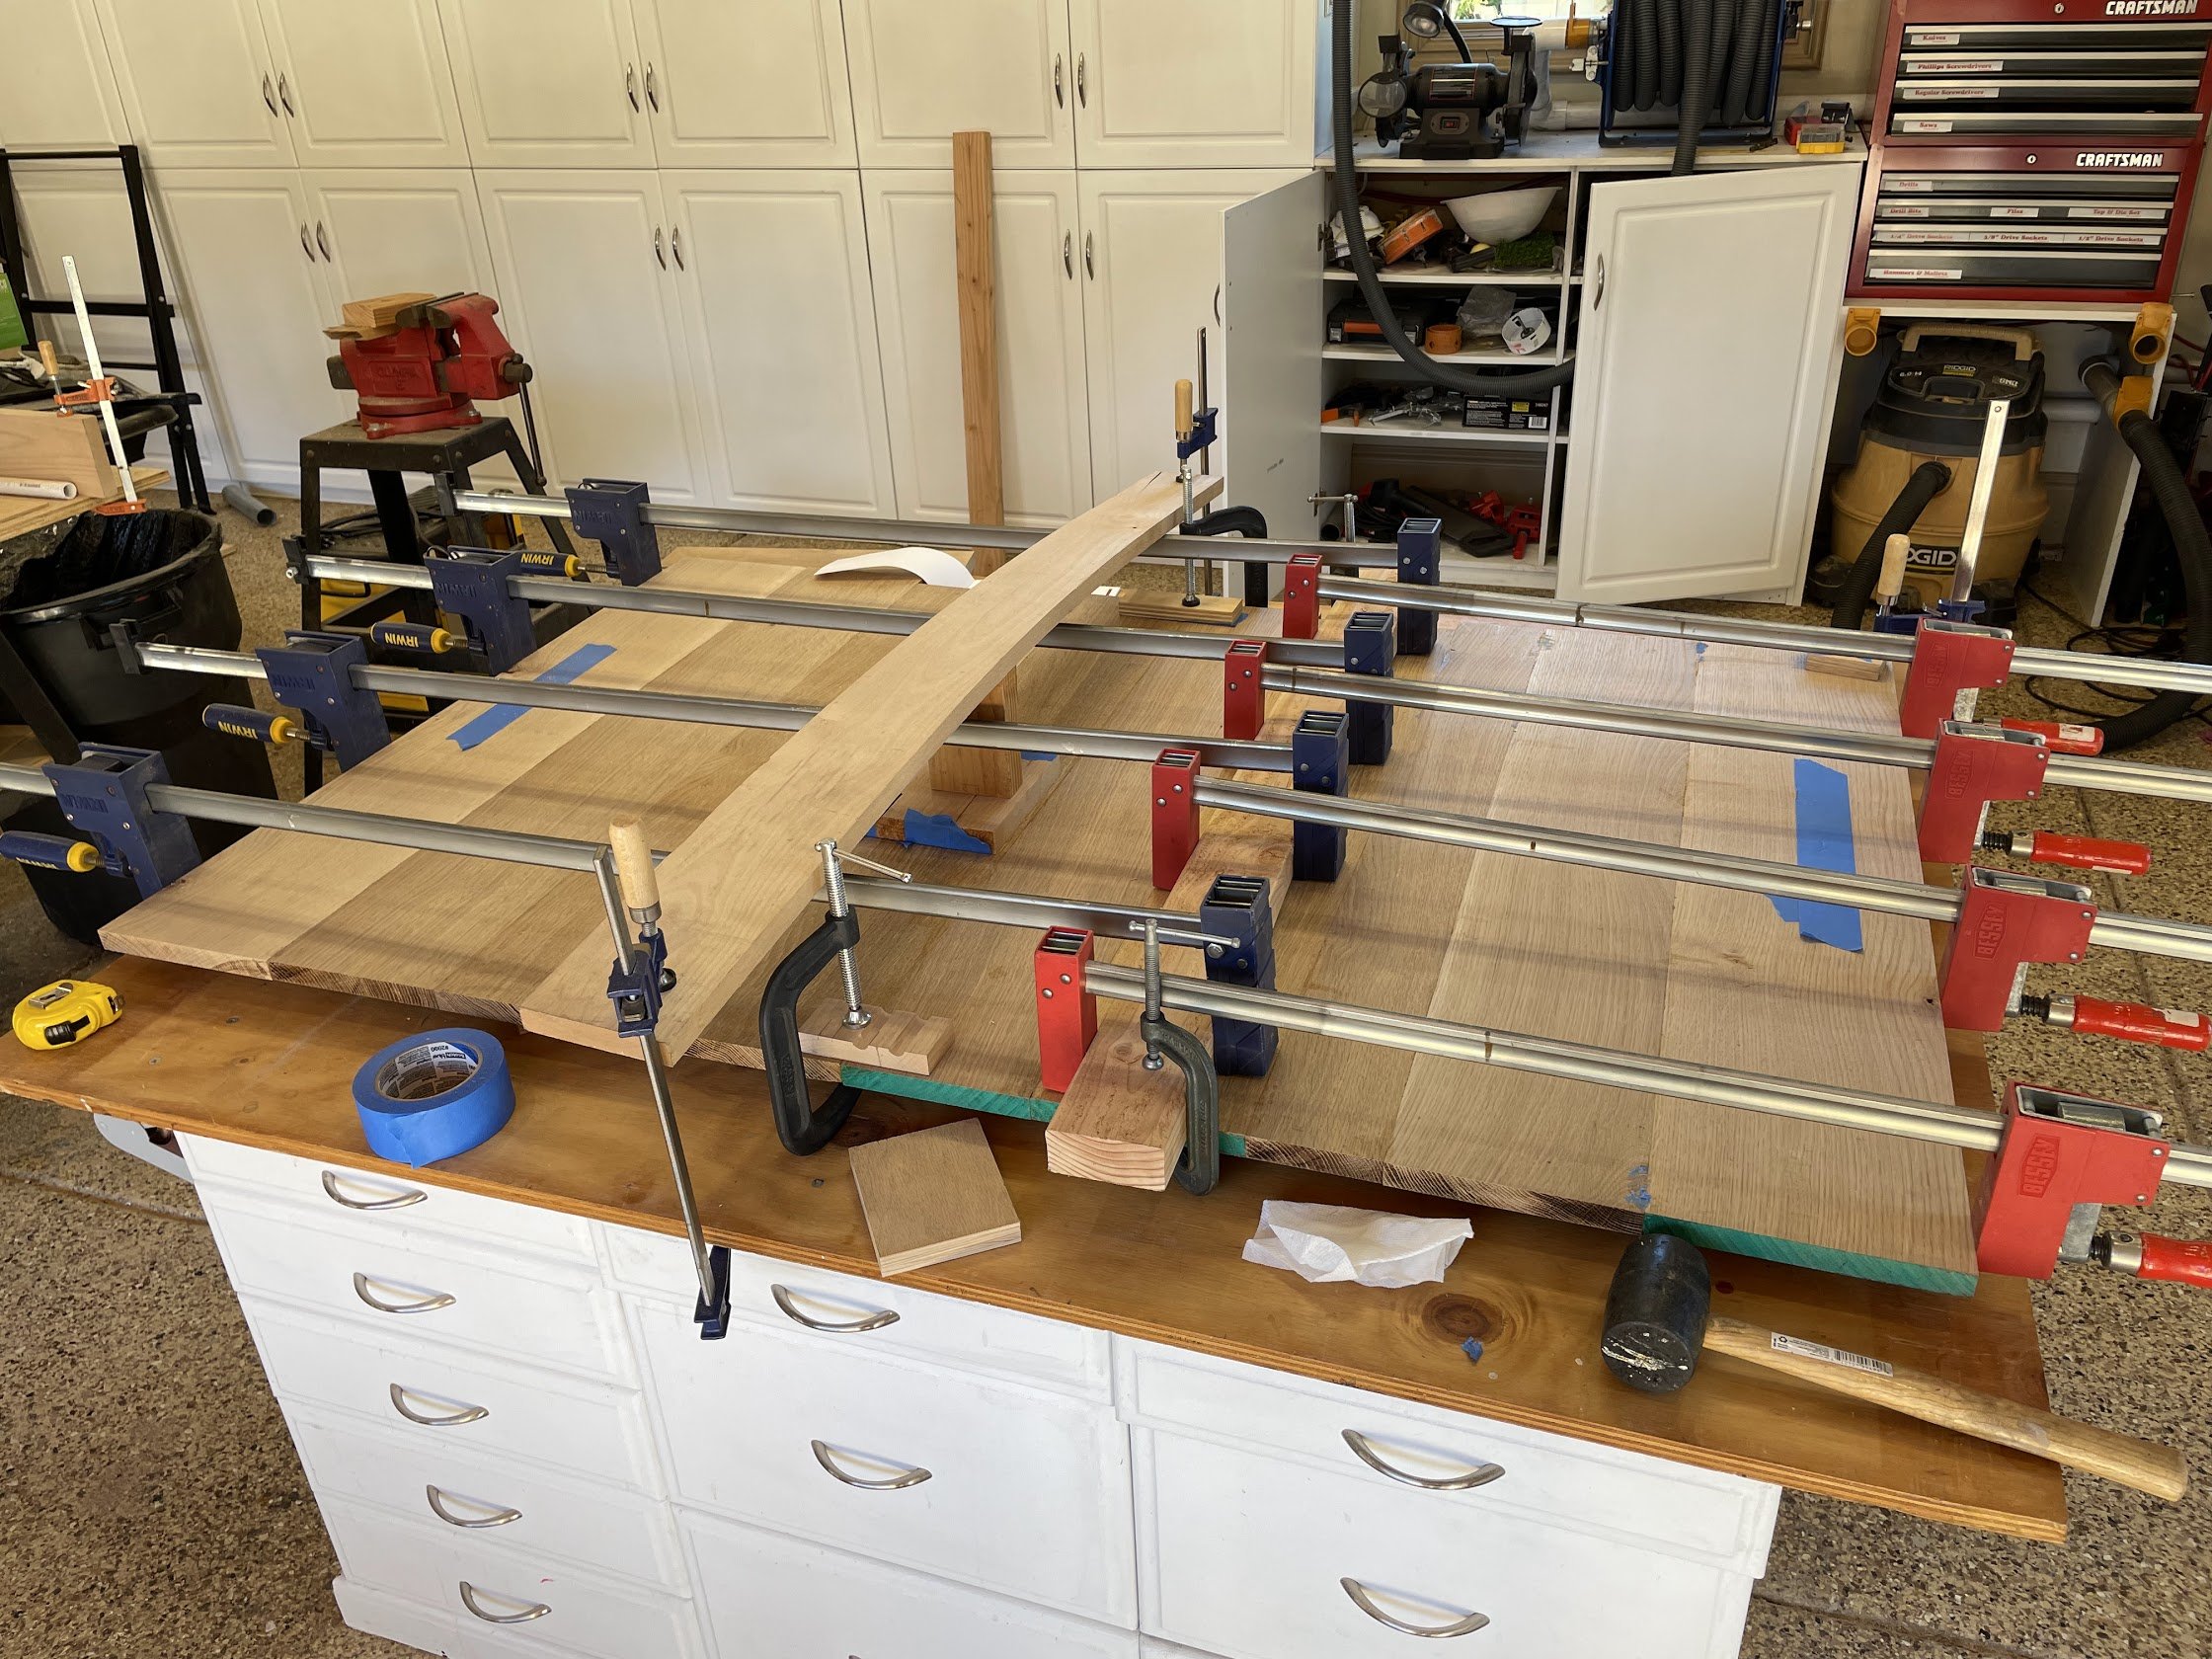
At this point, we had all of our material for the table top in one flat piece. So we needed to cut the sides off of each end and then re-attach them at a 90 degree angle. We took the circular saw and cut 4 inches off of each side at a 45 degree angle. This left the top in the correct size and with each edge at the 45-degree angle we wanted. But each side piece that had been cut off was now at the opposite angle that we needed. So we took each to the table saw, cut the opposite 45 and then cleaned up the flat side of the piece to an even 3 inches. Once the first side was ready, we glued it back onto the top, creating the waterfall edge. This was super challenging to get right, since we needed two 45s to line up perfectly. Hence the record-setting use of 24 clamps.
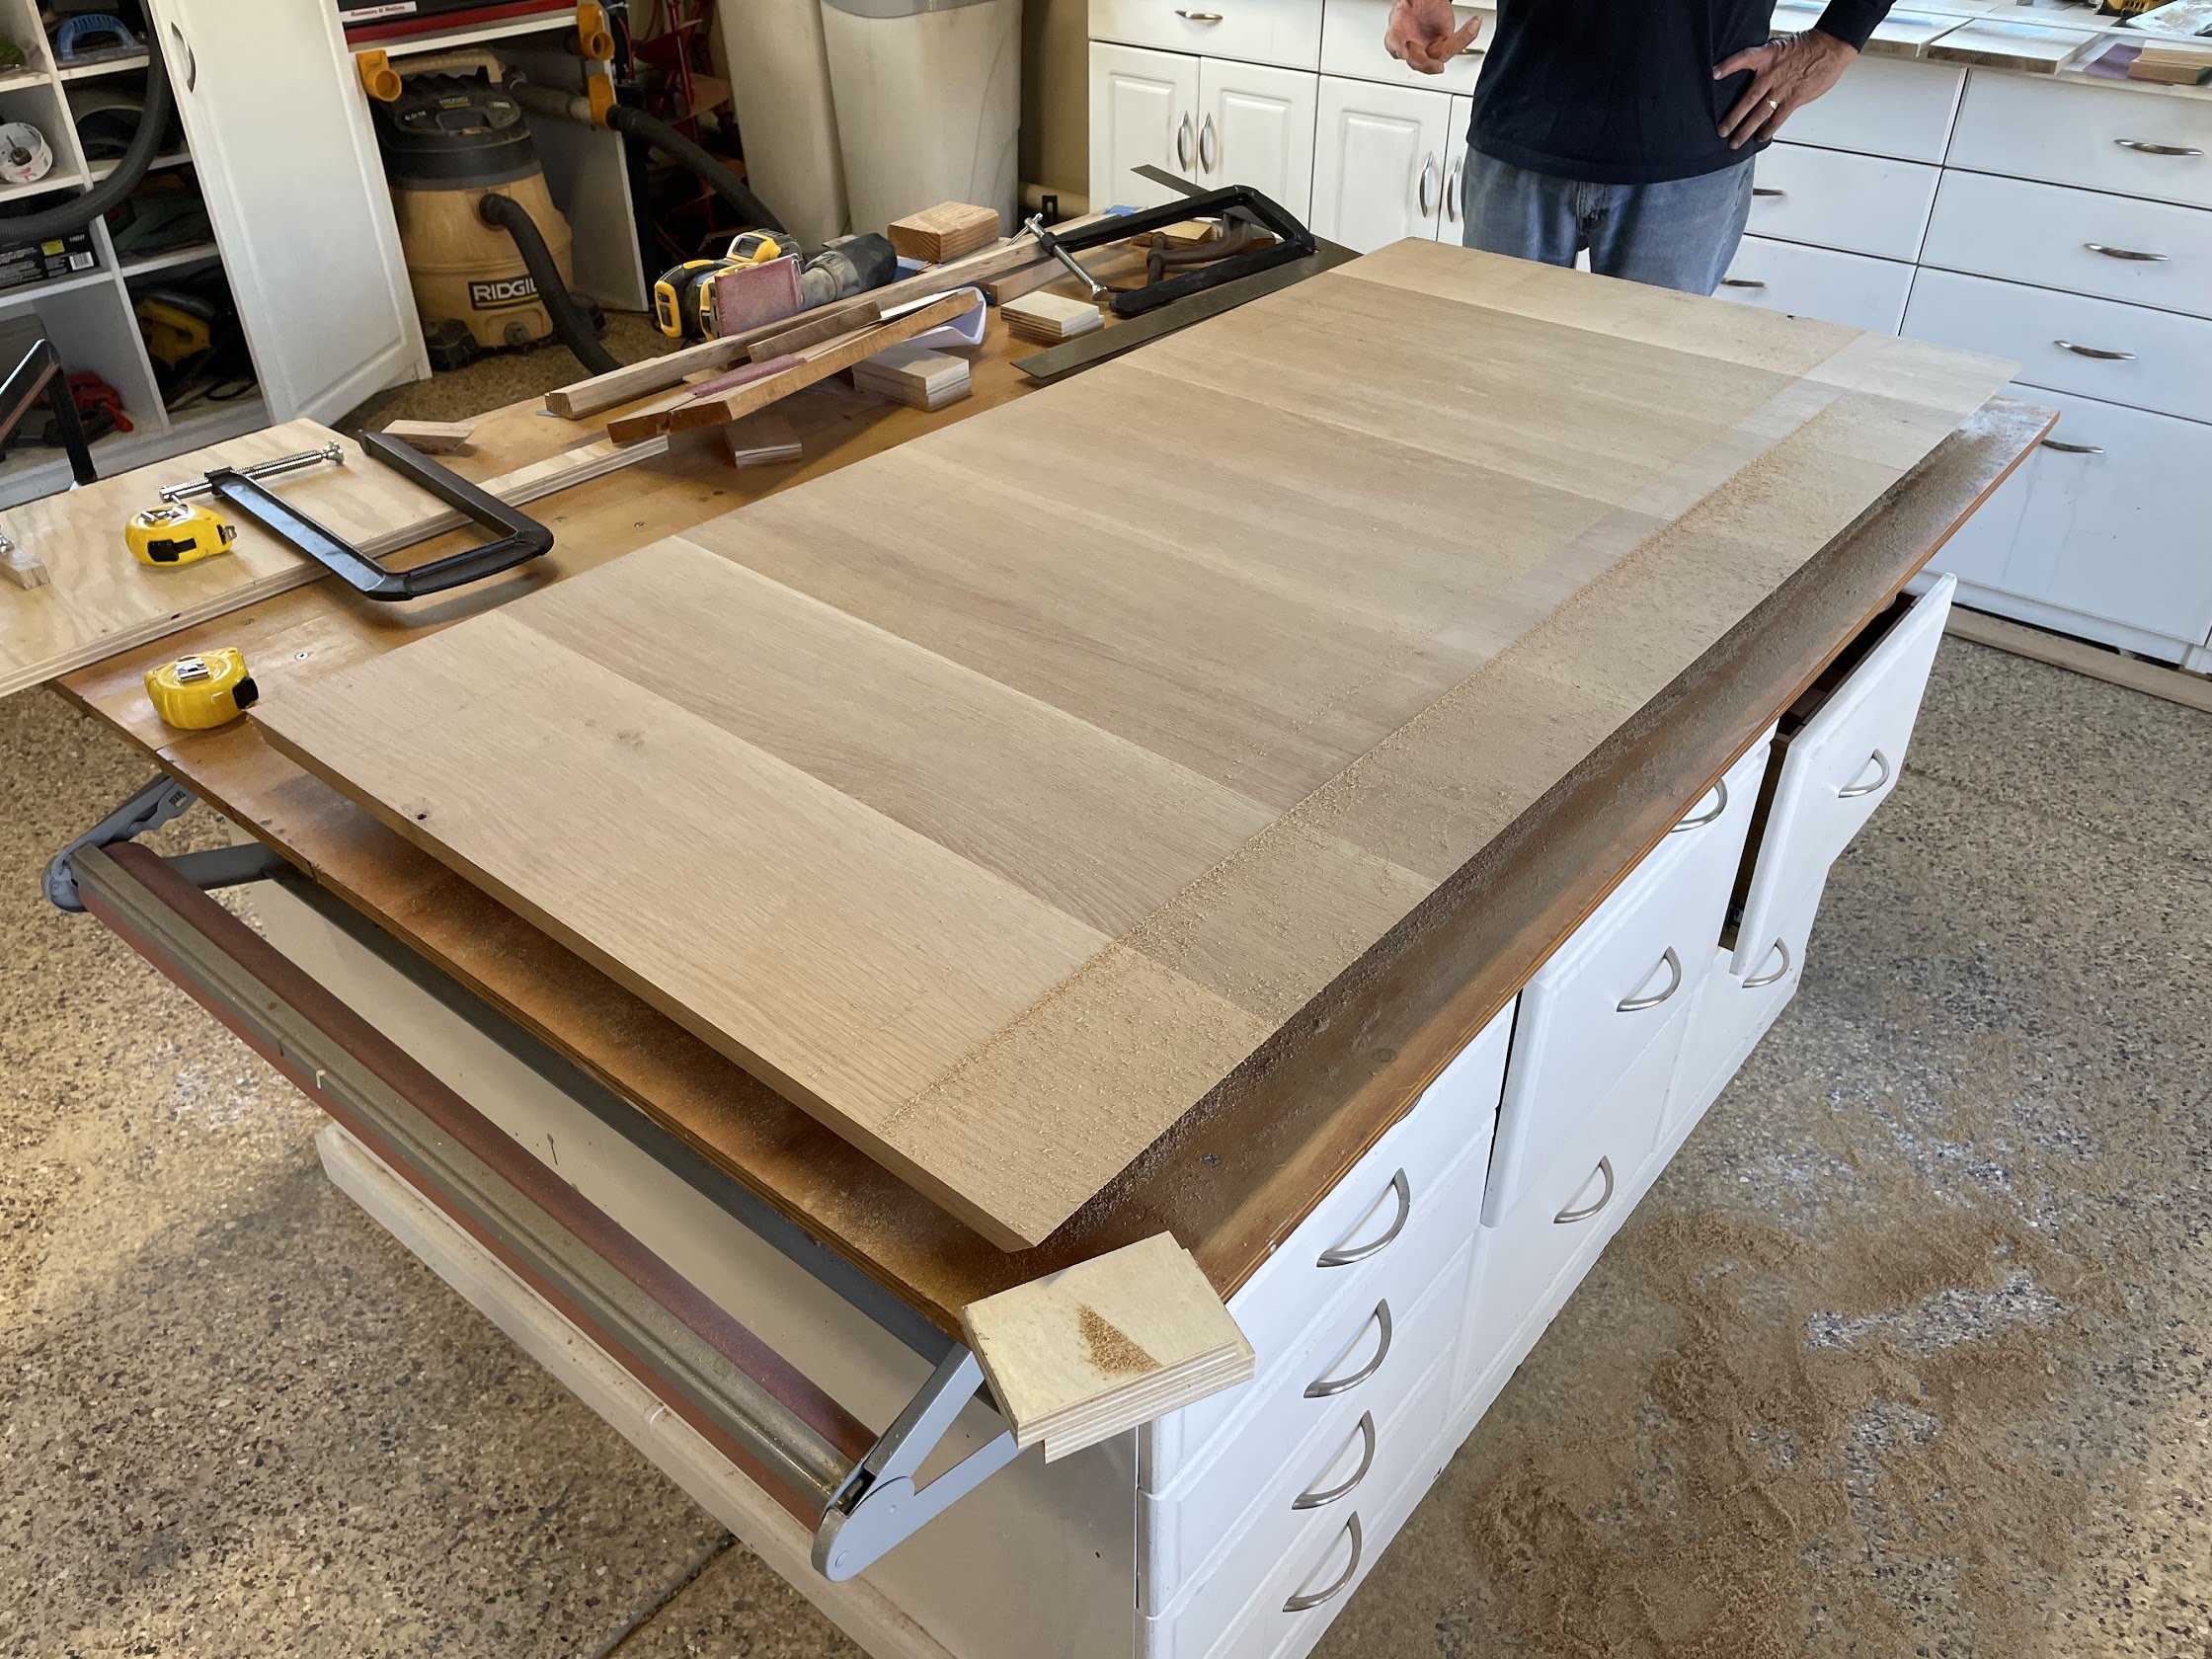
After repeating that same process for the other 3 sides, we had our top roughly complete. The waterfall edges turned out pretty good, but we knew they would need some cleanup work later on. There were a few gaps and mismatches that we concluded were just unavoidable when doing a miter join of that length. Overall we were happy with the way it came out. My dad revealed at this point that he had predicted much worse.
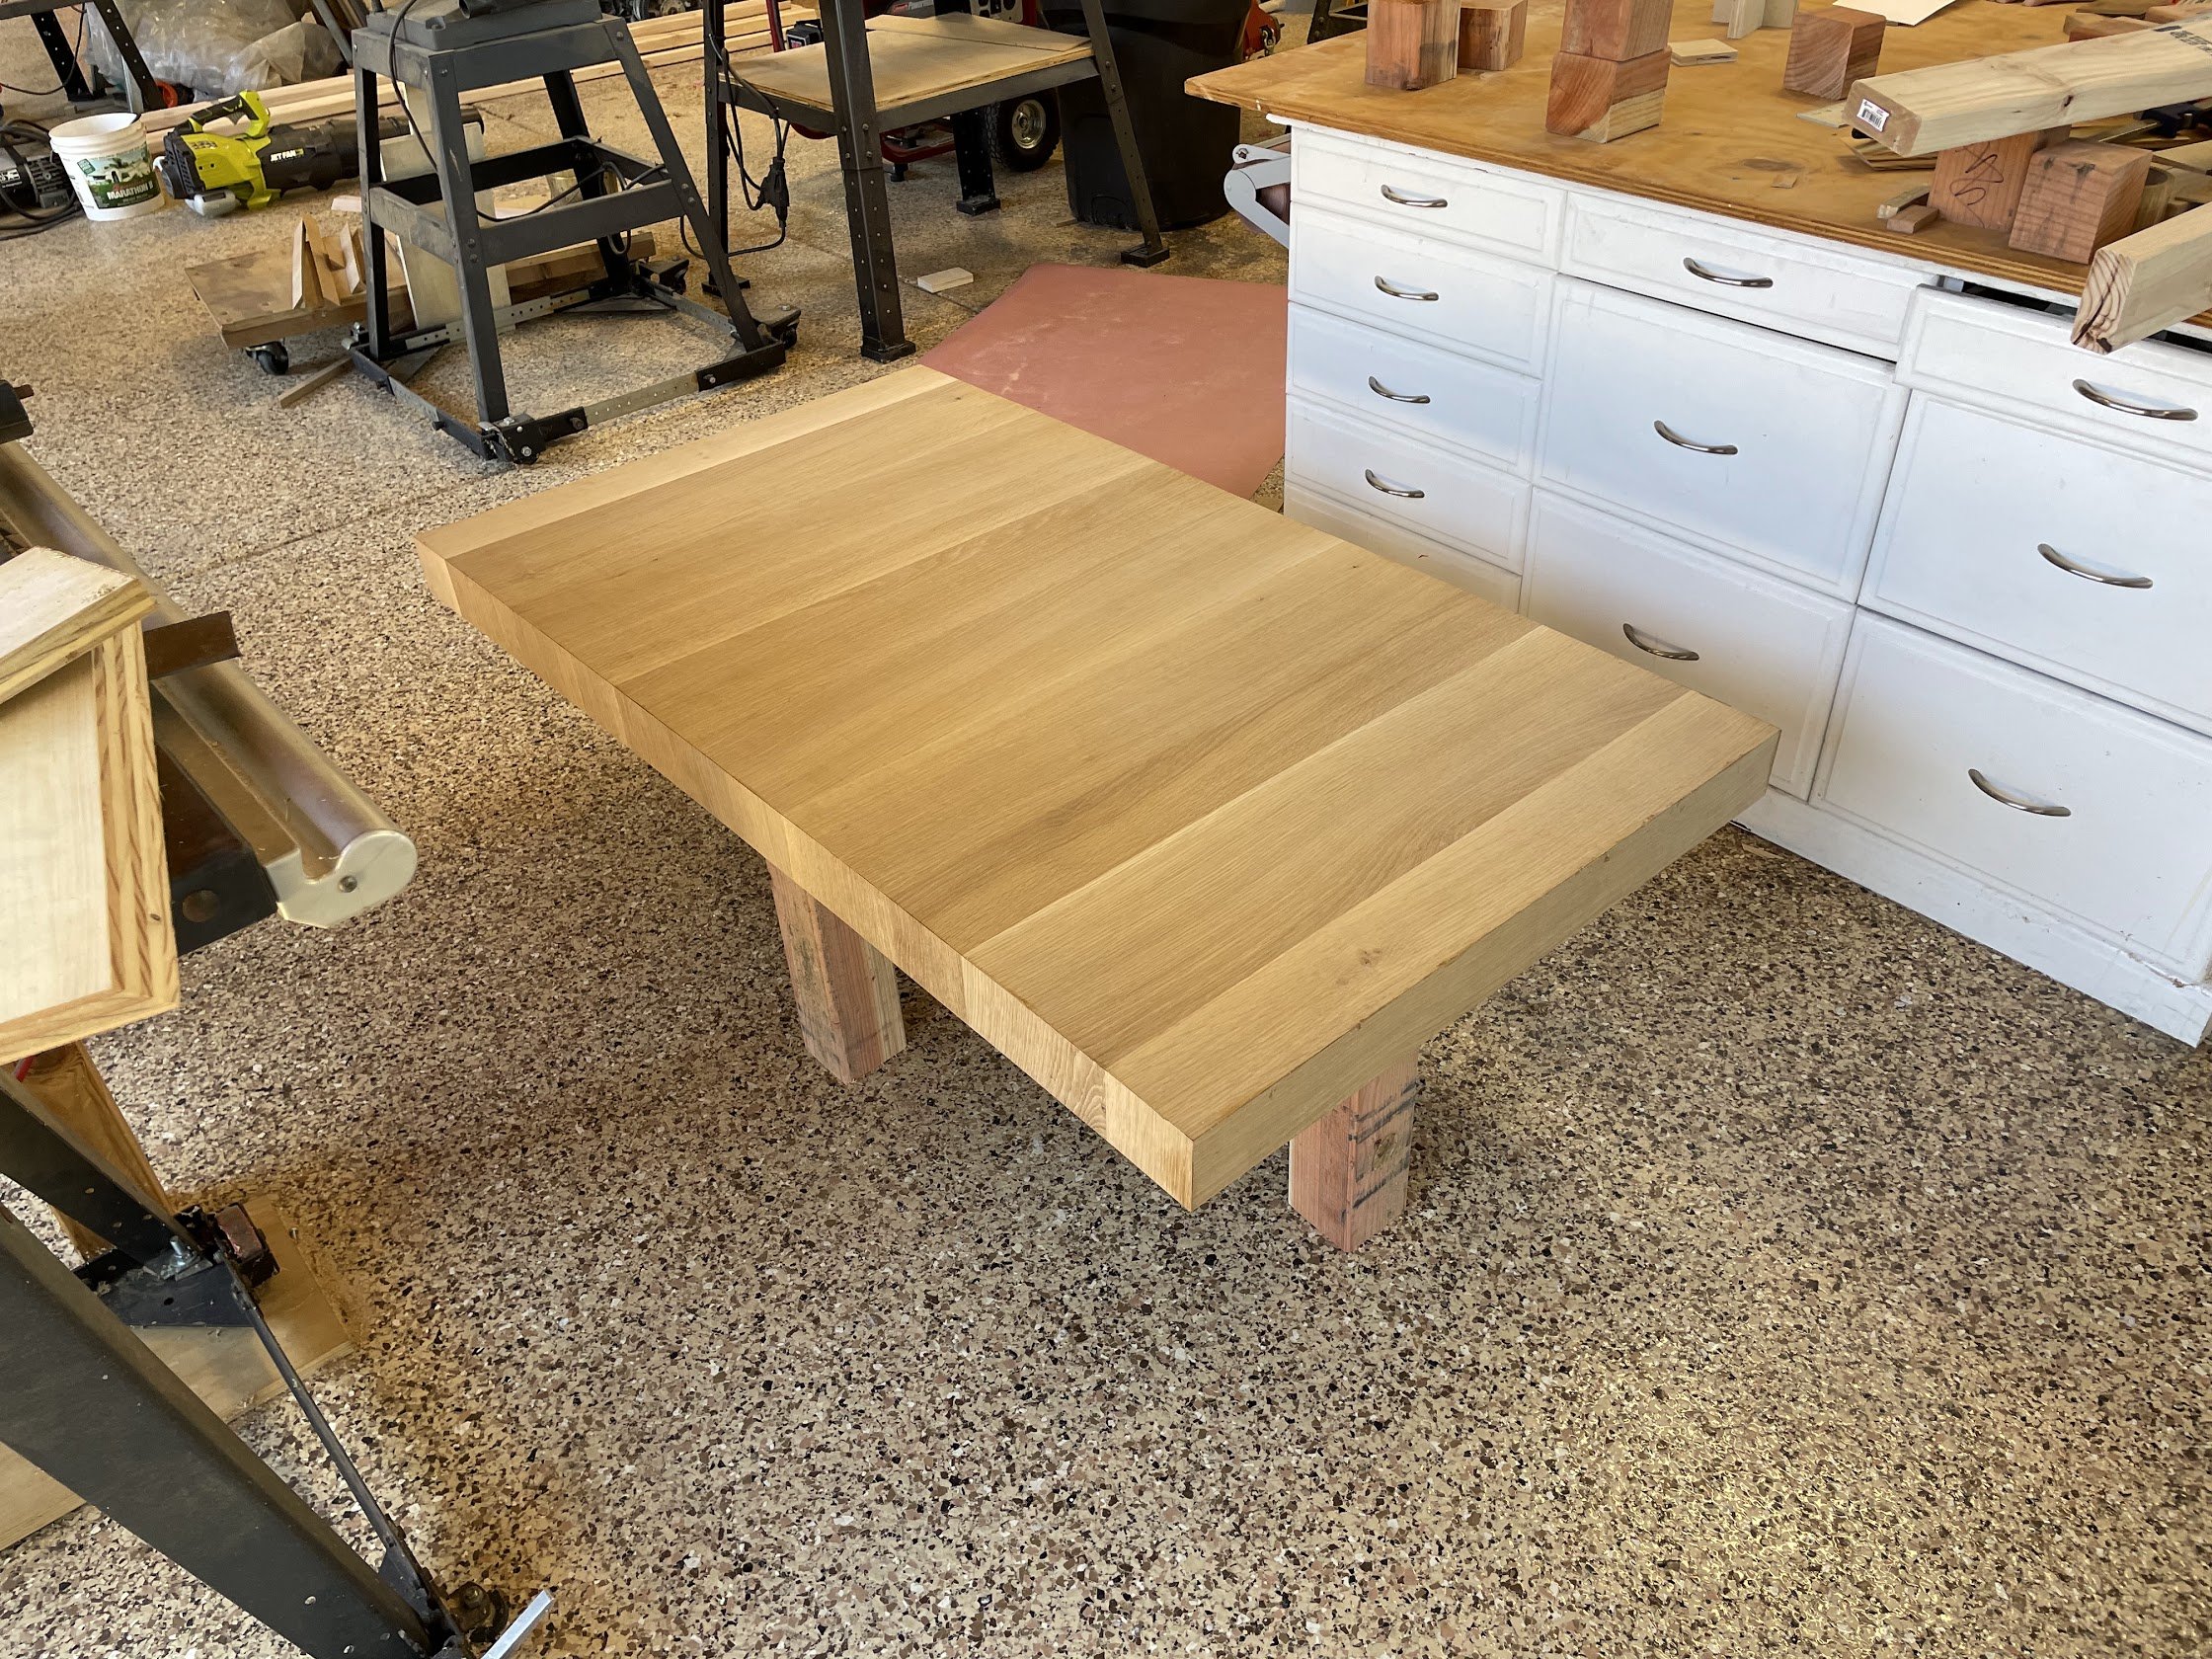
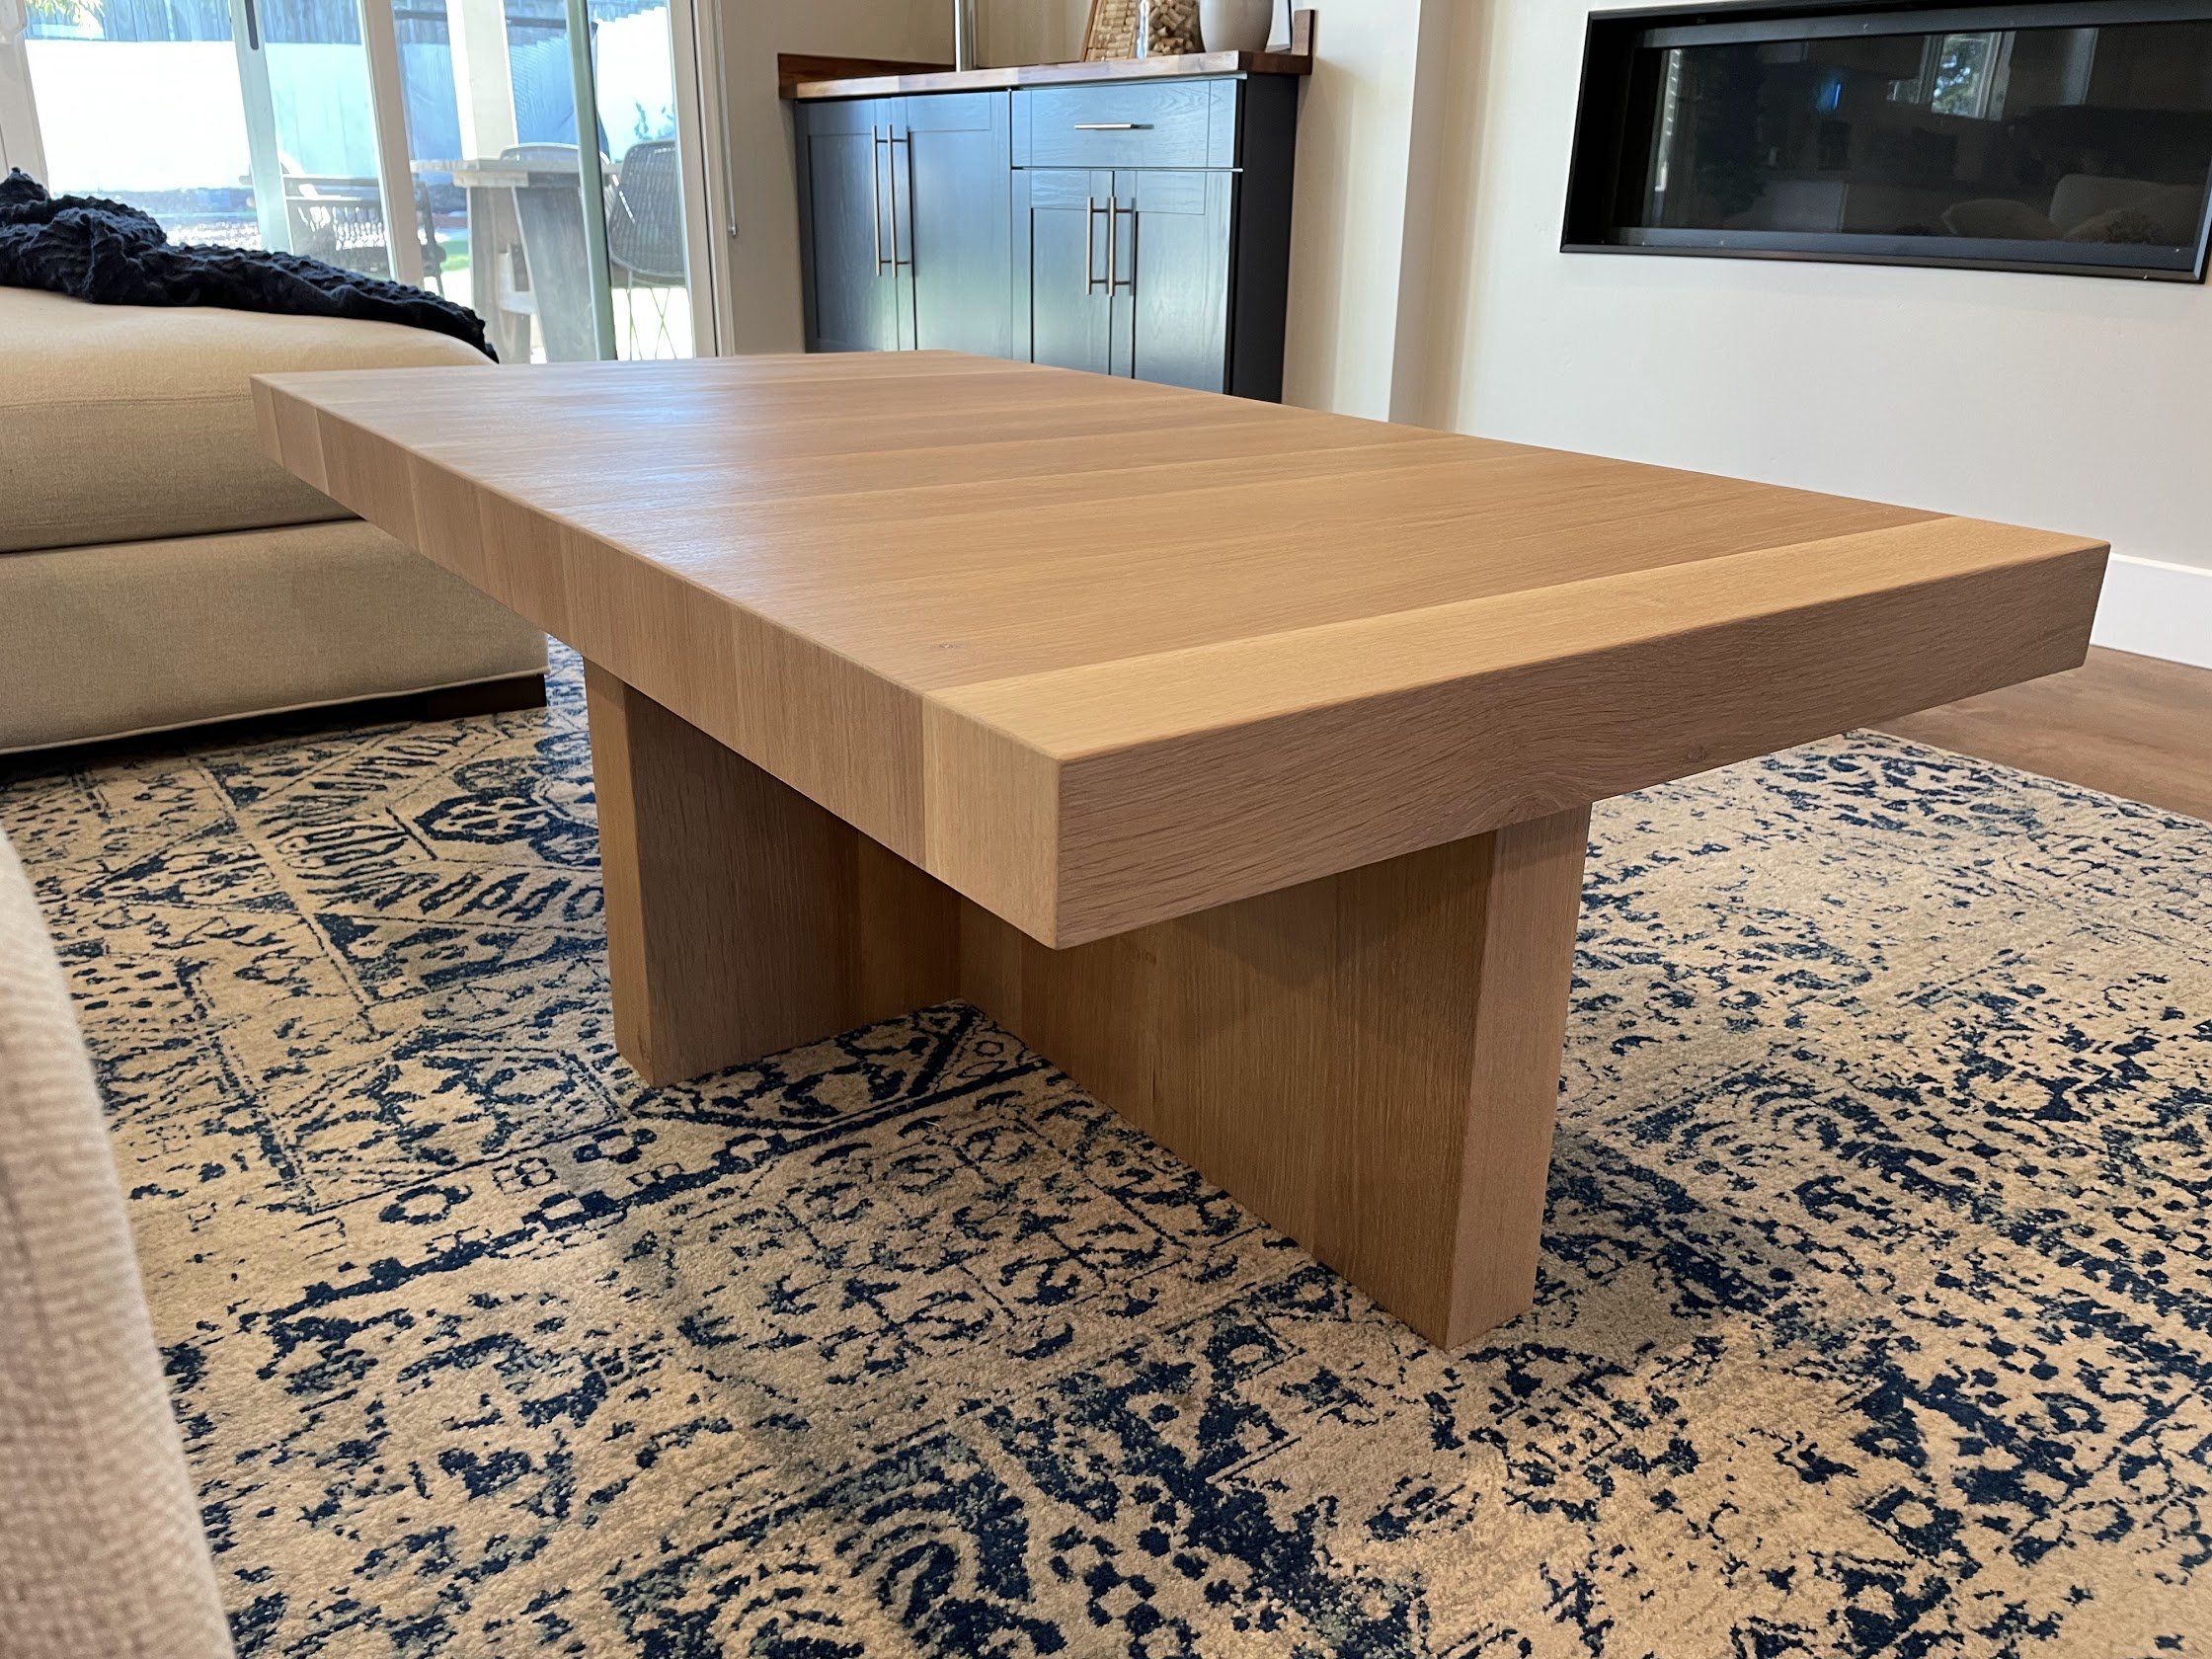
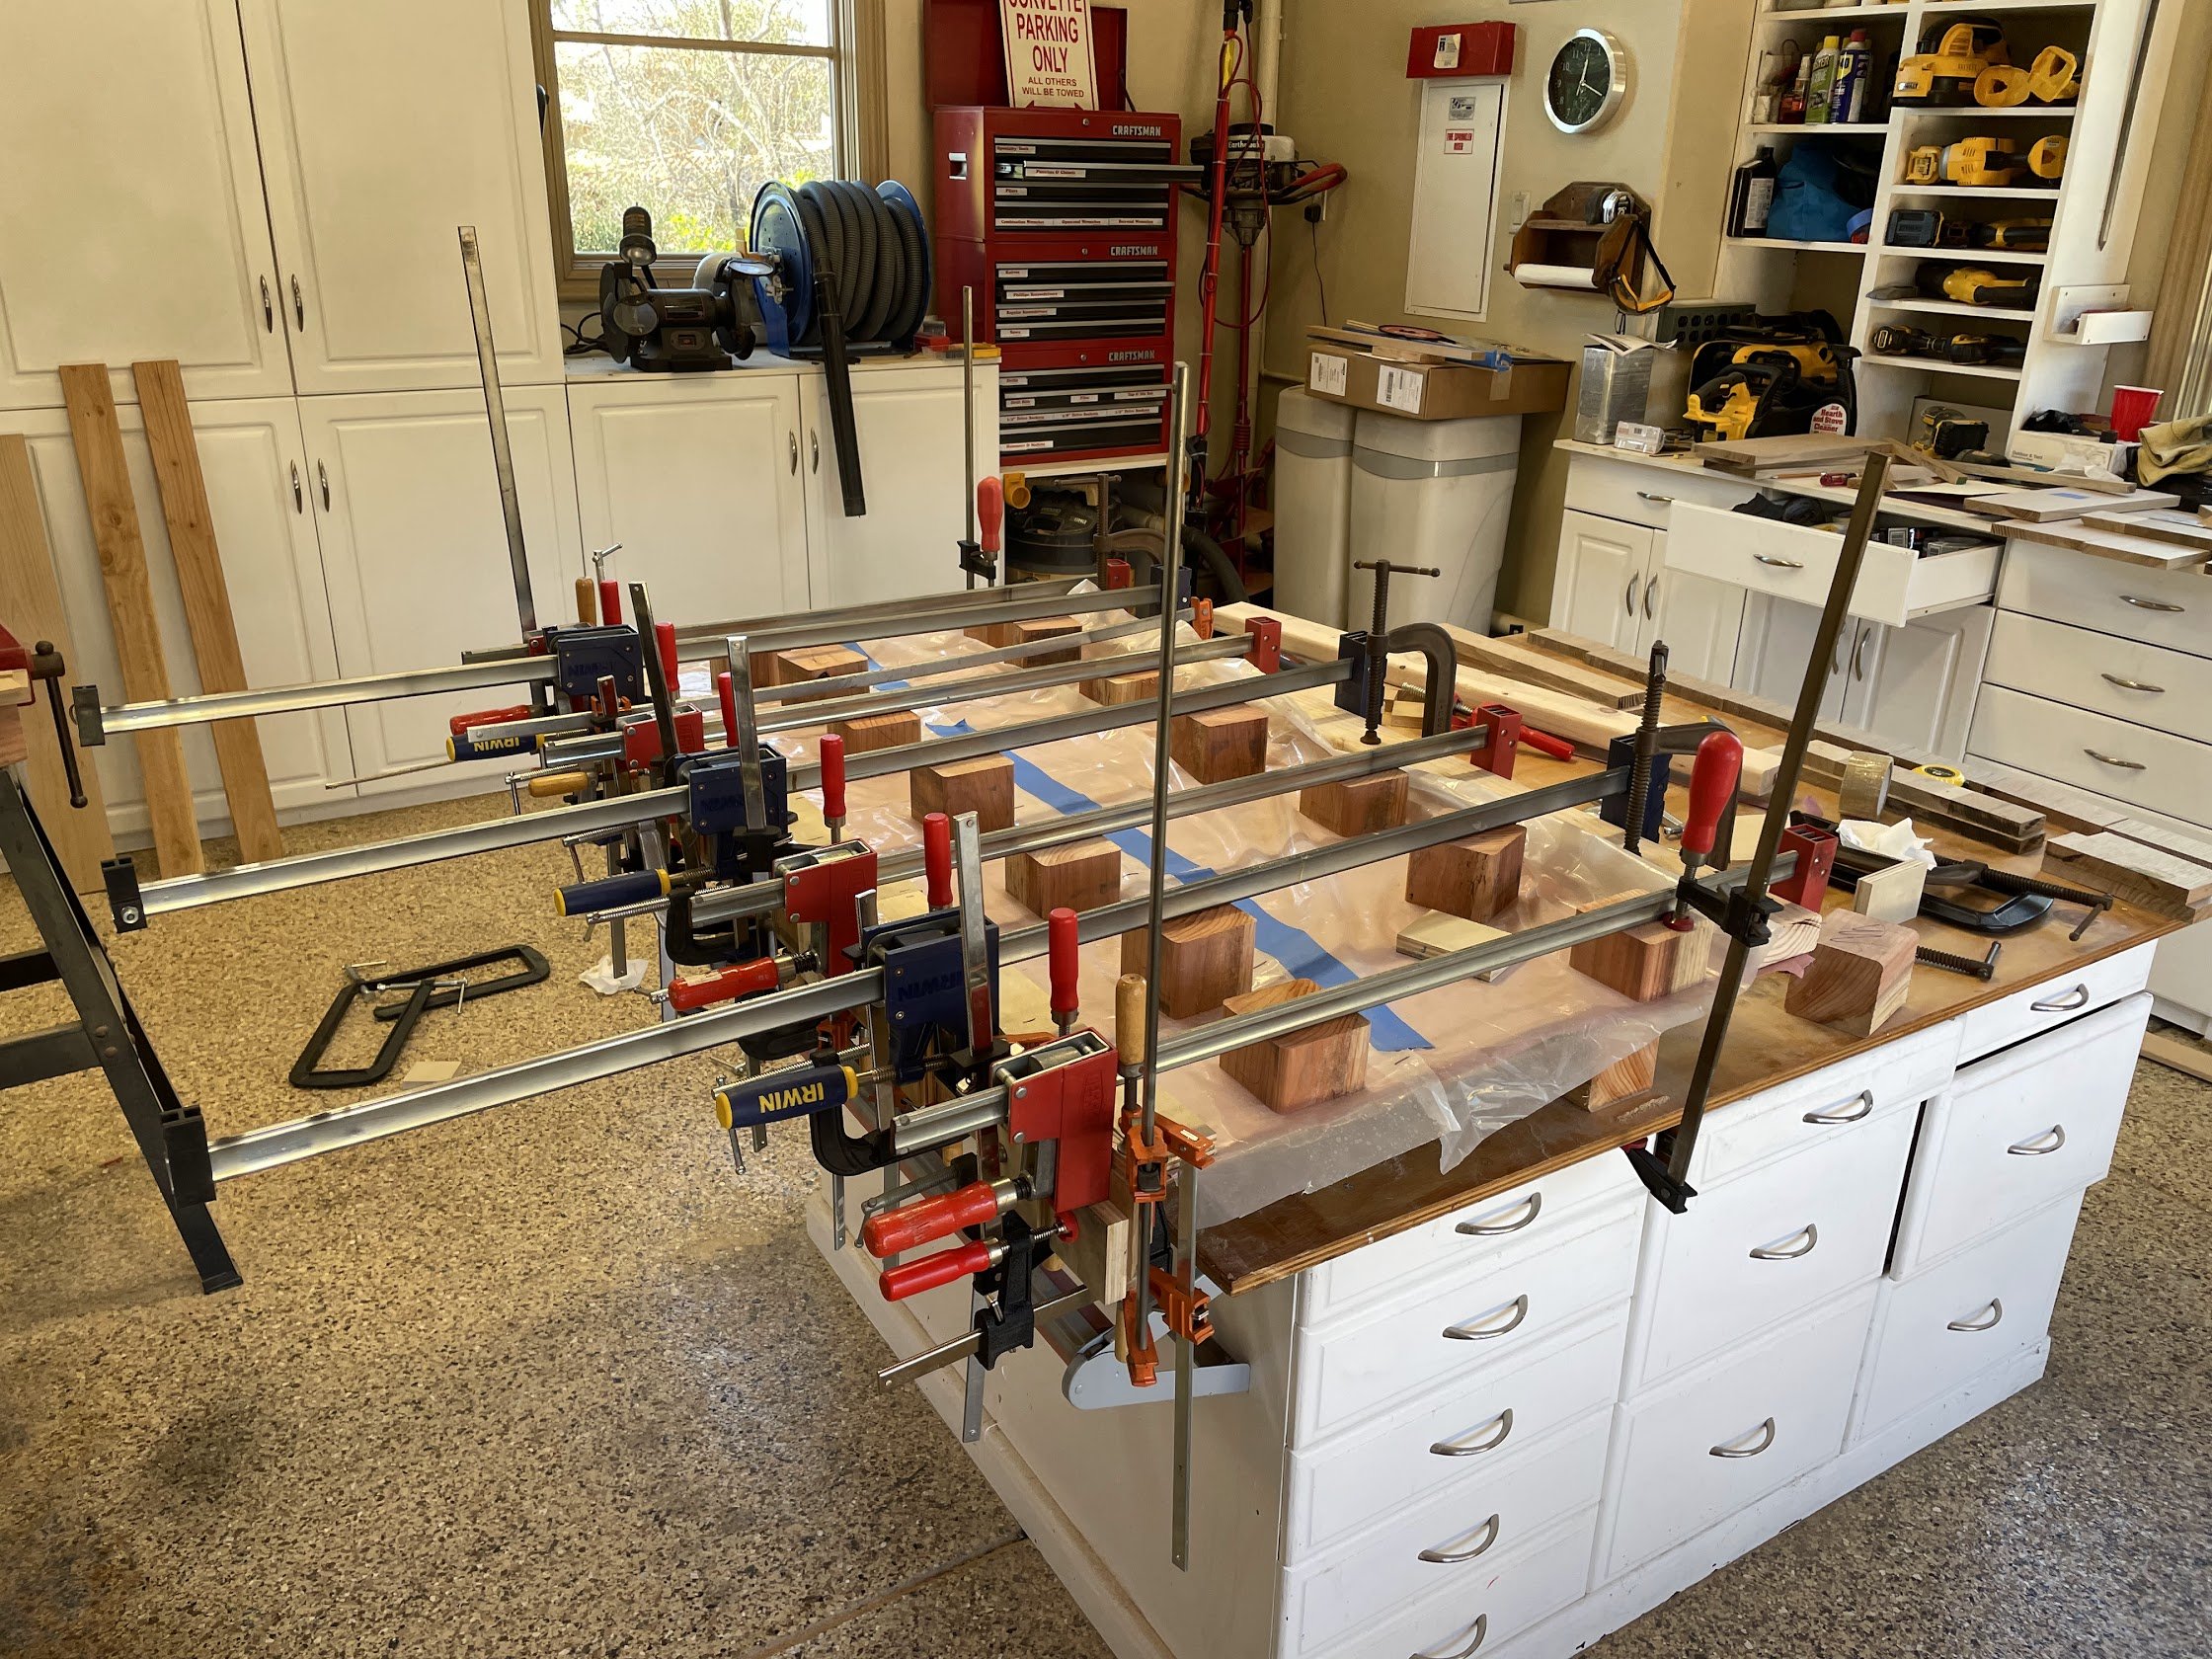
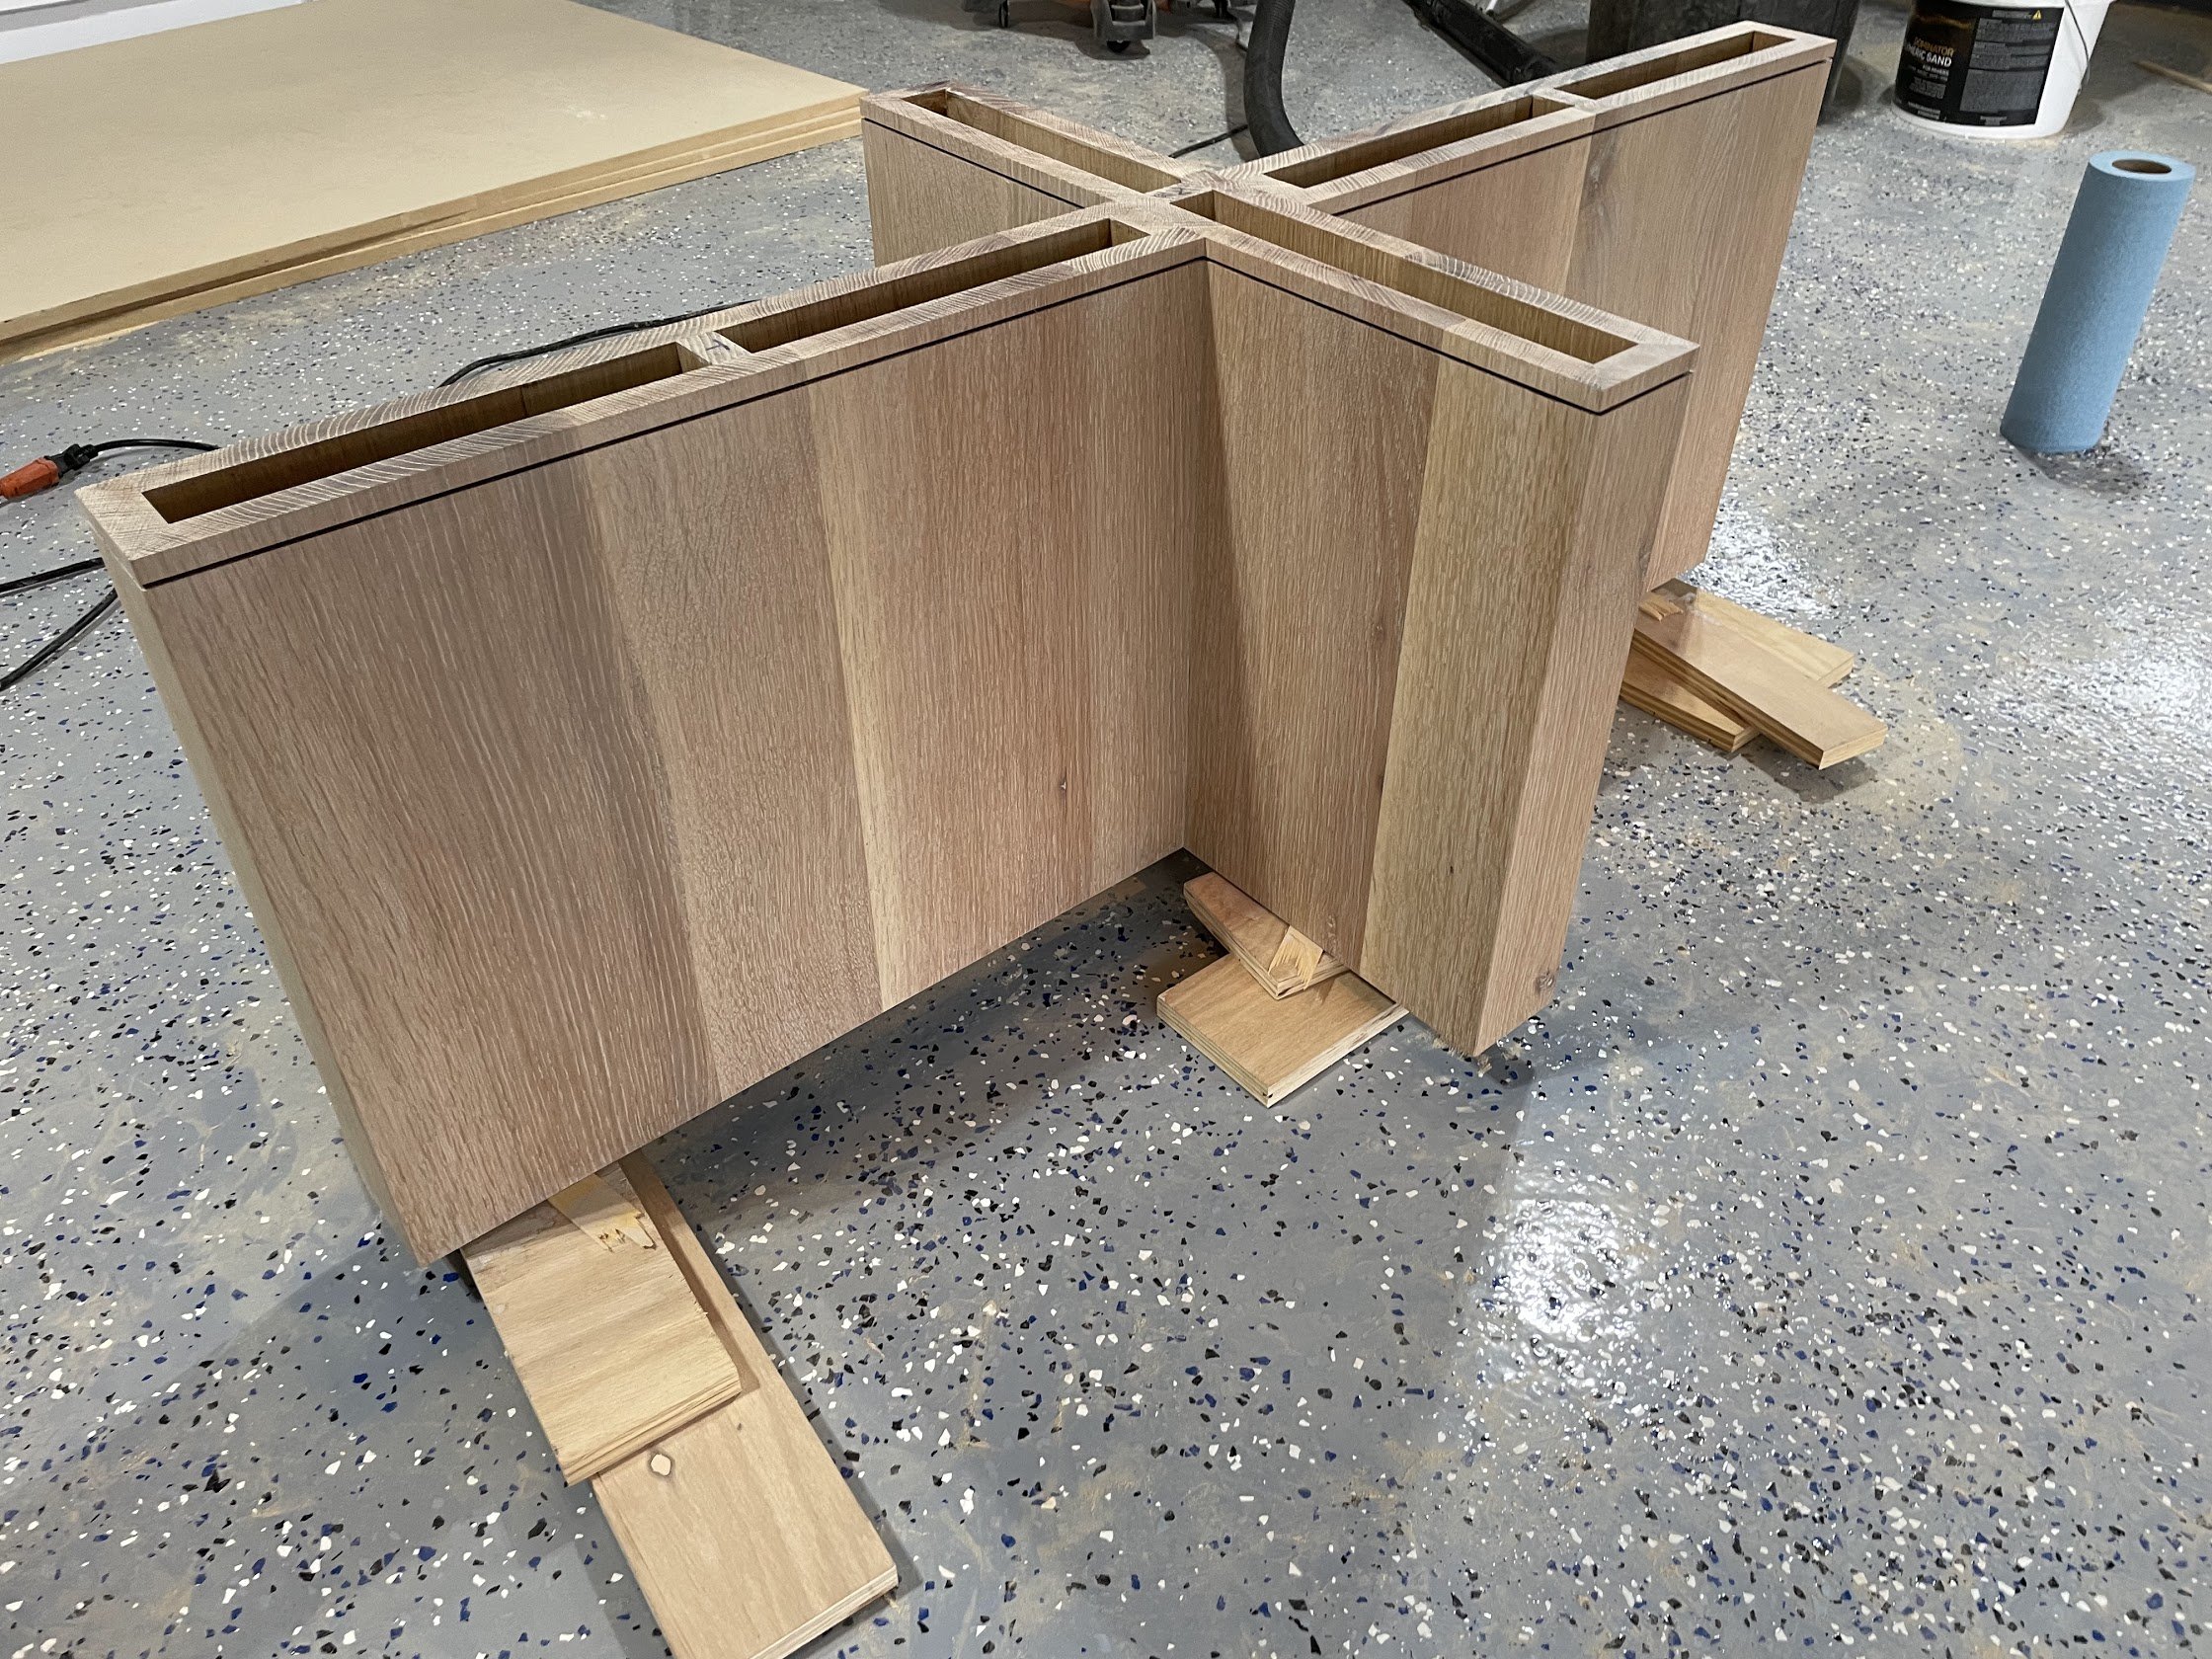
With the top construction done (or so we thought, more on that later), we turned our attention to the legs. We glued up 6 panels to create the 3 leg pieces, cut 45s similar to the top construction, and then glued up the 3 pieces. The 3 pieces were then connected with long bolts to create the solid cross-shaped leg structure.


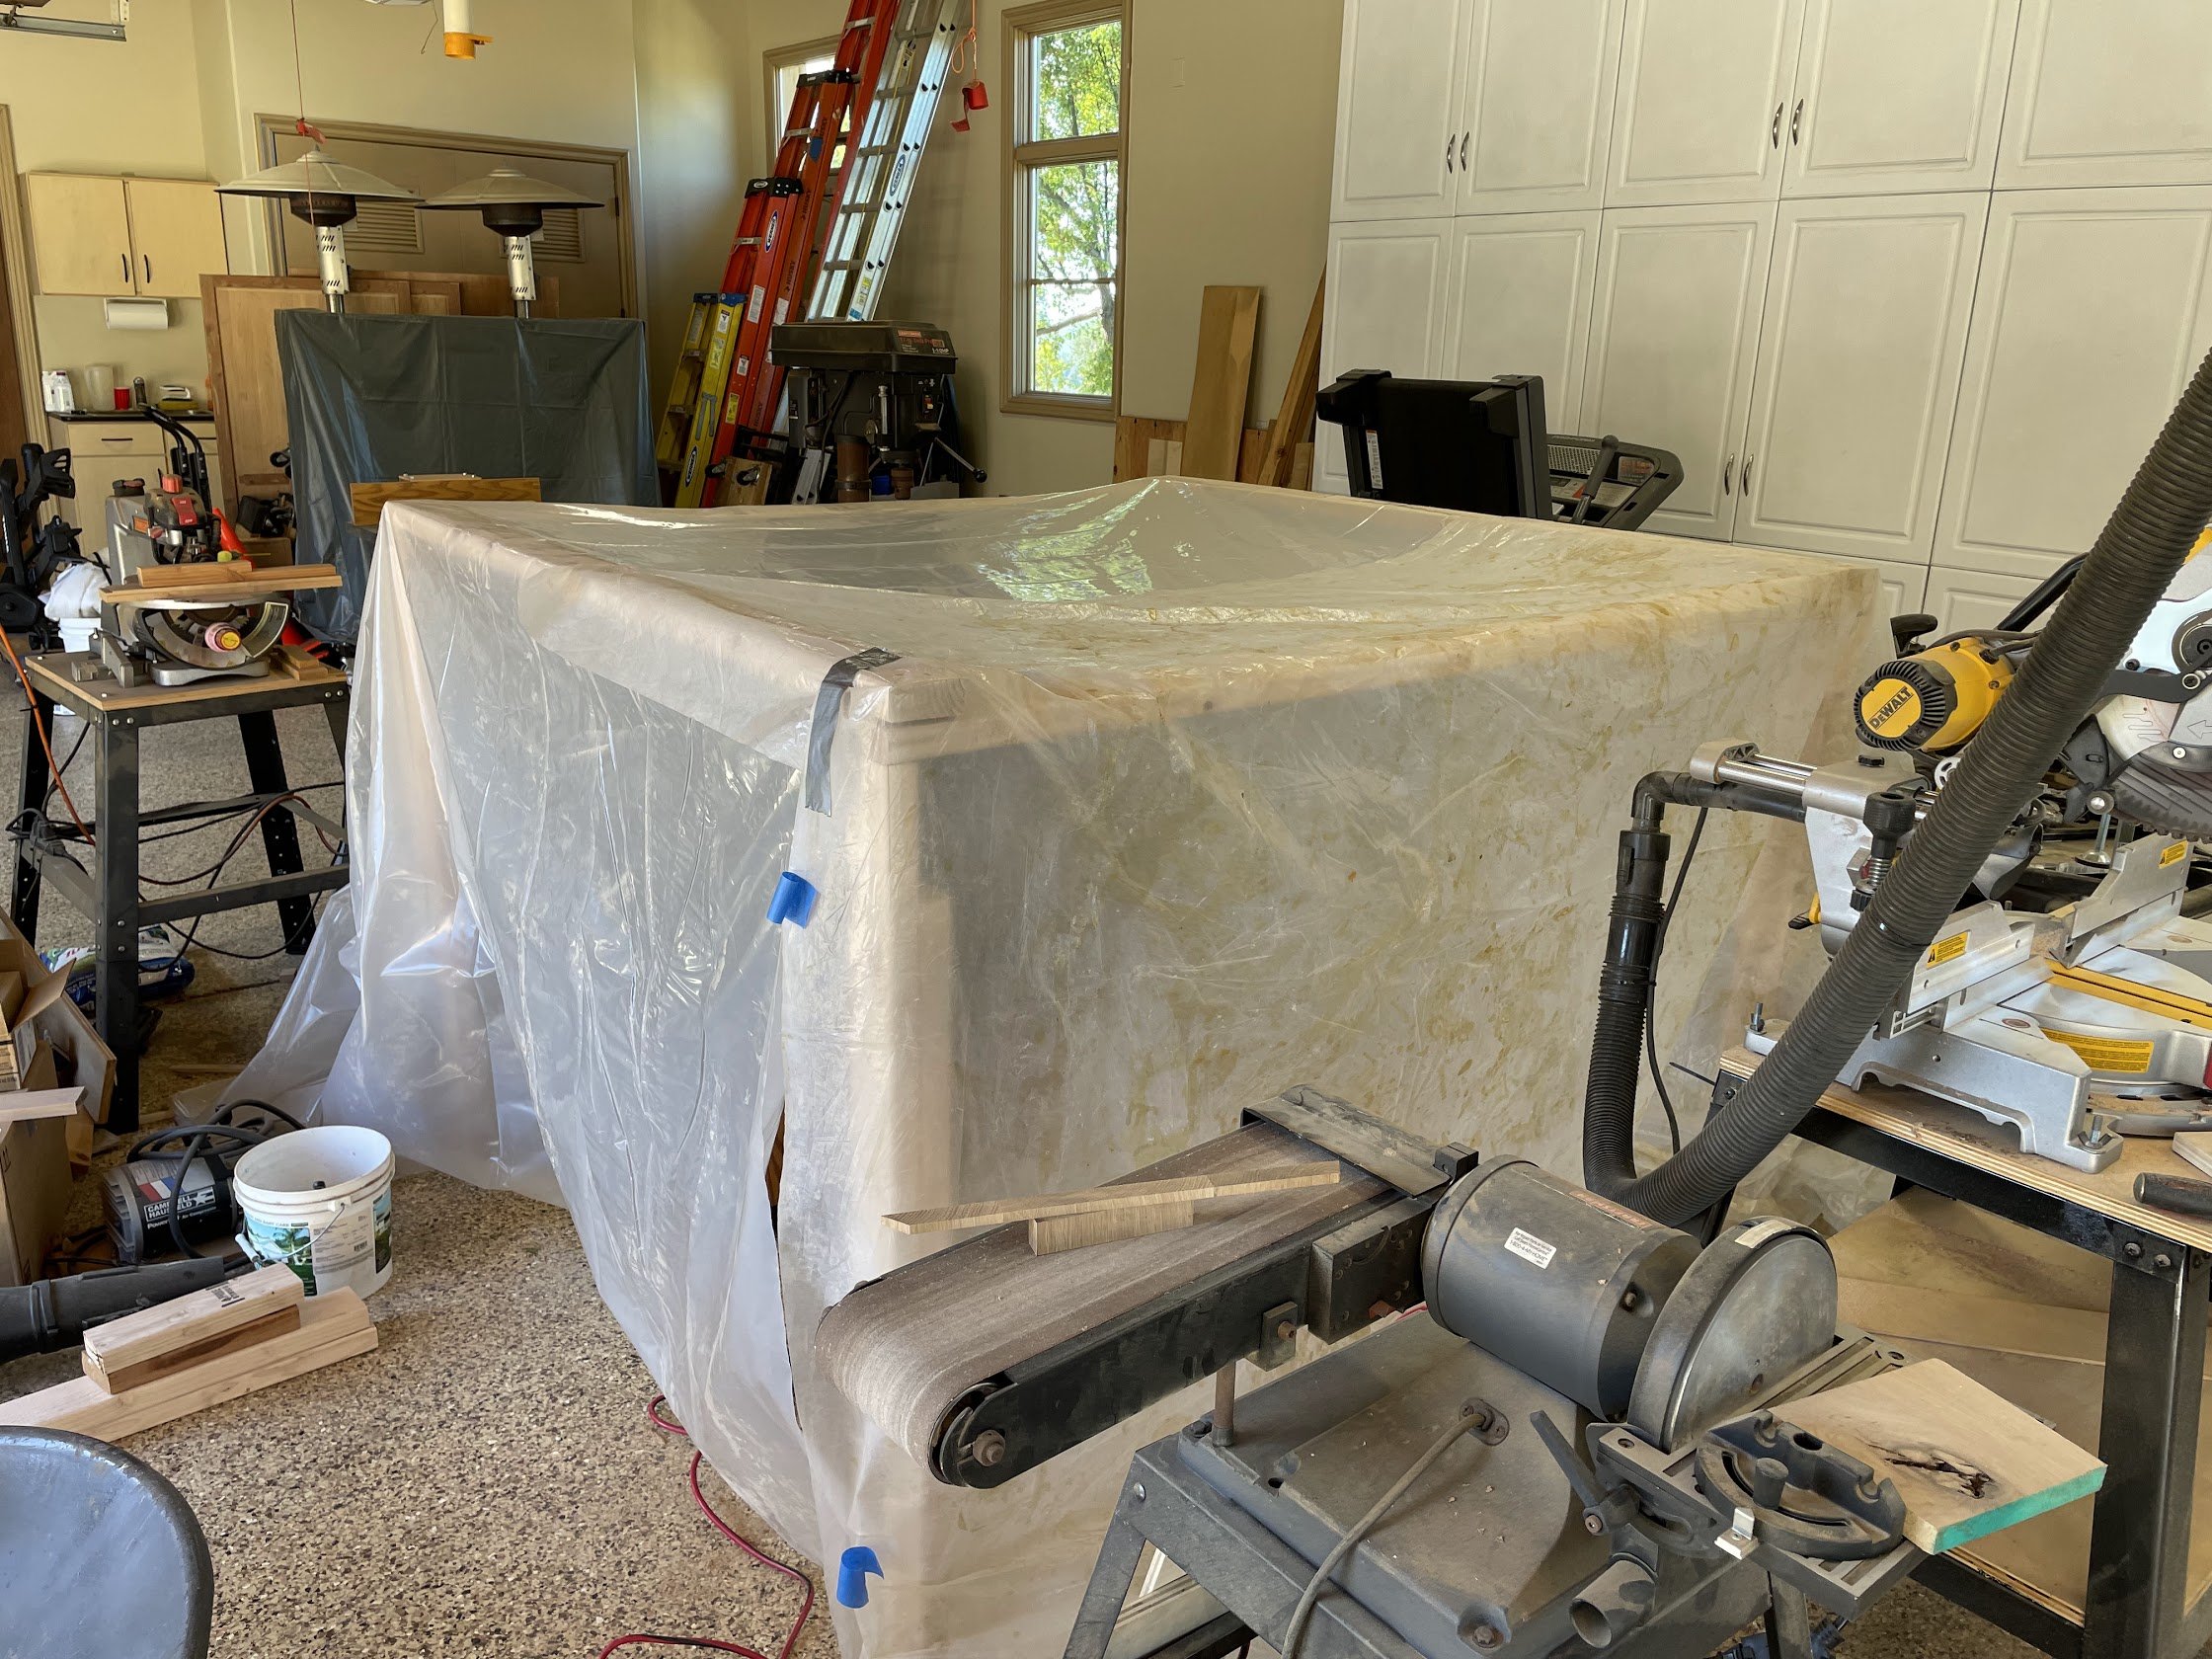
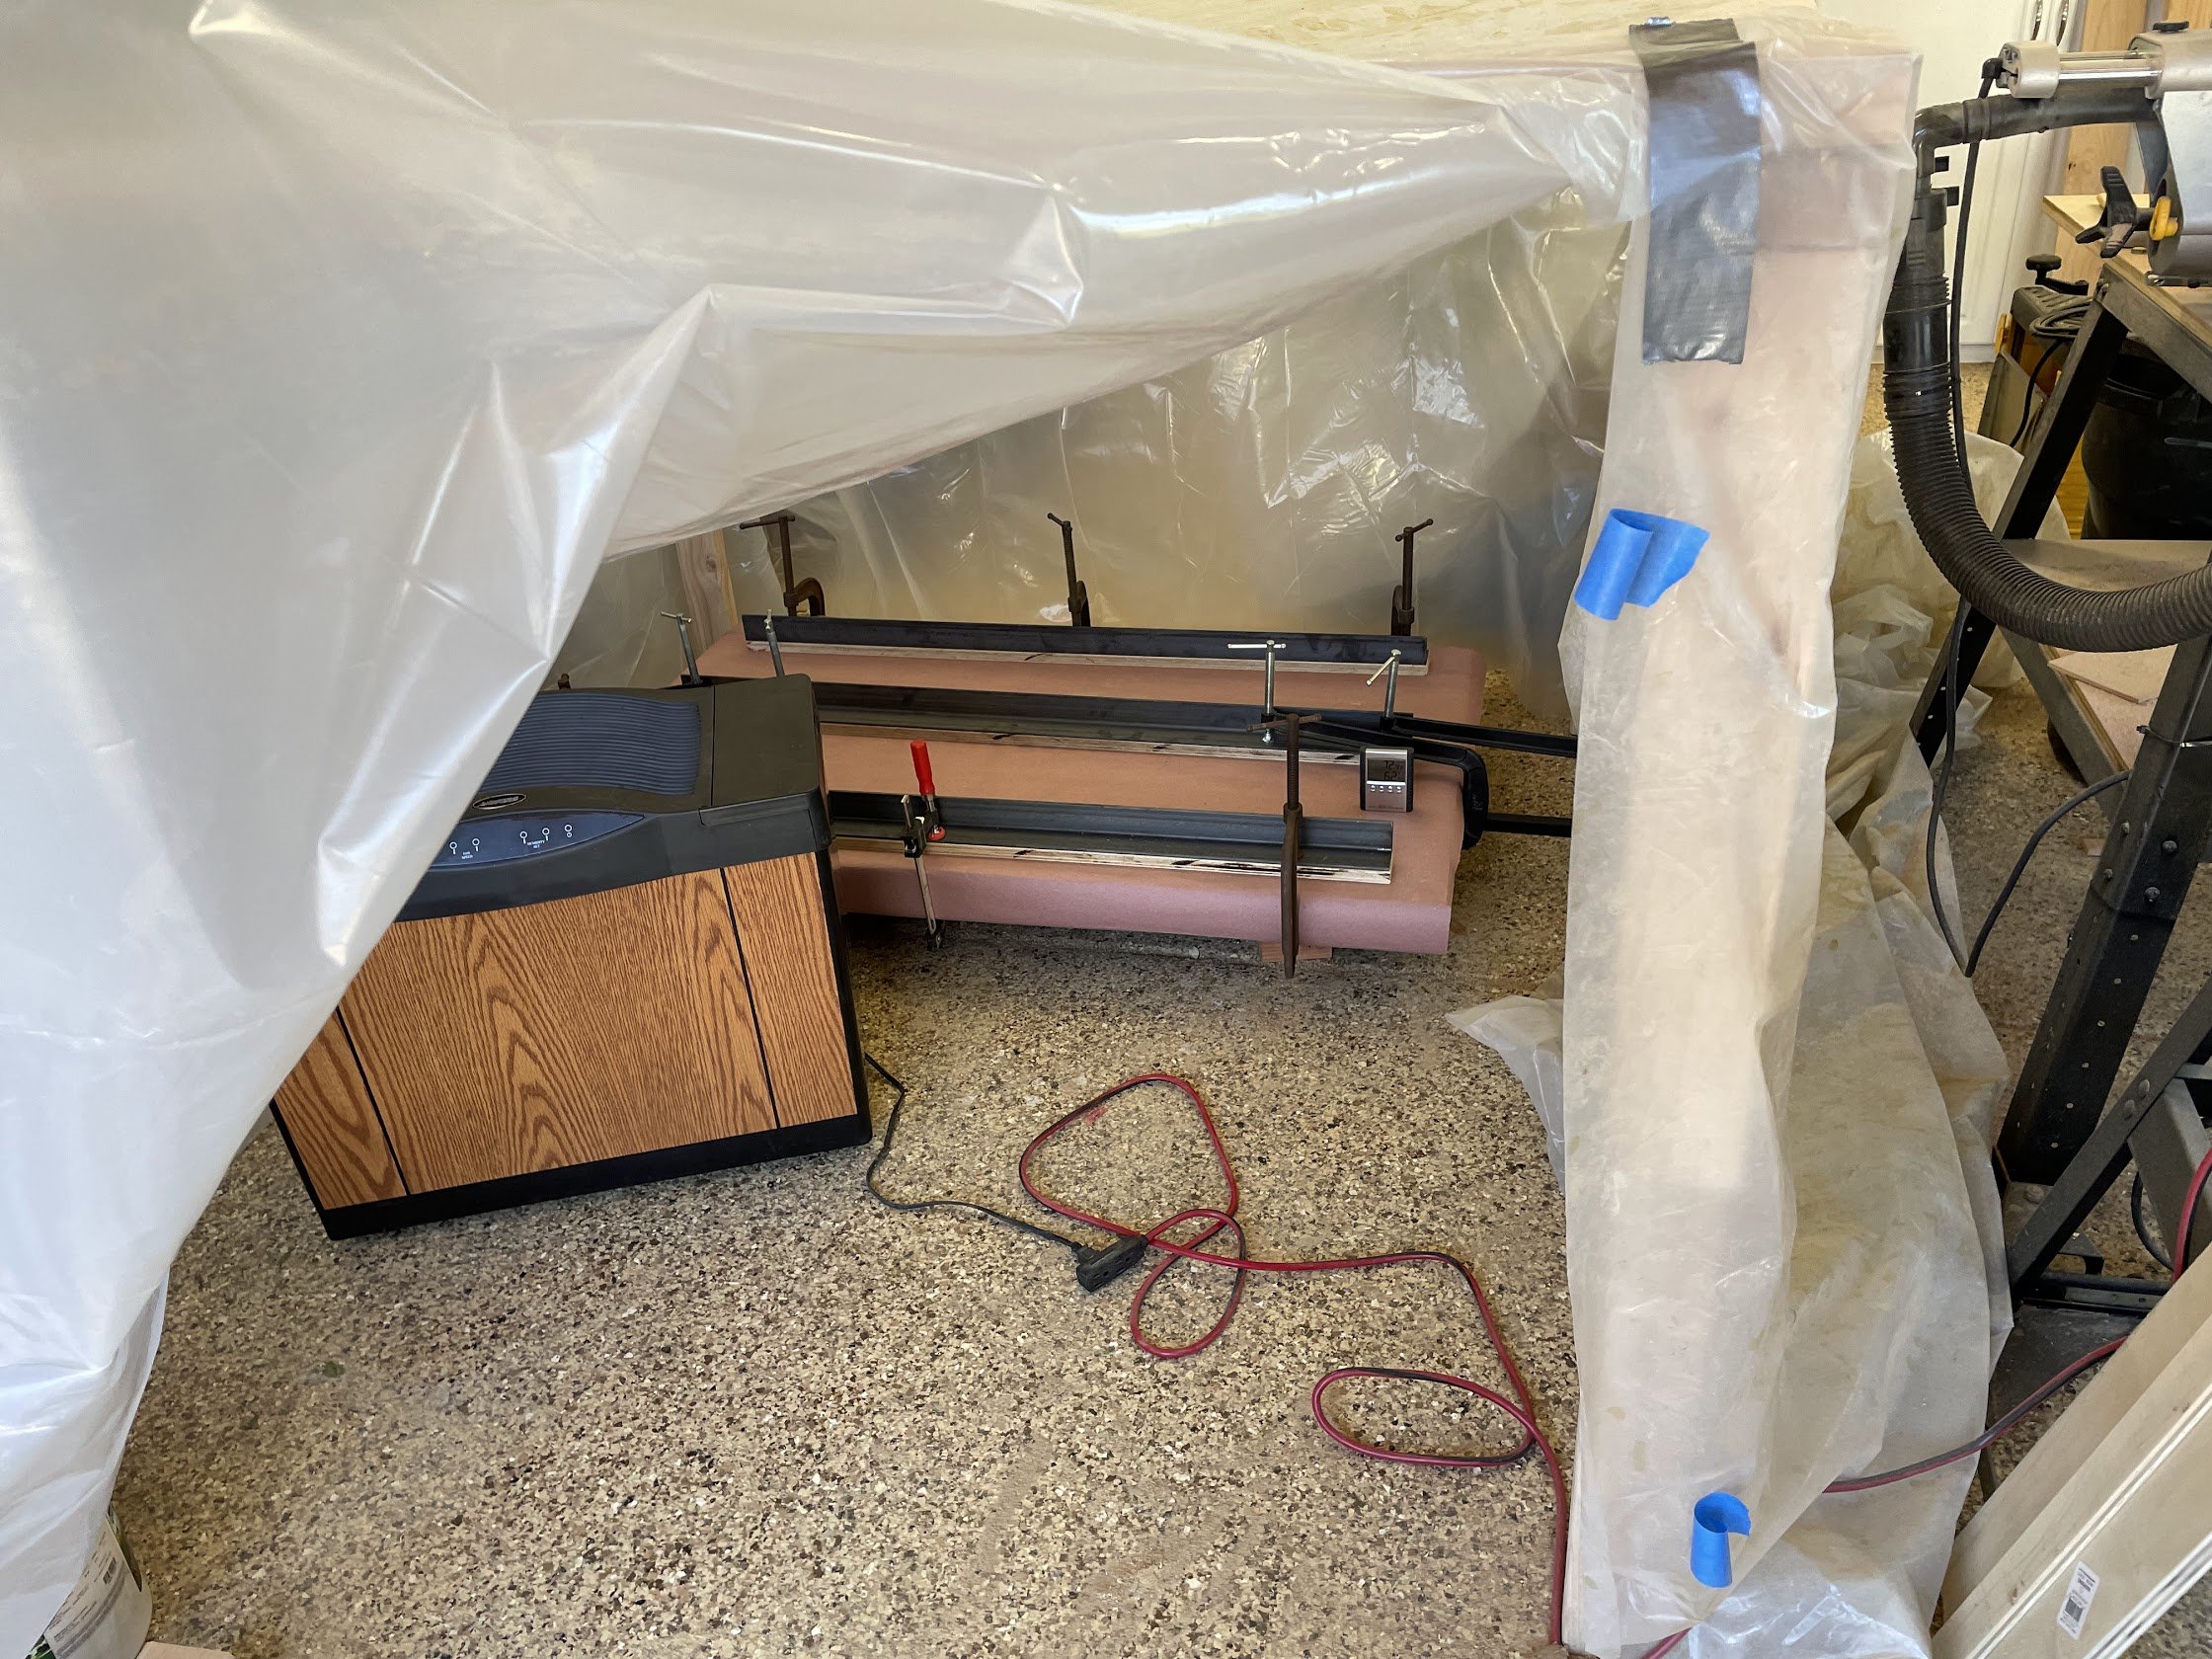
While all of that was going on, our table top was sitting off to the side. There were some major changes in humidity in the weather, and we noticed that the table top was no longer laying flat along the long dimension. There was some clear bowing upward in the middle section, creating an upside-down “U” shape. Not good. After some discussion and debate, we decided to create a humidity chamber, crank up the humidity (using a borrowed humidifier from the wine cellar), and apply some weight to the middle section to try to flatten things out. We thought it would take a while and a couple iterations, but to our surprise, after the first day the weights had over-corrected creating now a downward bow in the middle. Encouraged that at least our method worked, we clamped some straight steel bars to the table to get it flat, let it sit in the humidity chamber for a couple days, and then let it dry for a week or so that way. I am still pretty shocked that this worked.
With everything built and flat, all that was left was the finishing touches. First, we cleaned up the edges on the top. Where there were gaps in the miter joint, we used a technique I had seen in some Youtube videos to roll a screwdriver on the edge, pushing both pieces of wood towards the center. In combination with some sanding, this worked pretty well. Then, we sanded the whole thing to 150 grit. While we’ve typically gone to a finer grit in other projects, I wanted this table to keep the feeling of the grain. We finished it with Rubio Monocoat in “smoke” color to give it a gray/white look in the grain while keeping the natural look of the wood.

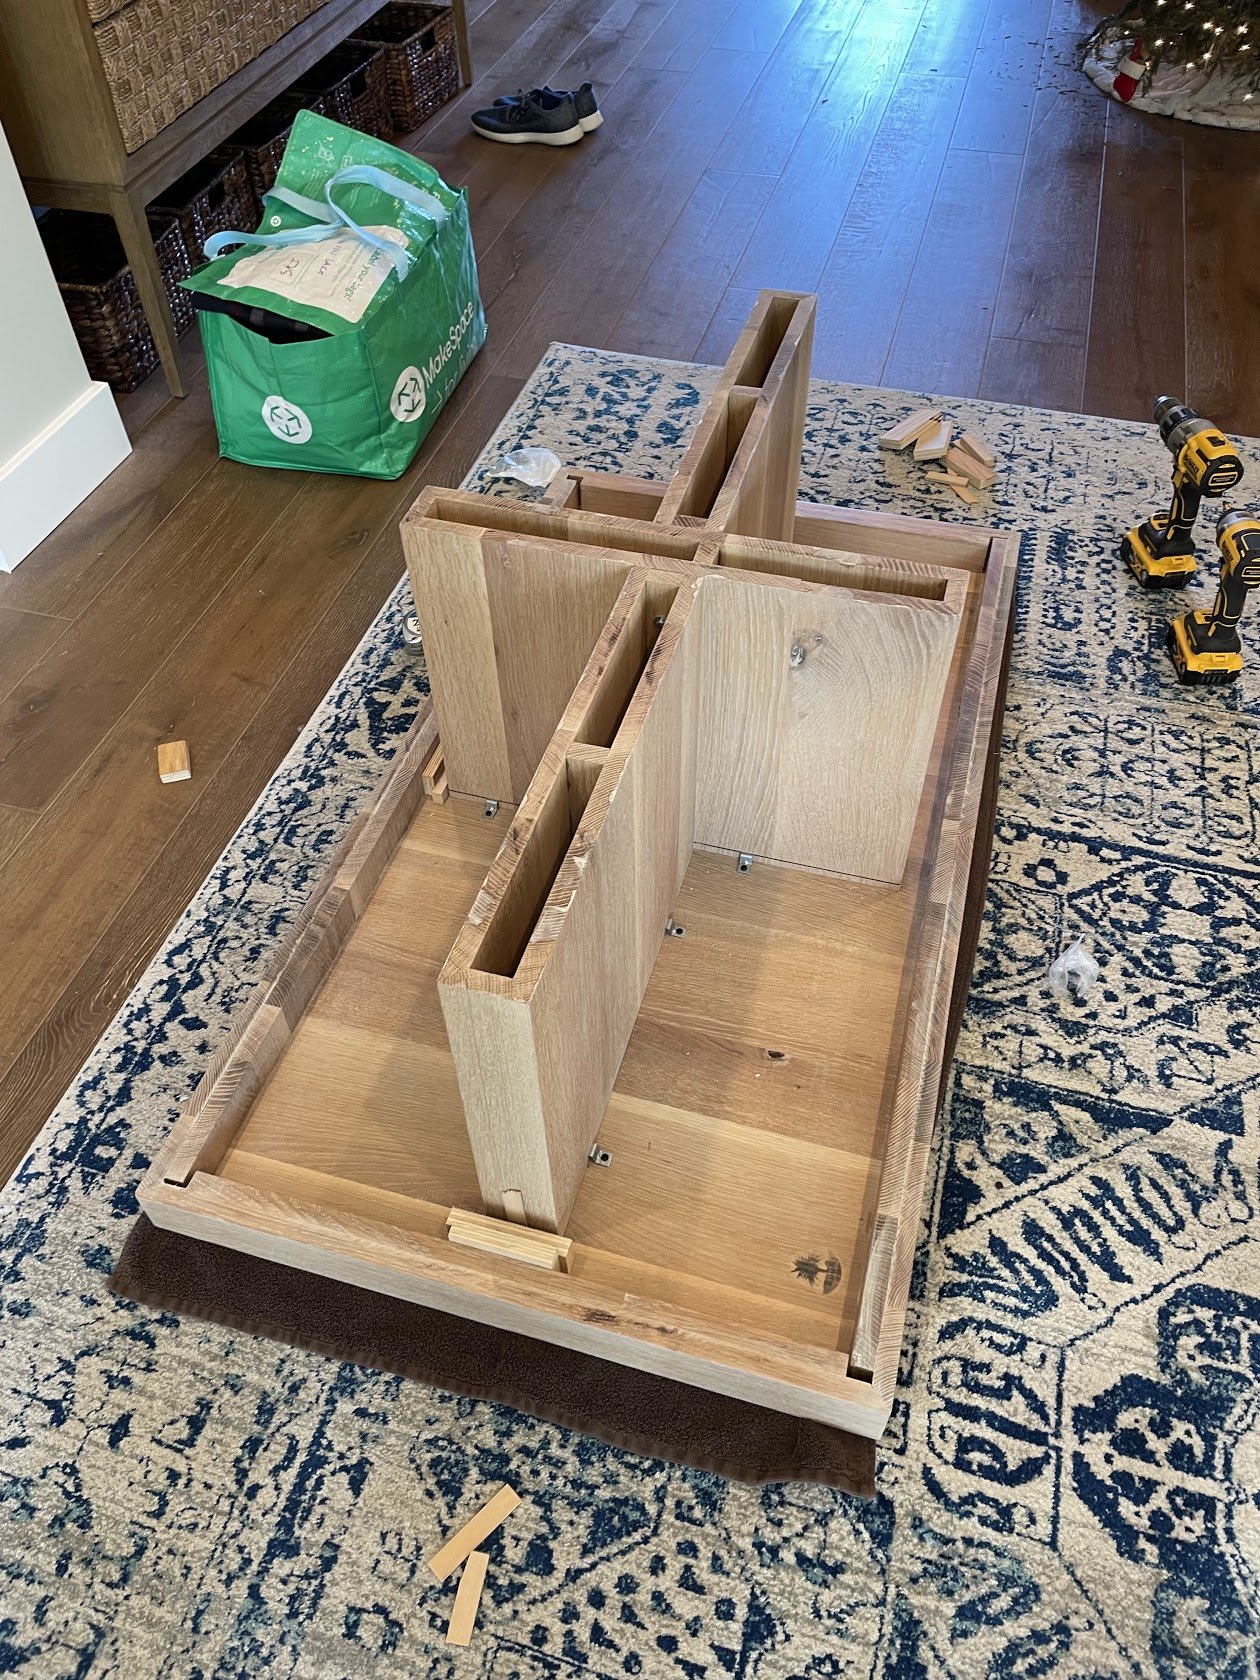
Once both pieces were finished and dry, it was time to attach them. We used z-shaped clips that slide into a slit we cut at the top of the legs and then attach to the underside of the top with a screw. This method means the wood can expand/contract in multiple directions without creating any strain on the wood.
This was an awesome and rewarding project. It had the typical number of missteps and unexpected issues which just means more learning. The table proudly sits in our living room.
