
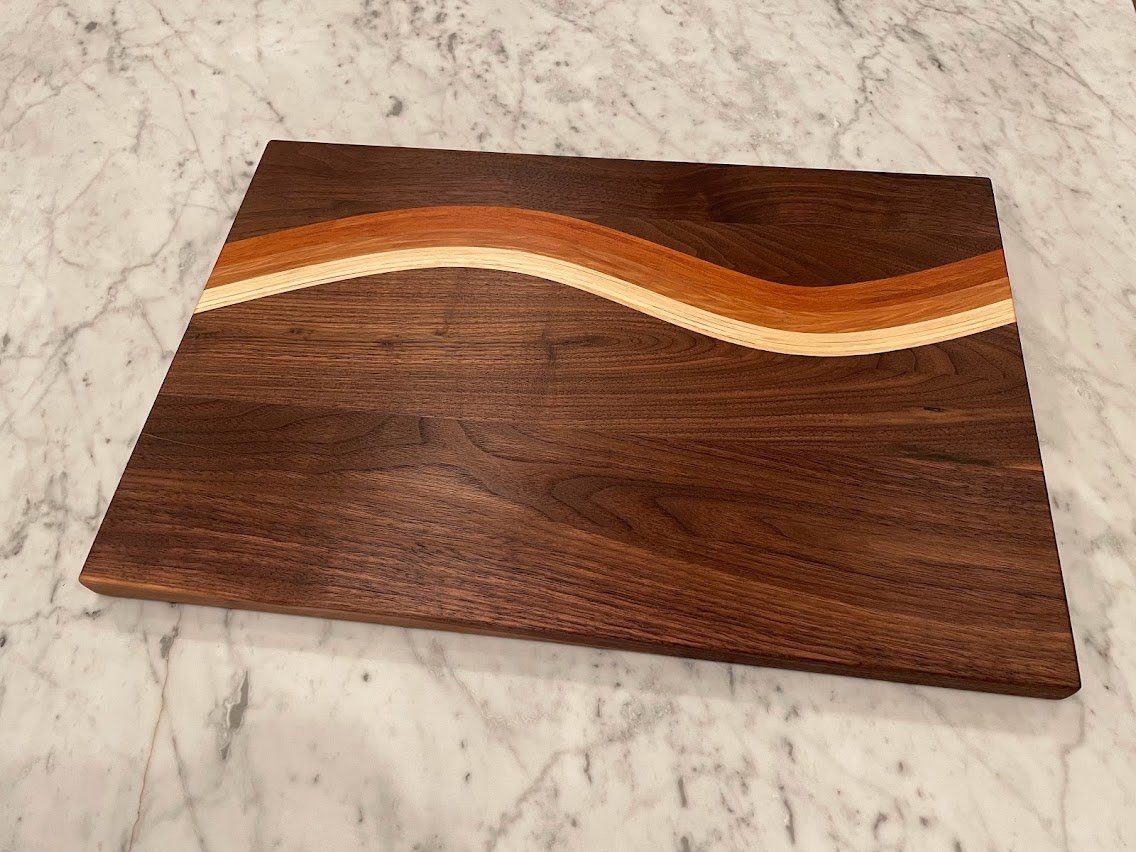
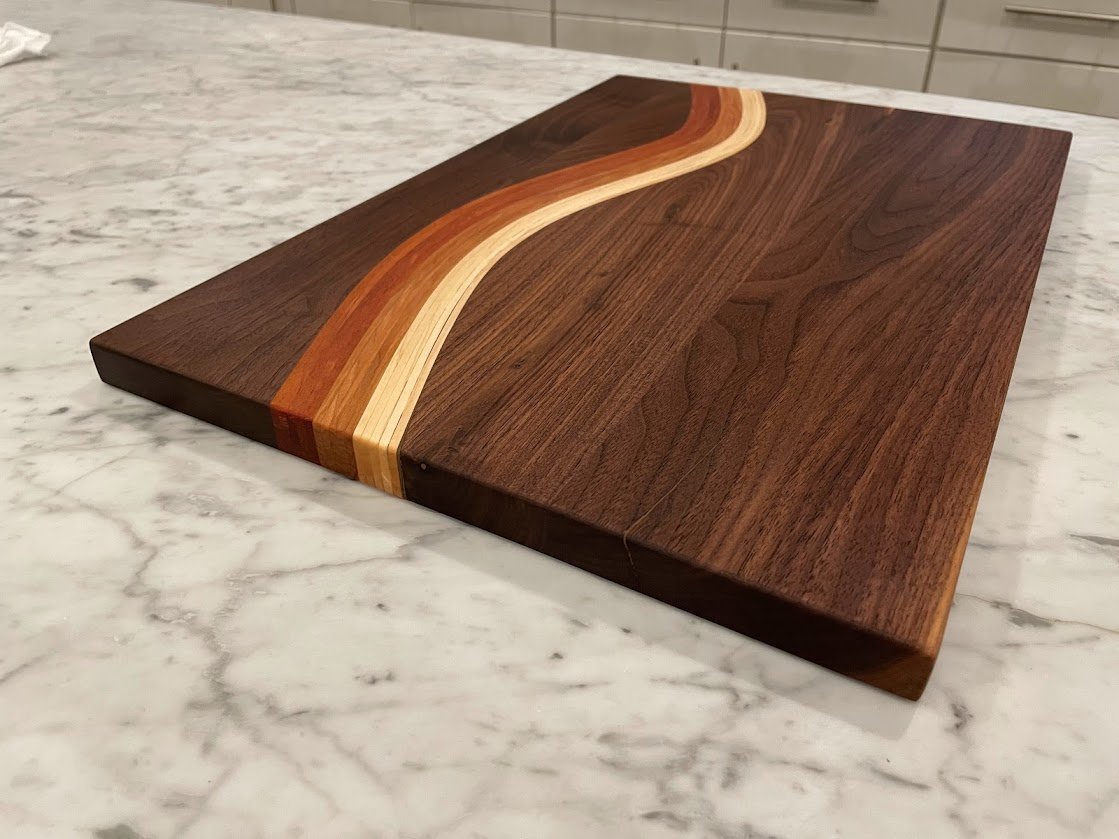
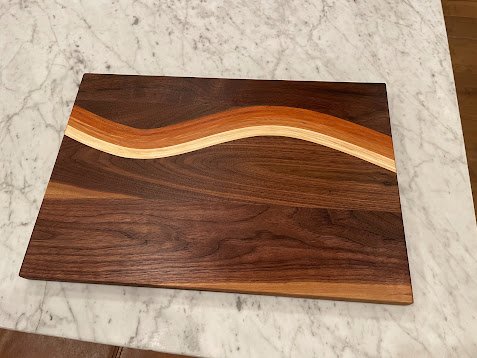
Bent Lamination Charcuterie Board
I made this charcuterie board after watching Brad from Fix This Build That make a bent lamination board. I hadn’t really considered the idea of bending wood before that and it seemed like a really cool concept. I lacked the professional belt sander that he used to help make the thin strips, but I wanted to try it anyway. This board is made out of walnut with strips of maple, cherry, and mahogany. The strips are cut thin, and the combination of glue and clamp pressure allows them to be bent into a curved shape. It reminds me of beach waves and colors of the sunset, so we’ve named it Sunset Cliffs. Read below for more!
The Process
Over the holidays I was playing around with mixing different kinds of woods to make some cutting/charcuterie board designs. Most of these were straight-forward, but I wanted to try one that was more ambitious using this bent lamination technique to create some curves in the design. Bent lamination is basically just using thin strips of wood and glue to create a curved shape. Wood has some natural give in it, and will hold the new shape once the glue dries.

PowerPoint Mockup
As always, I started with a rough design. I liked the color combination of maple, cherry, and mahogany with a walnut base. I wasn’t sure at this point how many layers I would use, how thin the strips would be, or exactly how much curve they would have.
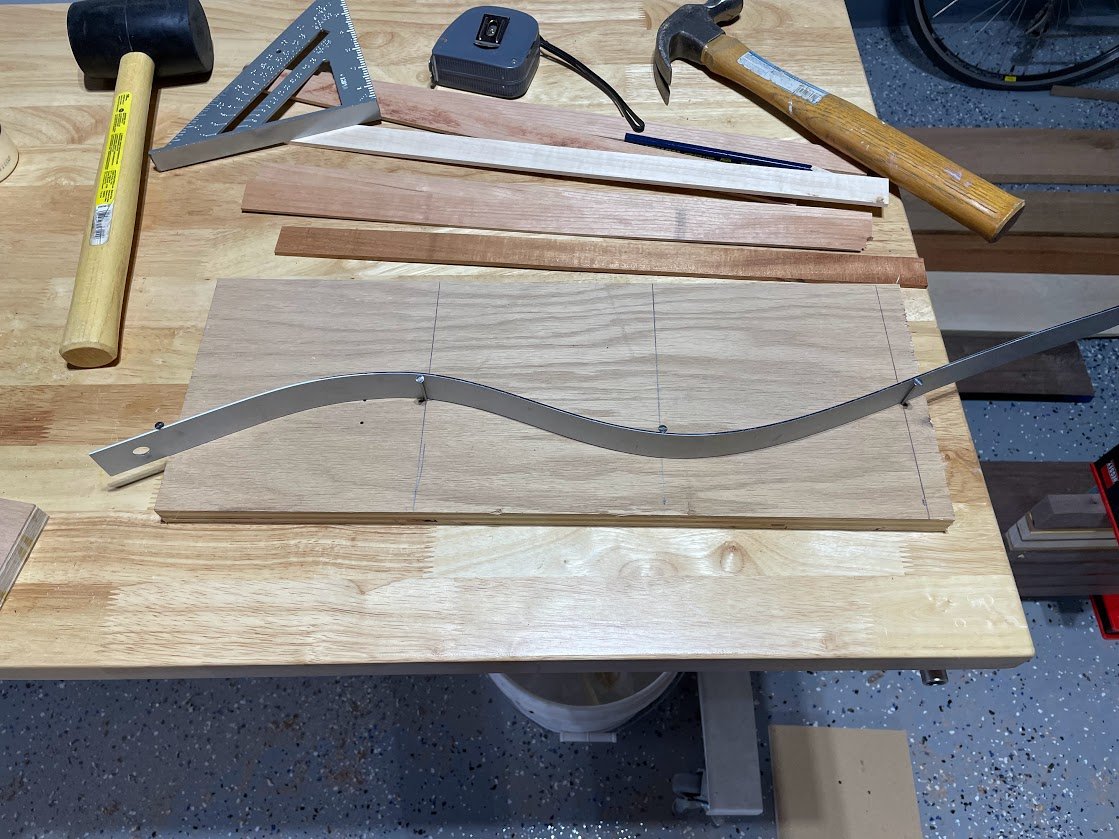
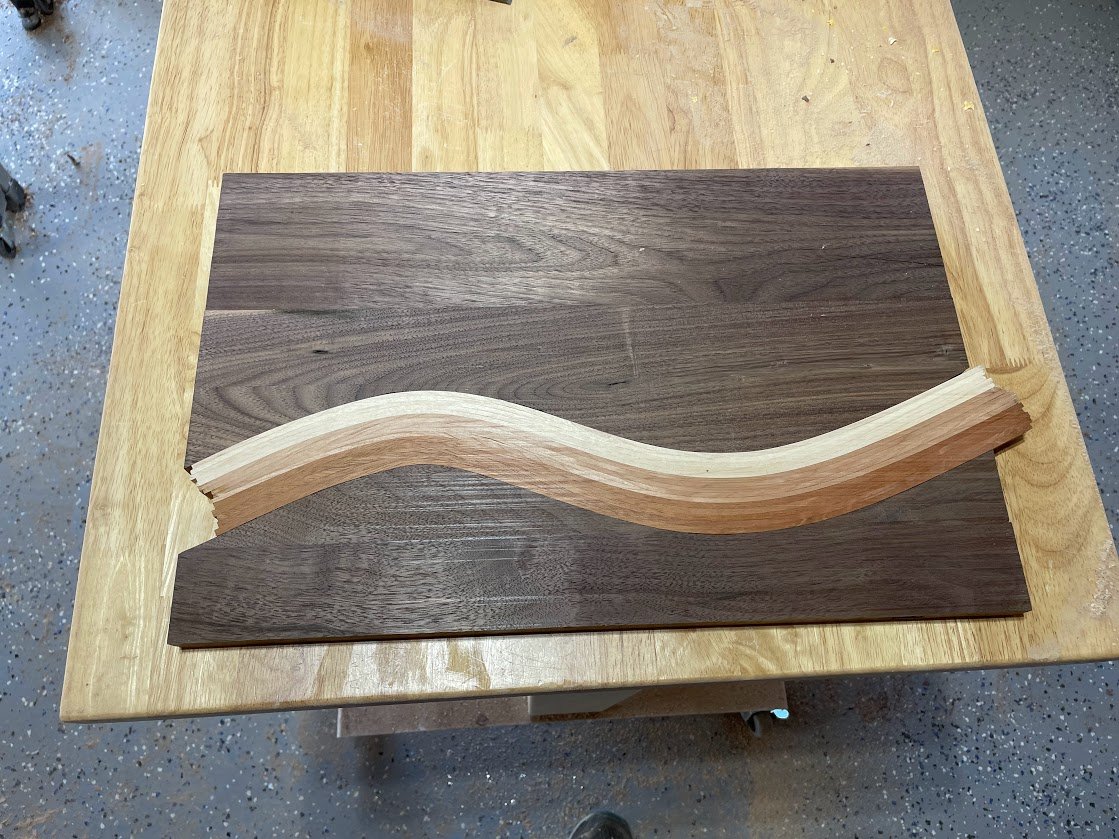
I wanted as much curve as possible, but wasn’t really sure how much that was. You can’t really test this either because the dry wood does not want to bend. So I picked a pretty arbitrary amount of curve and figured I’d see how it went. I took a piece of scrap wood about the length of my desired cutting board, and measured it into 4ths. On each line, I put a nail in to create a sine-wave. I can’t remember exactly but I think the amplitude of the sine wave was somewhere between half an inch and an inch. Then I took my semi-flexible straight edge (which has since been completely destroyed by using it for things such as this), and bent it around the nails so I could trace out the full sine wave. I used a jigsaw to cut along the line, then used the combination of a jigsaw and flush trim router bit to cut the same shape out of a couple of walnut panels I had glued together.
Using the plywood as a template over the walnut
Then, I started cutting my thin strips. This was tricky with the tools I had on hand. I cut these to approximately 1/8 on the table saw (which is always a little scary). I was hoping to use my planer to get them all to a uniform thickness at about 3/32, but the planer did not like that. It doesn’t go down to that thin of a setting, so I used a piece of scrap as a sled and taped the strips to it with double sided tape. This worked ok, but I lost about 30% of my cuts to chip-out on each run through. I was wishing I had a drum sander, but wasn’t quite ready to drop the $1,500+.
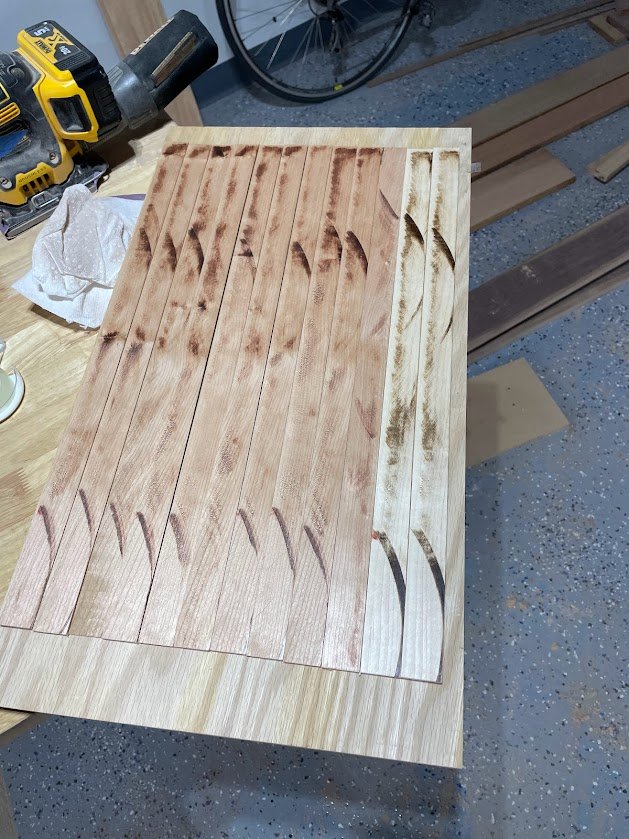
Raw 1/8 strips. You can see the burn marks from the table saw on the thin rips.
In the end I mostly gave up on the planer and just got as many pieces as I could thin and clean on the table saw, and did a little manual sanding to smooth any ridges. I had about 5 strips of each type of wood, so I decided to go for it with those. I didn’t really know how to prep for the glue-up. I practiced with a single scrap and it didn’t seem too bad, so I figured I’d just try it and see what happened. I knew I was going to need a lot of pressure to get these boards to the right shape, but also that I needed to think about getting them aligned vertically. So I took a piece of plywood and covered it with duct tape that the glue wouldn’t stick to, so I could use that as a base. I wish I had taken a video of this process. It was pretty much a frantic disaster.
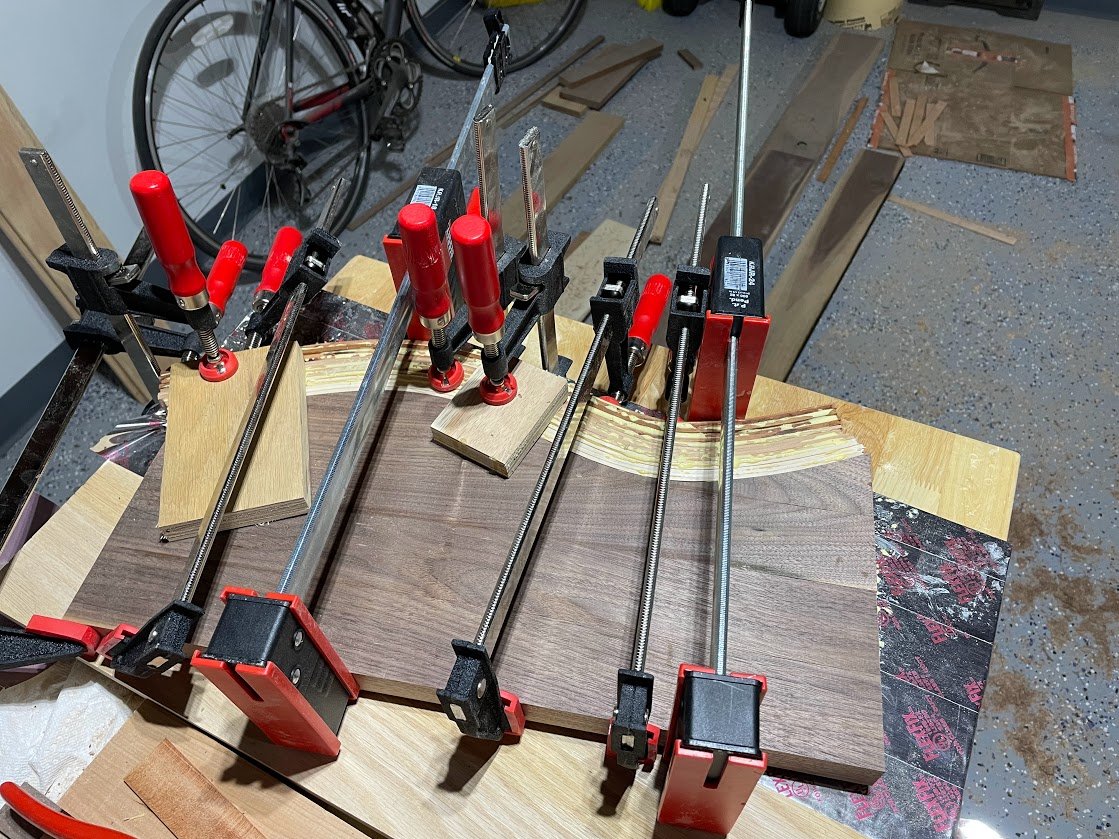
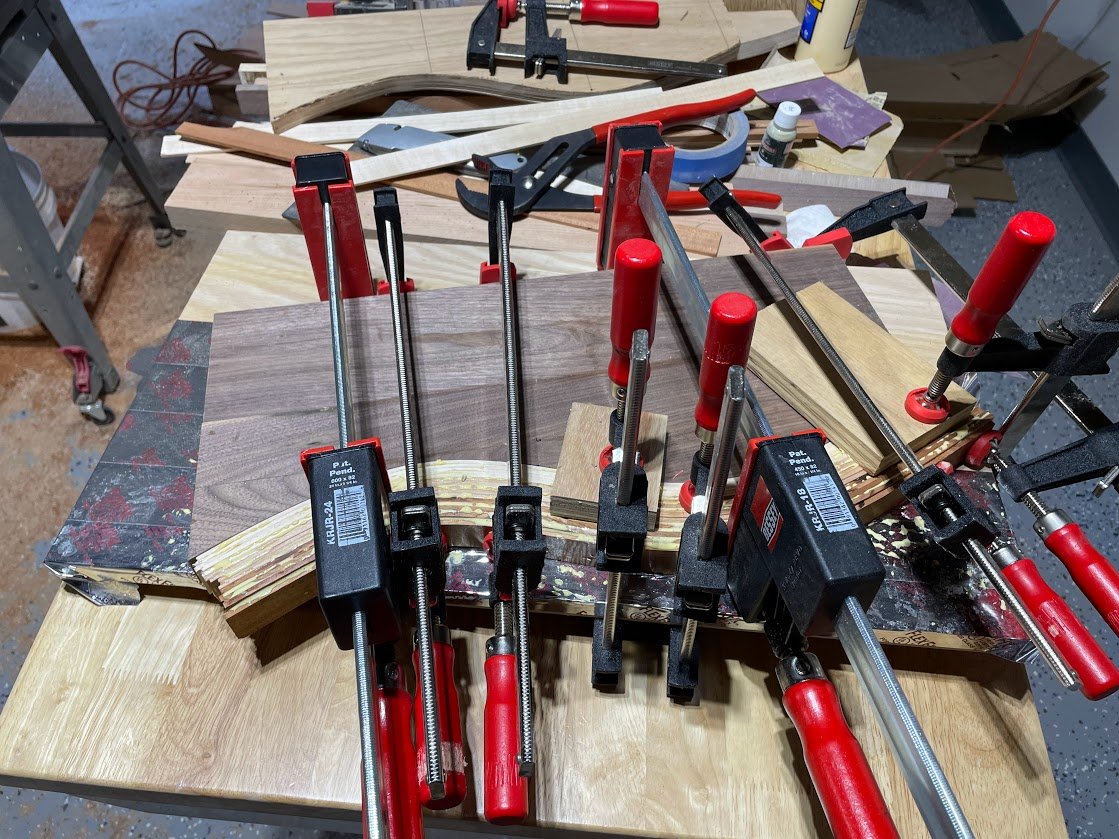
I applied glue to all the strips, hurrying to beat the dry time. I put some of the clamps loosely in place so that I could start to stack the strips roughly in place but not yet bent. Once I had them all in place, I started applying clamp pressure (and running frantically to the other side of the room to grab more clamps). A few things started to become clear:
It takes a lot of pressure to bend that many strips—at one end I simply couldn’t apply enough pressure to make it meet the edge of the walnut
It was going to be really hard to get the vertical alignment right—with all the horizontal pressure applied, there was no way to re-align the boards vertically
I probably should have done this in 3 batches instead of all at once
To try to account for the vertical drift of the boards, I put some blocks on top and applied parallel clamp pressure. However in my rush, I didn’t think about putting tape on these, so I ended up also gluing these to the board and had to pry them off later. As you can see, on the right end of the board my strips don’t make it to the edge, so I knew I was going to lose some board length on that side. You can’t see it in these pictures, but on the other end is where I couldn’t draw the strips all the way in, so I was also going to lose some length there. And of course I was going to lose some thickness trying to get everything clean vertically. But all in all, it probably went a lot better than it could have.

The next day, I took the clamps off, and somewhat surprisingly everything stayed in place. I had a lot of excess glue, and some clamp marks on my end piece (and some residue from accidentally gluing my plywood scraps to the board), but otherwise, not bad.
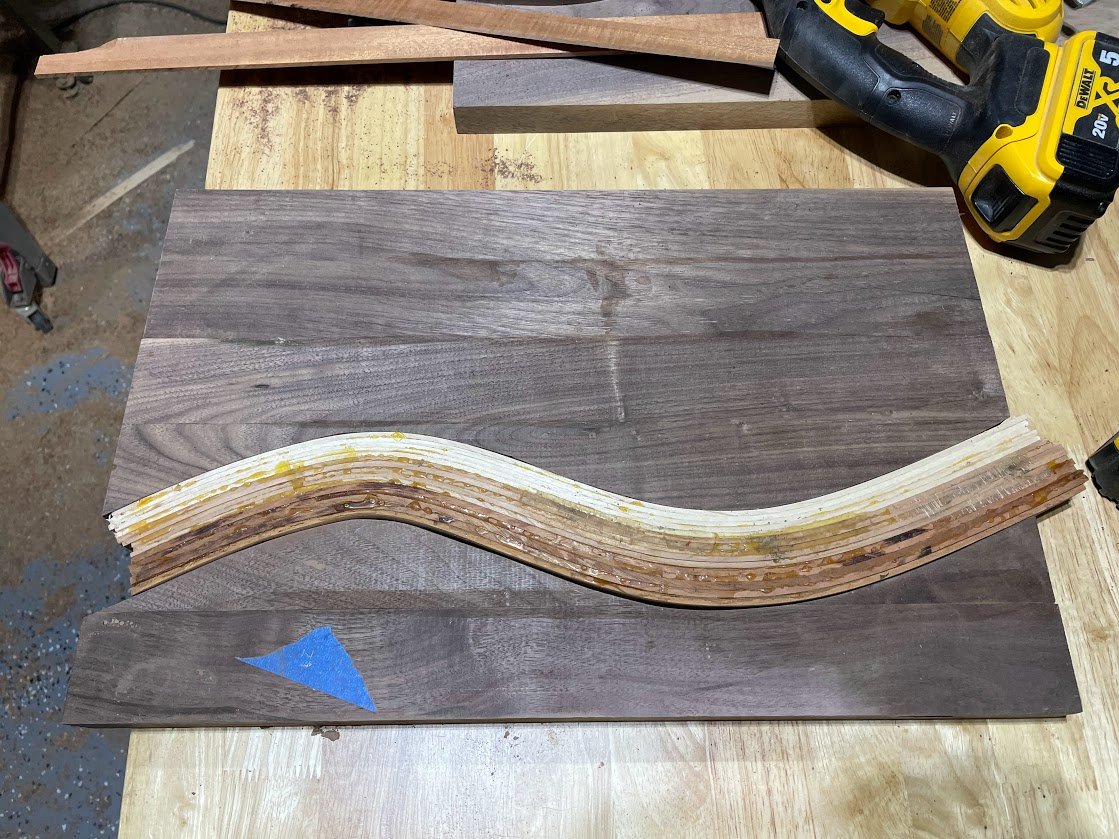
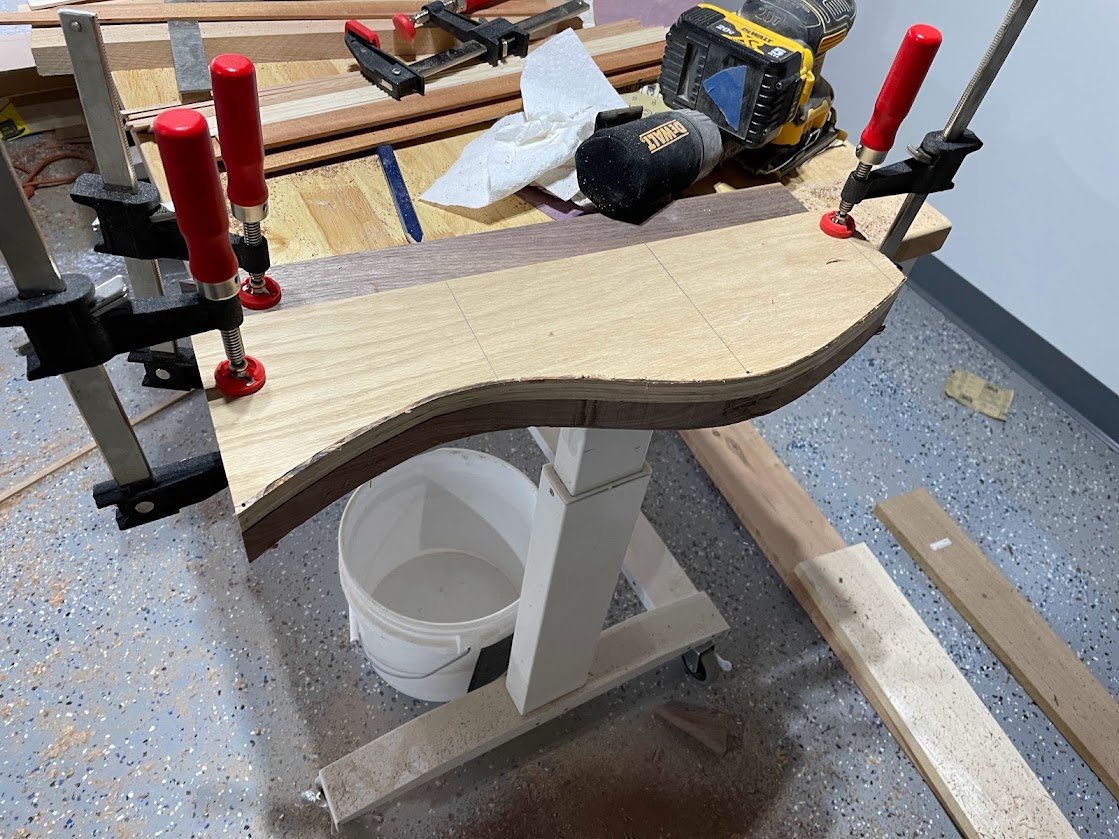
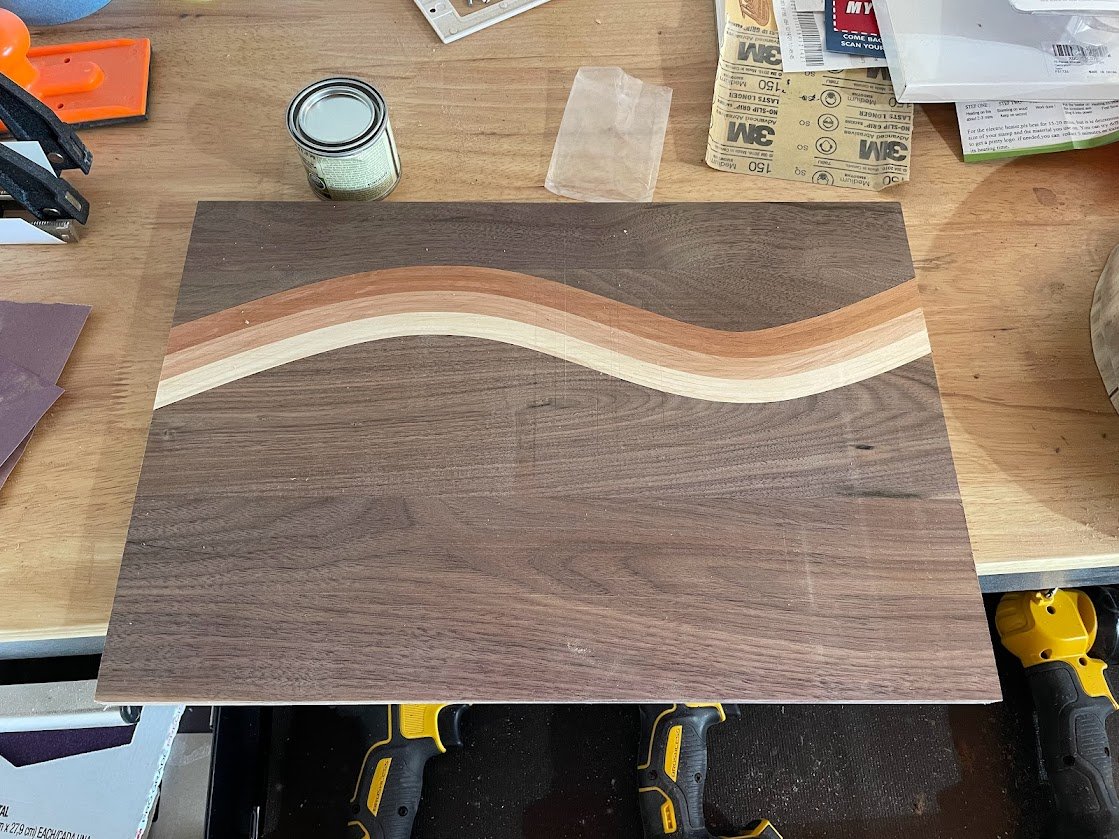
I traced the curve onto another piece of walnut, and did my best to cut out the line with a jigsaw. I don’t know how people get accurate curves cut that way. I was wishing I had a band saw, but again wasn’t going to make that purchase. It mostly lined up, but not perfectly. I tried to clean the high spots with the sander, but that never seems to work as well as I hope. I also saw that there was some vertical slant to the way that final strip was sitting. So even if I got it perfect on the “front” of the board, there would likely be at least a small gap on the “back” of the board. I got it as close as I could and then hoped the clamps would help me out.
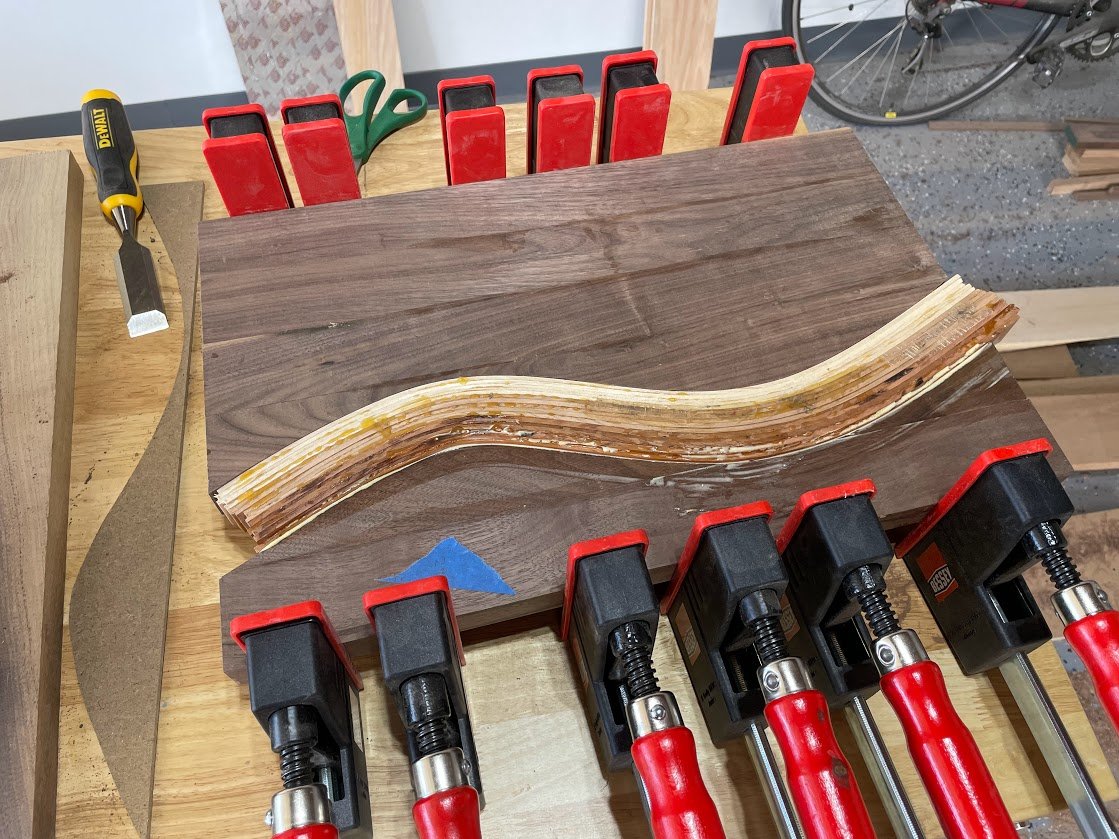
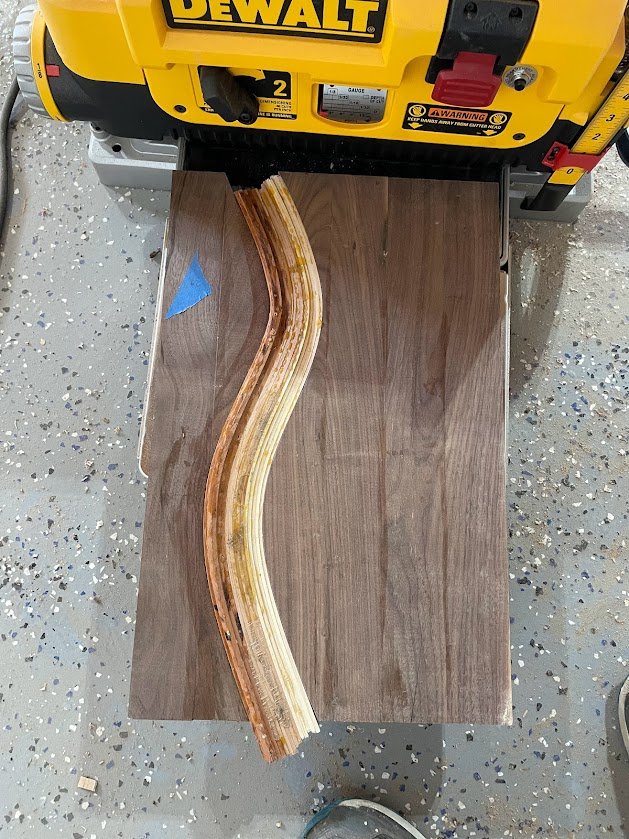
Once that dried, it was time to run it through the planer to clean up all vertical edges. I was going to need to take off almost a quarter of an inch to get down to where the lowest strips had settled. I ran it through a few times on both sides and, woah, that was actually starting to look kind of good. I squared up the sides on the table saw and again was pretty impressed with how things were looking.
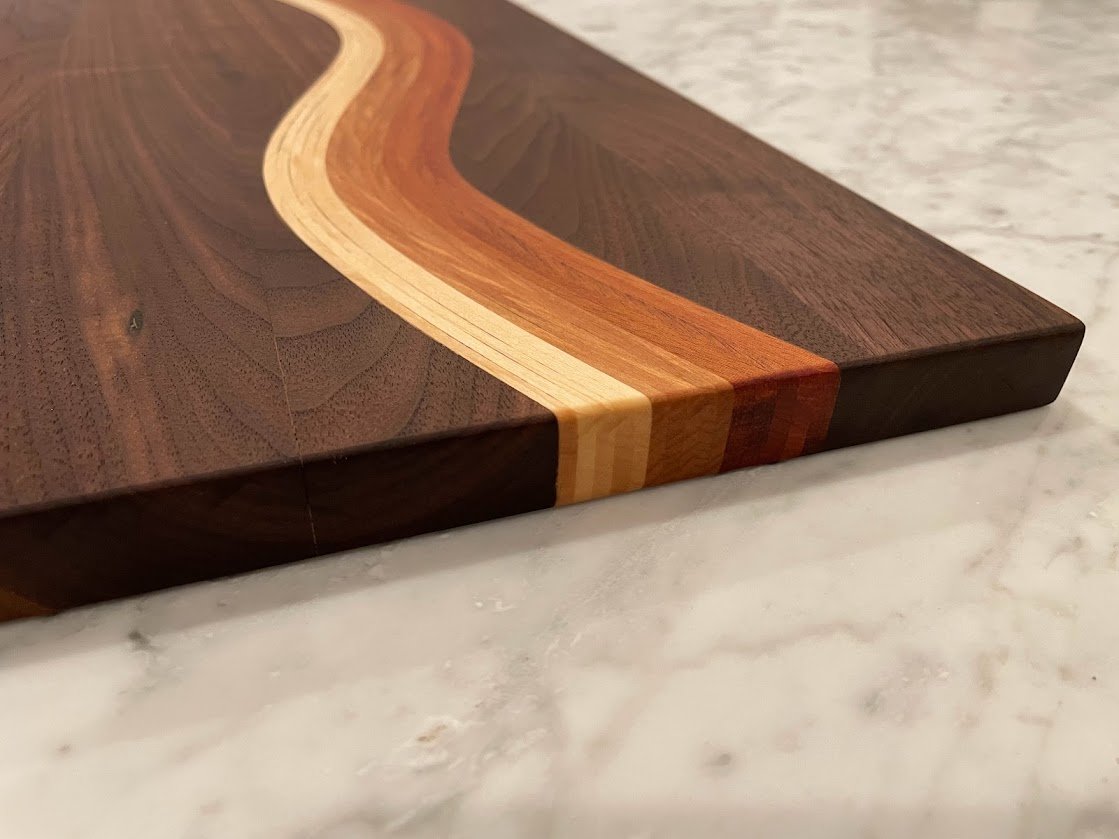
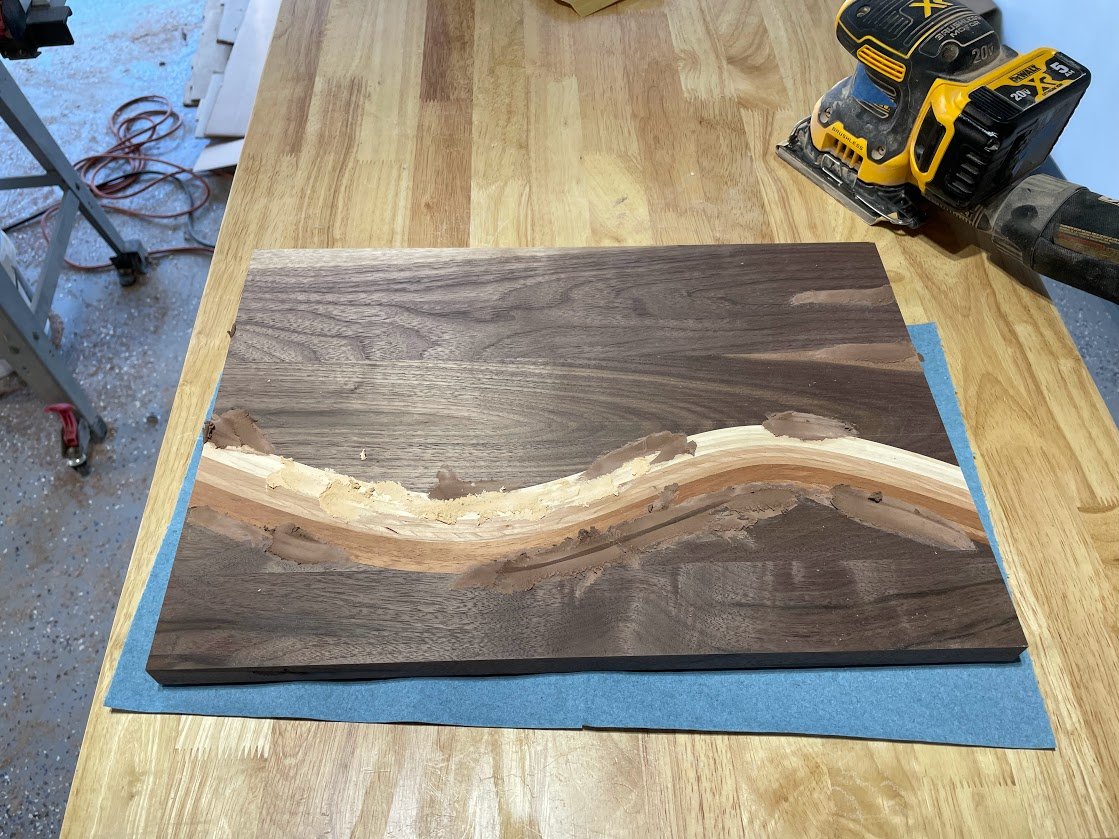
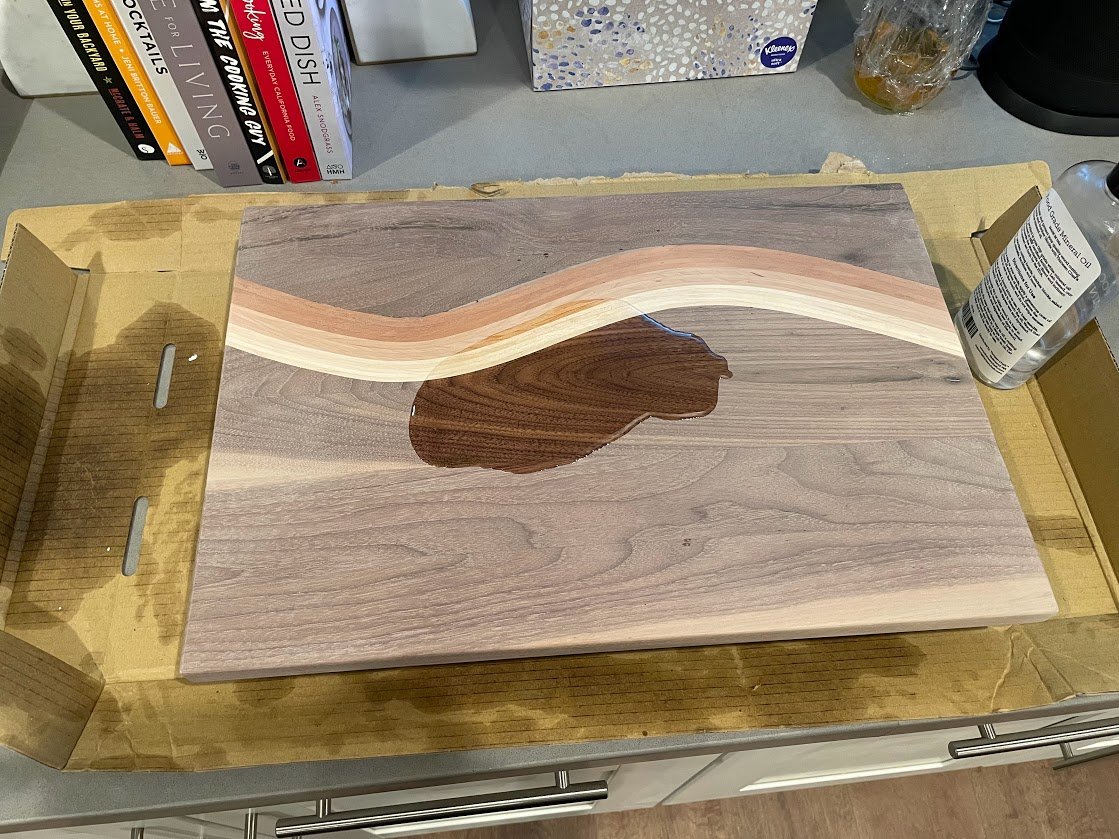
I still had some gaps, especially along the edge where the smaller piece of walnut met the mahogany, so I got out 4 different flavors of wood filler and started filling. I should have been a little more thoughtful with this process. I ended up with some walnut filler in between some of the maple strips by mistake, but it wasn’t too bad.
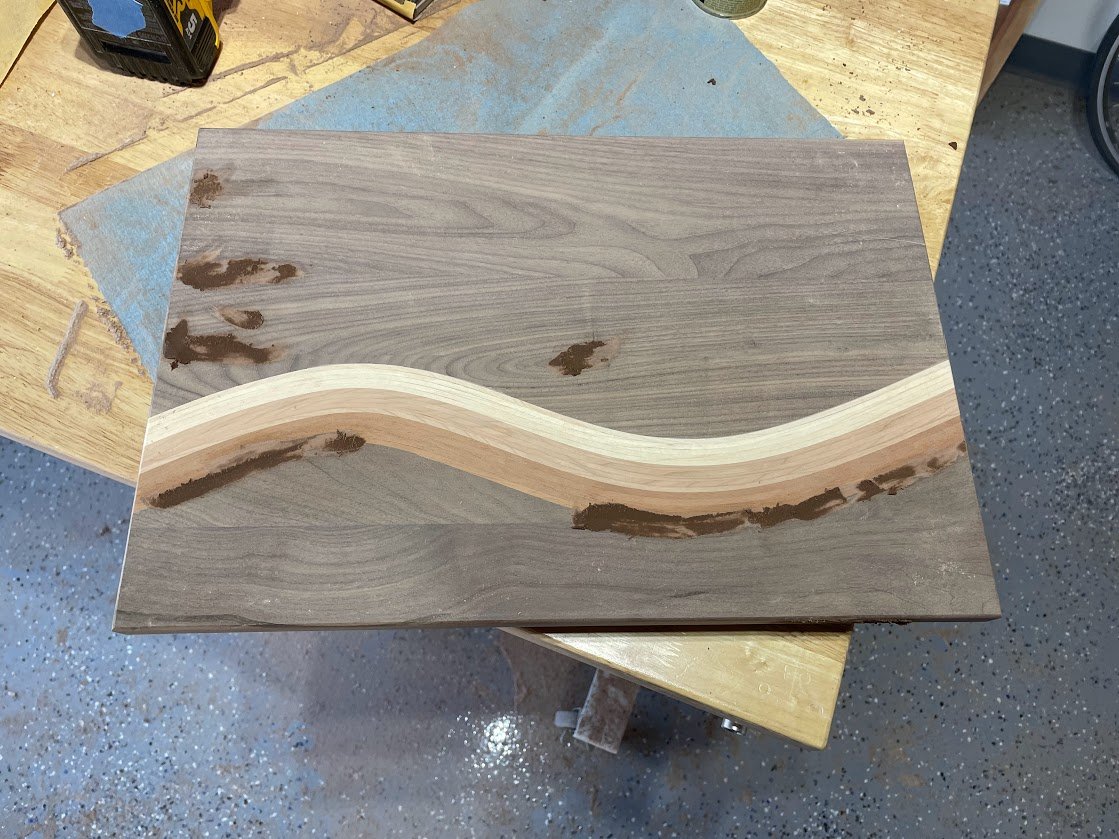
Once the filler dried, I sanded the board down to 150, then 220, then sprayed it with water to raise the grain, sanded again to 220, then hand-sanded to 300 and finally 400. Somewhere in that process I also went over the edges with a 1/8 roundover bit.


Spraying with water raises the grain. Sanding after this step means when the board later gets wet while in use, the surface will remain smooth.
Finally, I rubbed the board down with mineral oil, and then a final coat of butcher block conditioner.
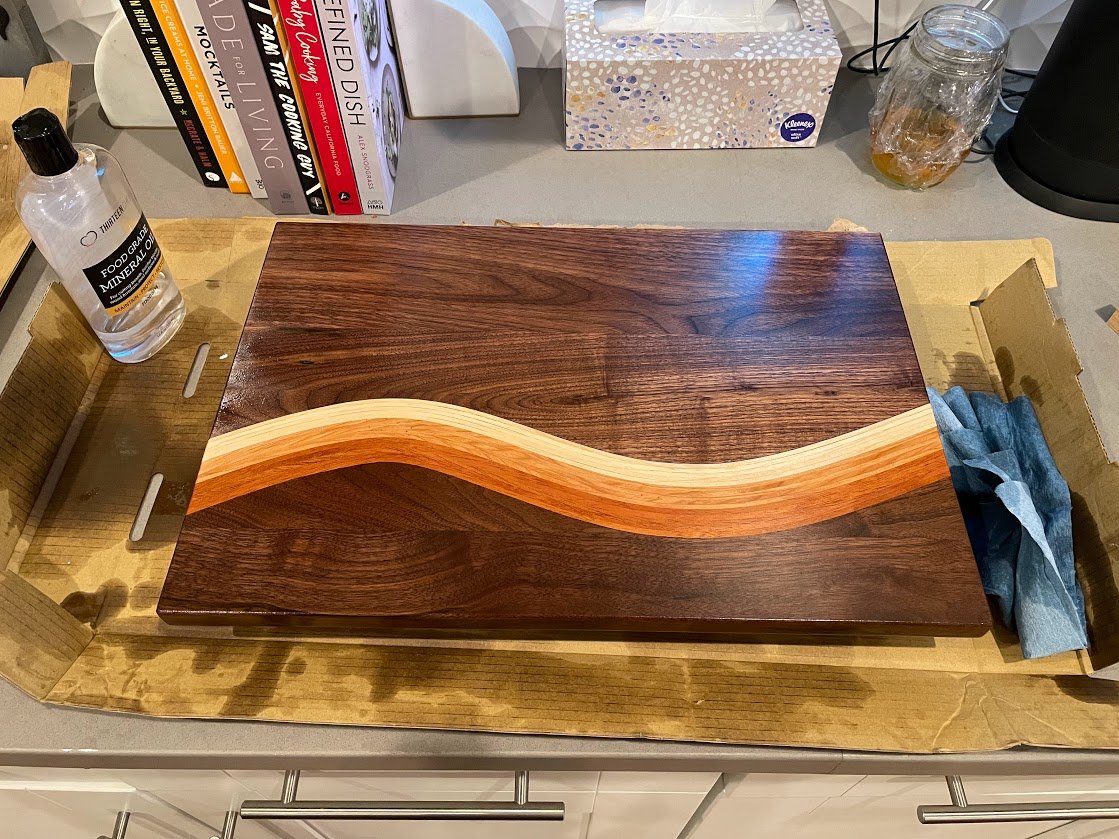
Not bad for a first attempt at this technique!