
Paver Patio with Fire Pit and Outdoor Golf Simulator
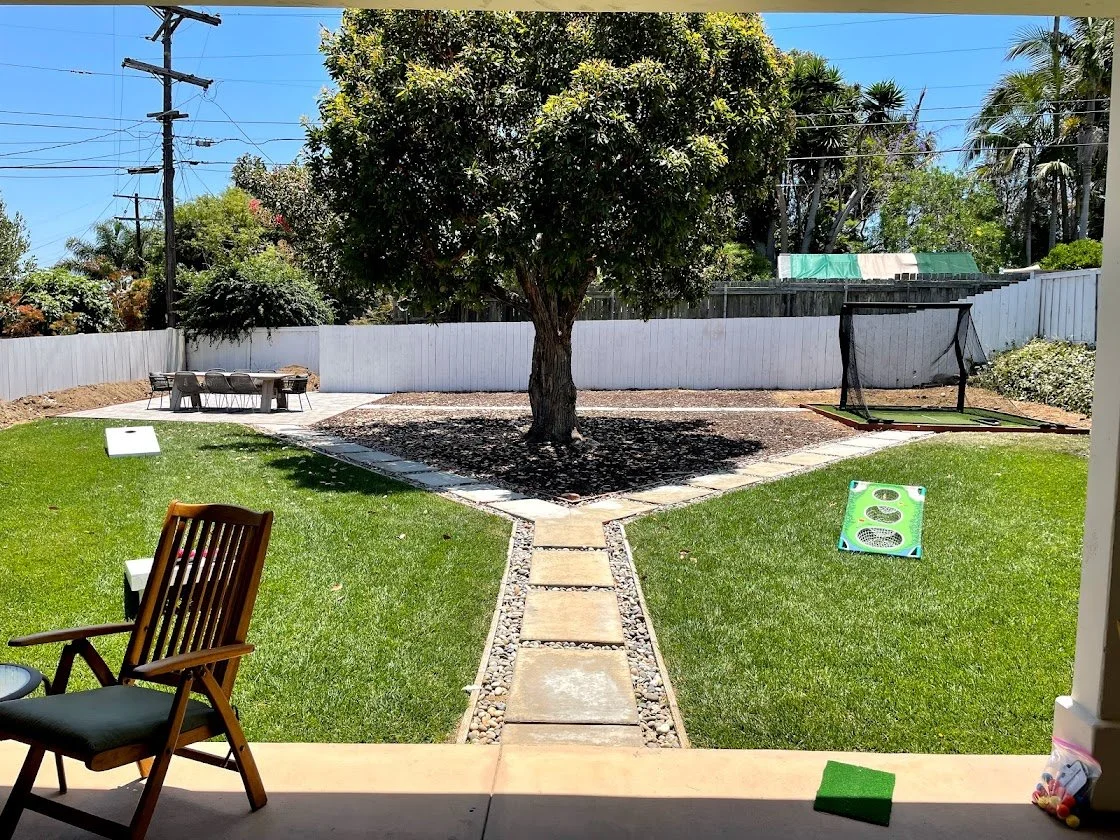
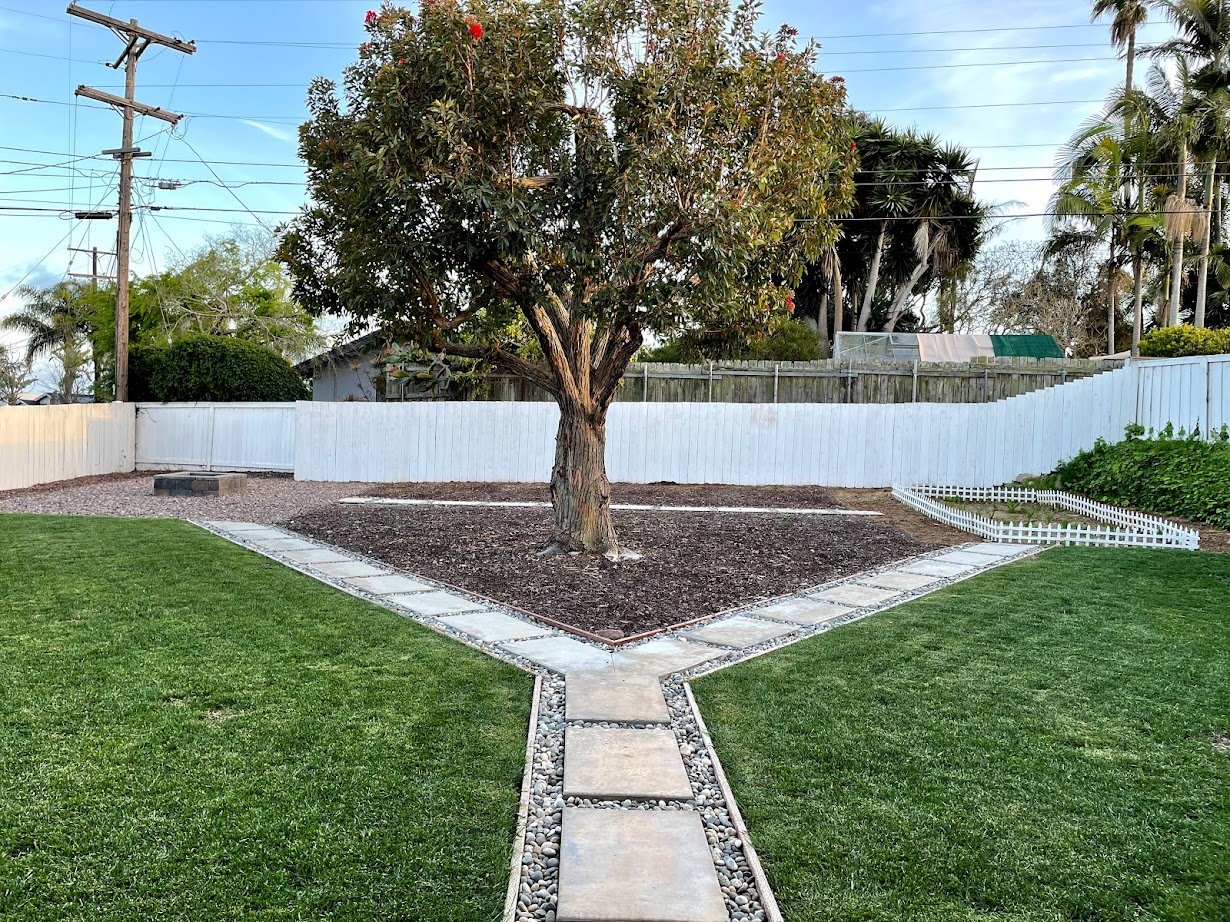
One of the major reasons we bought our house was the big backyard, which held a lot of promise but also seemed unfinished. The yard has a “Y” pattern of pathways around a big tree. It makes it look like pathways are leading towards something at each point of the Y. But when we moved in, there was a pile of rocks on one side and a (confusingly fenced-in) pile of dirt on the other side.
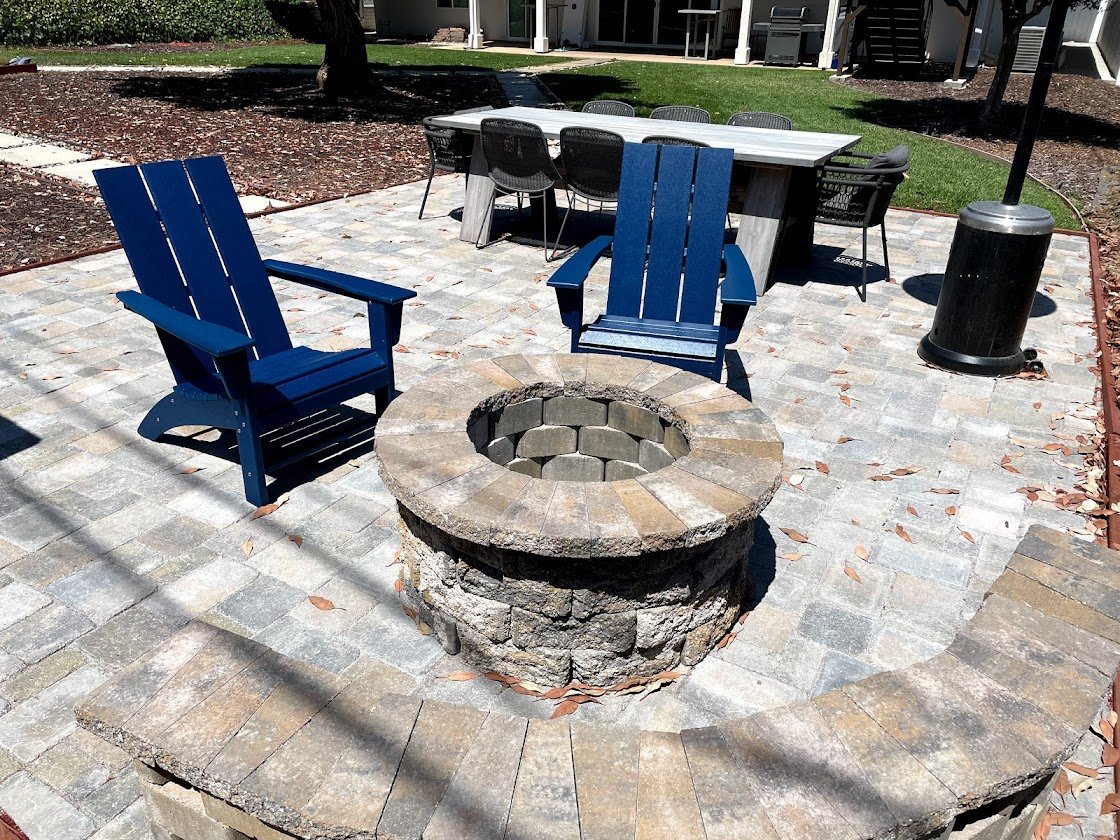
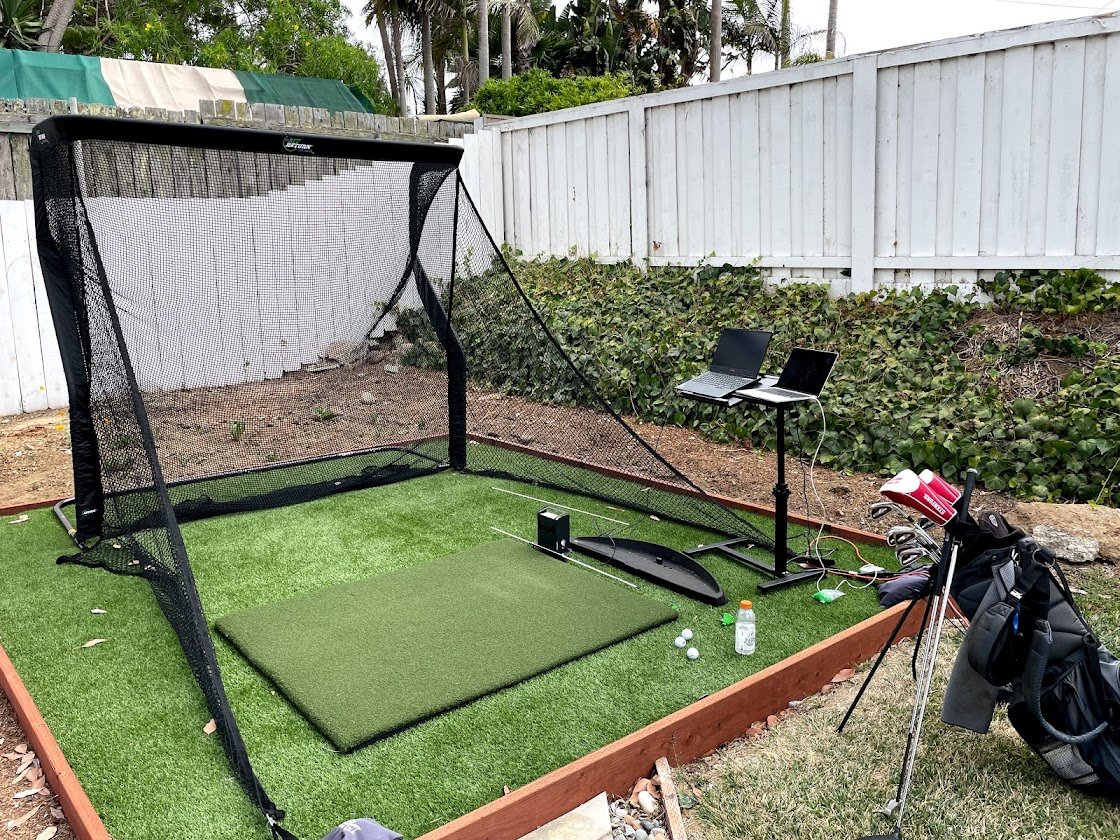
We converted the rock-pile side into this patio made of individual stone pavers with a built-in wood fire pit and curved bench made out of matching retaining wall blocks. This was definitely a massive project in terms of labor and materials (though not in terms of cost), but we are really happy with how it came out. About 80% of the way through that project, we decided to replace the dirt-pile side with a leveled-off turf area which could be used for many purposes but for now is an outdoor golf simulator.
This was one of the few projects where I had the foresight and patience to take some videos, which I assembled together to show the whole progression.


The Process
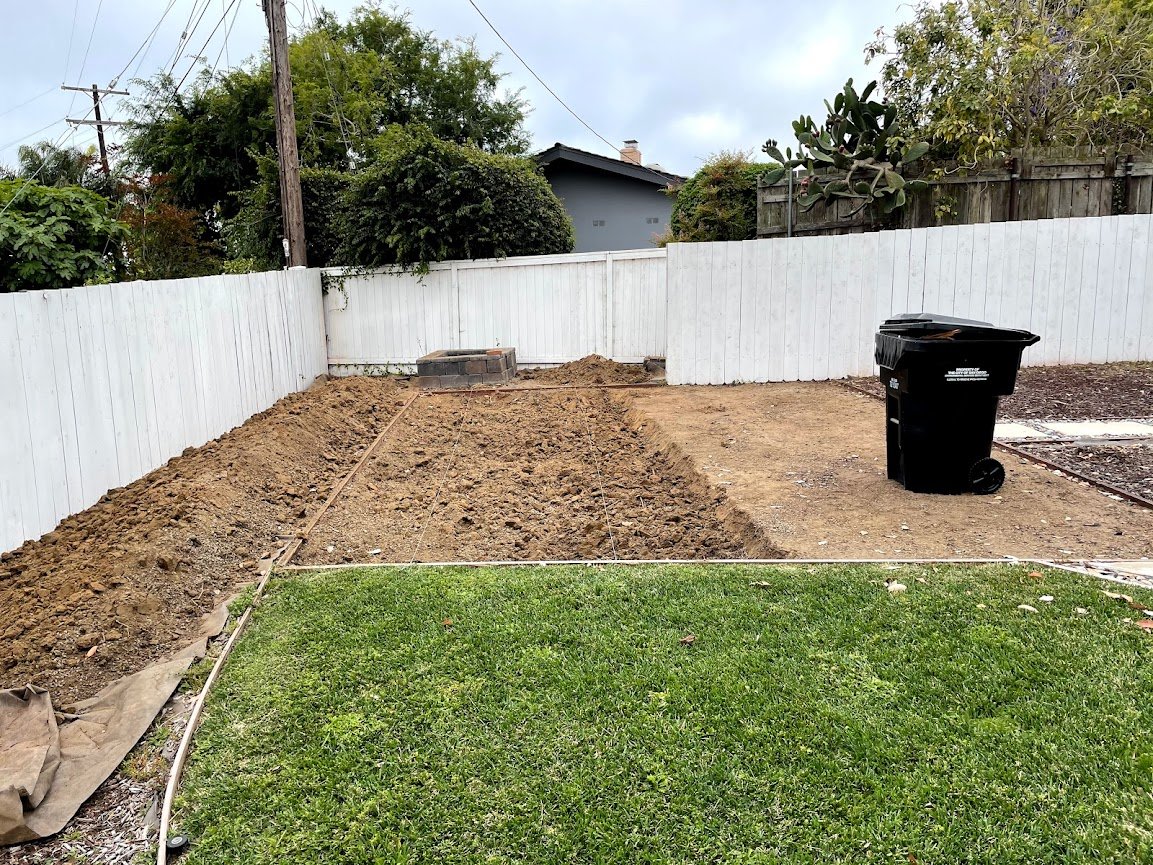
The “before” picture below shows the backyard when we bought the house. (Actually it shows it about 6 weeks after we bought the house, after a massive San Diego storm took down almost the entire back fence and our first project as homeowners suddenly became fence repair.) It seems like someone had grand designs for this backyard, but got stuck part way through.
The left side was nicely partitioned with treated wood barriers, but the rocks and decorative fire pit seemed like an afterthought—probably to make it look better for selling the house. It didn’t seem like the fire pit had ever been used, and it wasn’t really set up practically.
The right side came to be named our “weed garden.” When we first moved in we were confused by the very mini white picket fence surrounding a rectangle of dry dirt. When some weeds started popping up we originally removed them, but then decided to just let everything grow and see what happened. The result was a lot more colorful and vibrant than we expected. Clearly someone had a curated garden going here at some point.


We talked about a lot of different possibilities for these two areas. After a couple months we had seen that the left side got the most sun, and we knew it was completely impractical in its current state—the rocks couldn’t really support any substantial furniture and weren’t comfortable to walk on. We wanted another spot to hang out outdoors and thought it would be nice to have a leveled-out patio in the spot. After some research I decided it was within my capabilities and put together a rough plan.
The first step was to get rid of all of the decorative rocks. I wasn’t really sure how I was going to dispose of all of them, but then had an idea that we could relocate them to the courtyard between our house and garage. At the time, it had some decidedly-less-decorative gravel that we didn’t really like. We’re pretty sure we want to do something more drastic with that space down the line, but moving the rocks there for now made them future Scott’s problem. The fire pit came apart relatively easily, and I just moved it over to the side. We thought there was a chance we might reuse it on the new patio.


Those two pictures really make this part look fast and easy. It wasn’t.
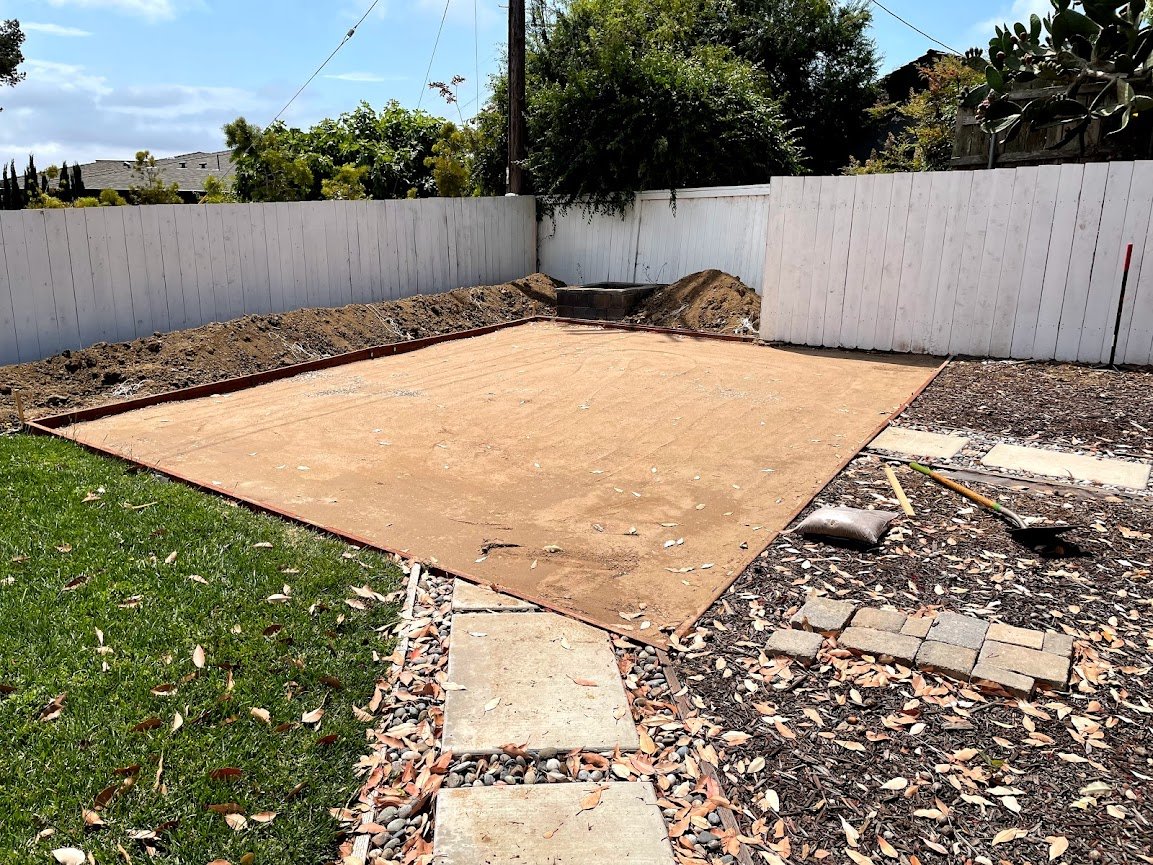
The next task was to excavate about 6-8 inches of dirt. Everywhere I researched said this was critical to making sure the patio had a solid foundation. With the project behind me now, I’m not sure I’m convinced this was completely true, but we’ll never know. I think if I had to do it over again, I would have taken something like 2-4 inches instead. The dirt was already pretty solid and compact (and as you’ll see later, I basically just replaced it with other dirt), so I think it would have been fine. Oh well.
As I slowly made progress, I put lines from front to back so that I could tell roughly how deep I was getting in the middle sections. I was also slowed down by having to remove a bunch of roots that I encountered.
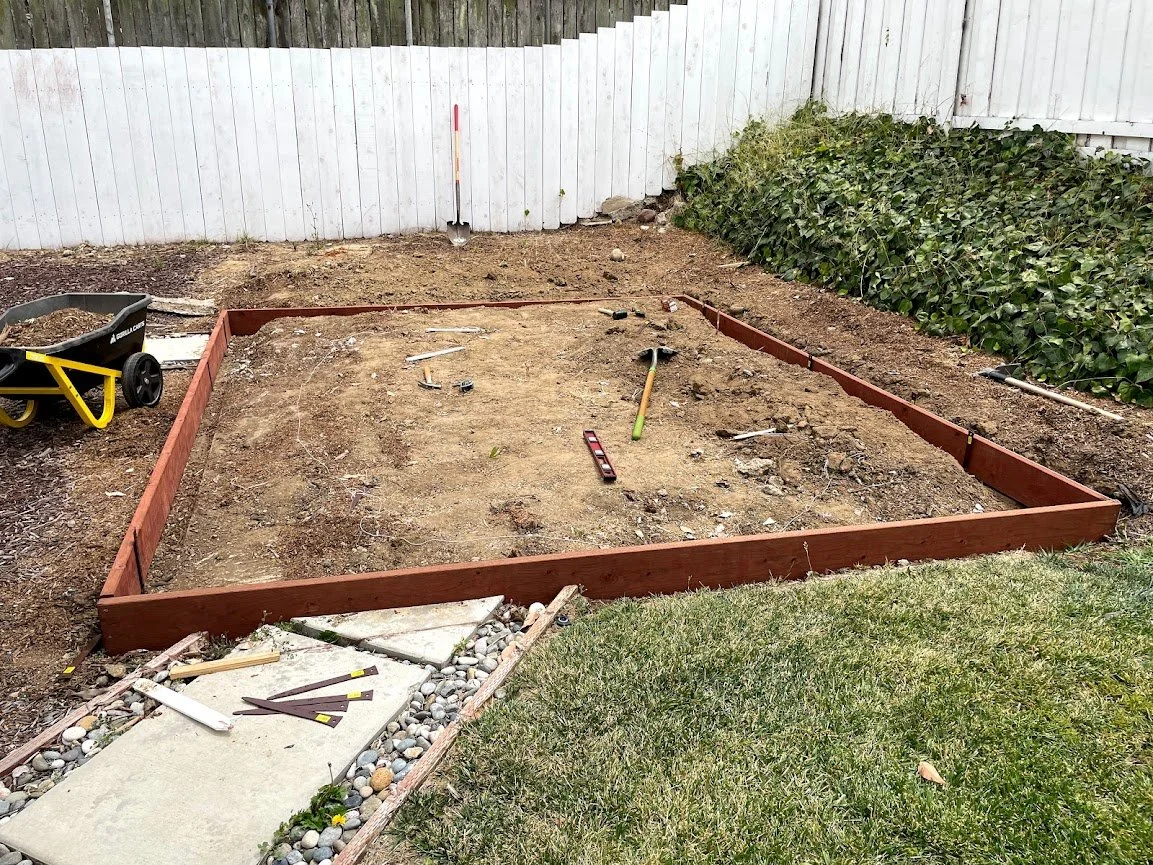
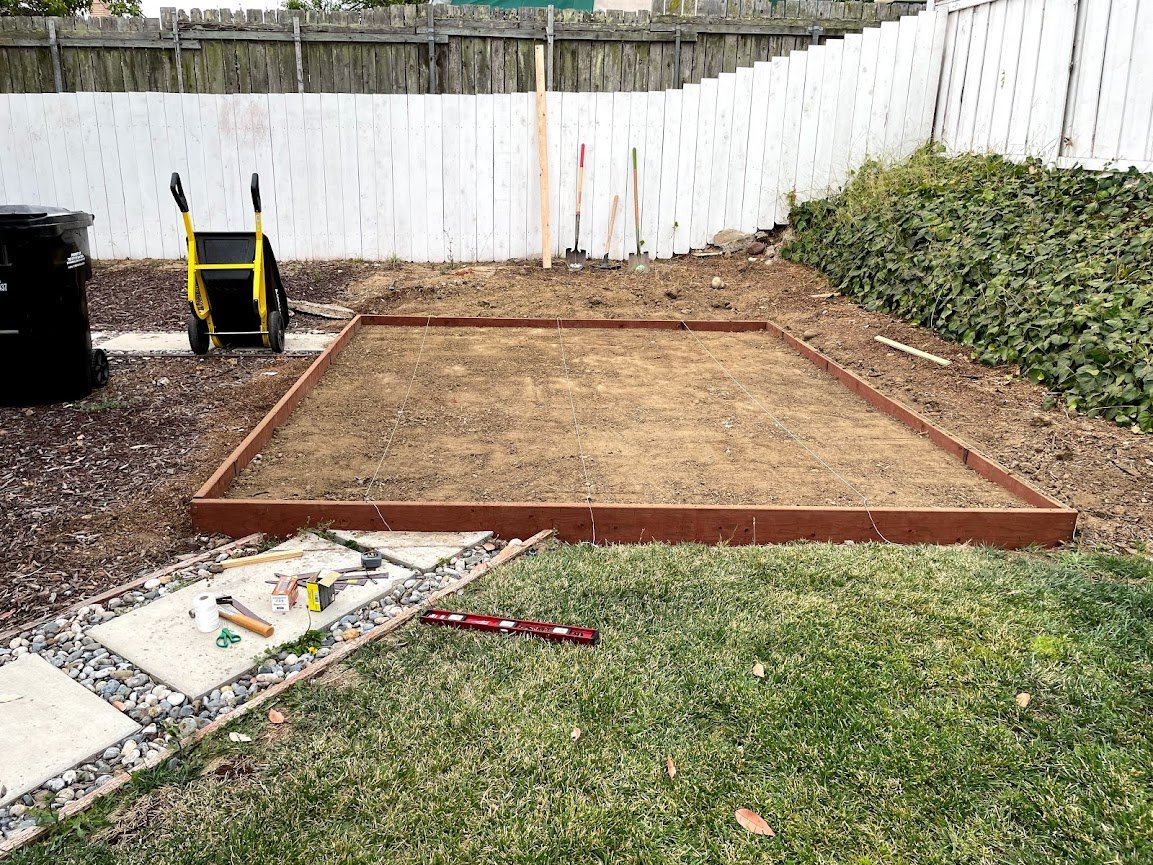
With the dirt removed, I added lines of string going horizontally as well to create a full grid, and then went through and tried to get the dirt layer roughly level and compact. I knew it wasn’t critical to have a completely level surface at this point and it would be easier to manipulate the layers that would go on top of the dirt, but I also thought it would make the future layers go down easier if this one was relatively flat. I just used a hand compactor for this stage, mostly because I was trying to get away with only renting the big plate compactor a single time.

This step also cleared dirt away from the wood edging and revealed that they were pretty rotted out. So I decided to remove them and replace them. Though they were all originally 2x4s (so 4 inches high), I replaced the left side with 2x6s to increase the height of that side and make the whole thing a little more level from side to side. In the front, I cut a 2x6 at an angle so that it sloped up from 4 inches to six inches. I wish I would have known I was going to do this ahead of time, because it basically meant I had removed about 2 inches more dirt than I needed to on the left half of the whole area.


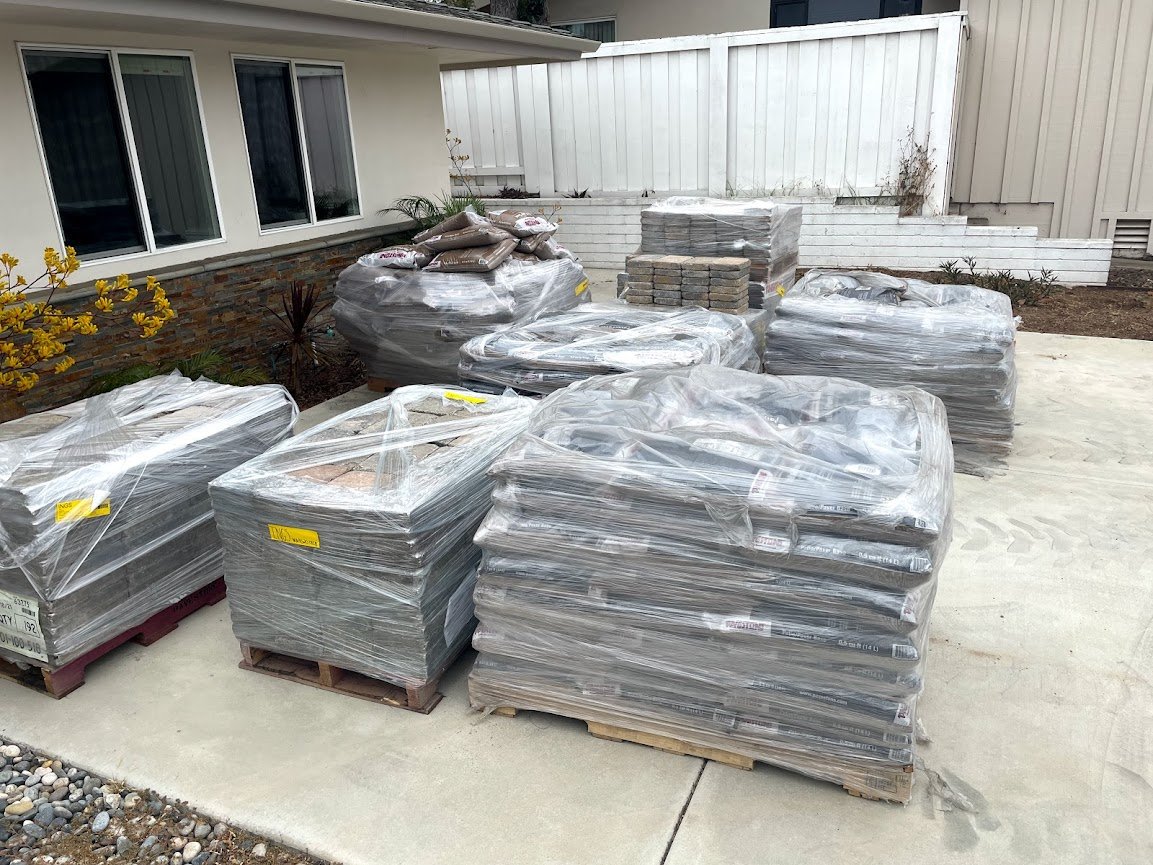
In the middle of this work I got a major delivery from Home Depot which included the gravel base layer, sand layer, and the pavers. I wasn’t really sure how all this was going to be delivered (and why it was only $80 delivery), but I figured they wouldn’t offer it if they didn’t know what they were doing. It ended up being an incredibly smooth process involving three trucks and two super-efficient forklift drivers, who quickly deposited everything on the top of my driveway.

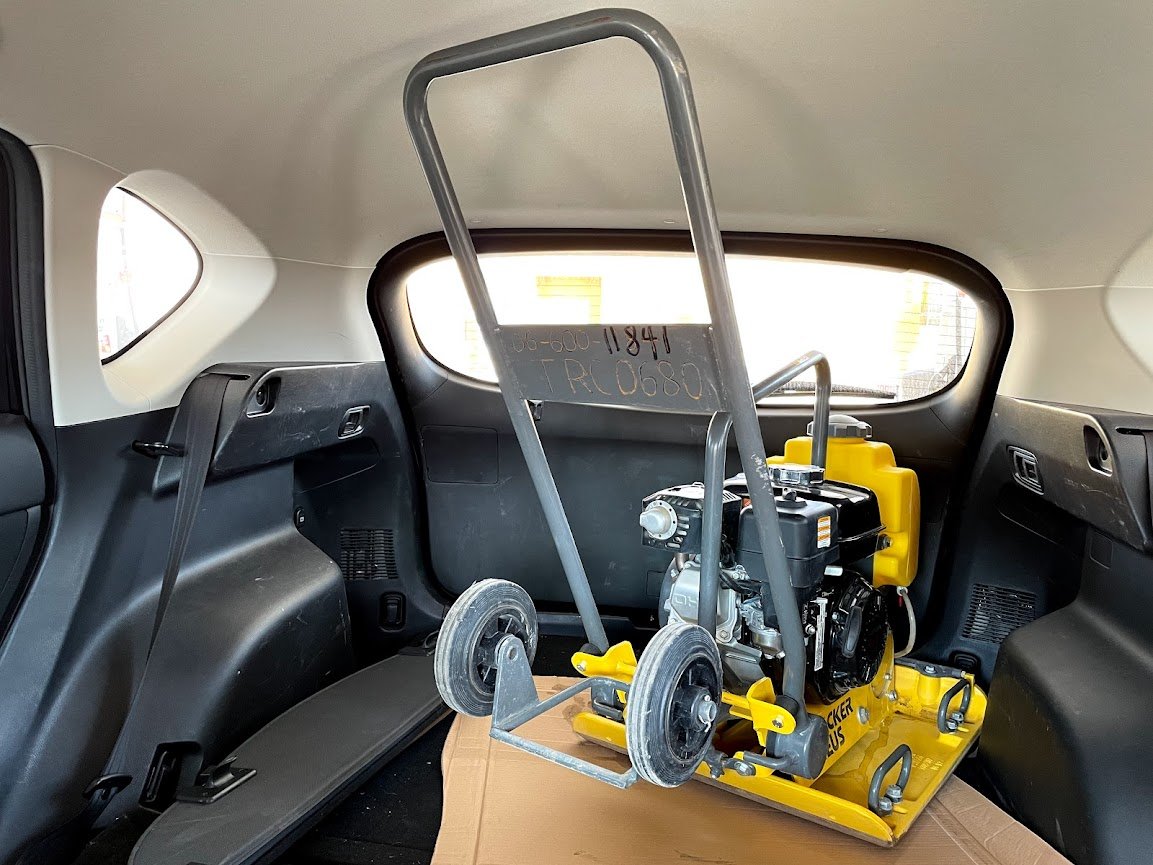
With the materials for the next layers in hand, I took the plunge and rented the massive plate compactor. While I’m always looking for an excuse to buy a new tool and am hesitant to rent, this is a heavy, expensive, bulky machine that only serves a single purpose, so I had to make an exception. It weighs about 180 pounds, and its job is to convert gasoline into hitting the ground really hard. I was naively optimistic that I could rent it for 2 days, fill and compact all 3 layers, and be done with it forever.
I started on the dirt layer as a base. After my first run kicked up a ton of dust, I watered everything down with the hose and then ran it again. This worked great until the very end when the plate started to accumulate some mud and slowed down, but it got the job done. The other benefit of the plate compactor is that it creates some super-satisfying time lapse videos.
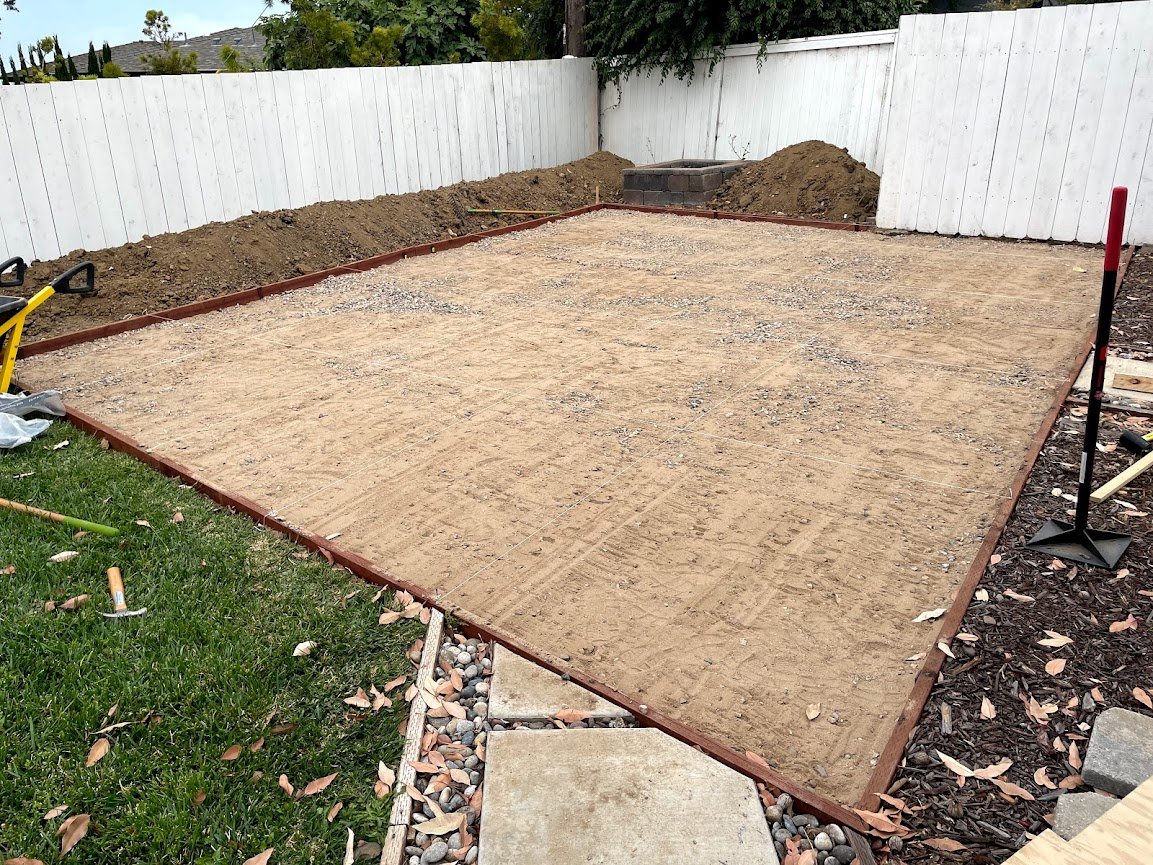
Once the dirt was compacted, I put down a layer of weed barrier fabric to keep anything from growing up under the patio. This was pretty straightforward other than having to maneuver the plate compactor out of the way since I couldn’t easily lift it back over the barrier.

With the barrier down, I started filling in the layer of “paver base” which is basically crushed gravel. It was at this point that I noticed that the “crushed gravel” I was filling the hole in with looked very very similar to the “dirt” I had dug out to make the hole. In retrospect, I probably should have ordered this stuff by the yard instead of by the bag as well, but it was all new to me. I also knew I had under-ordered with my first delivery, but at this point I realized that I had woefully under-ordered. After dumping and spreading my initial 160 bags of dirt, I went and ordered another 220. My dreams of a single rental period for the plate compactor were shattered.

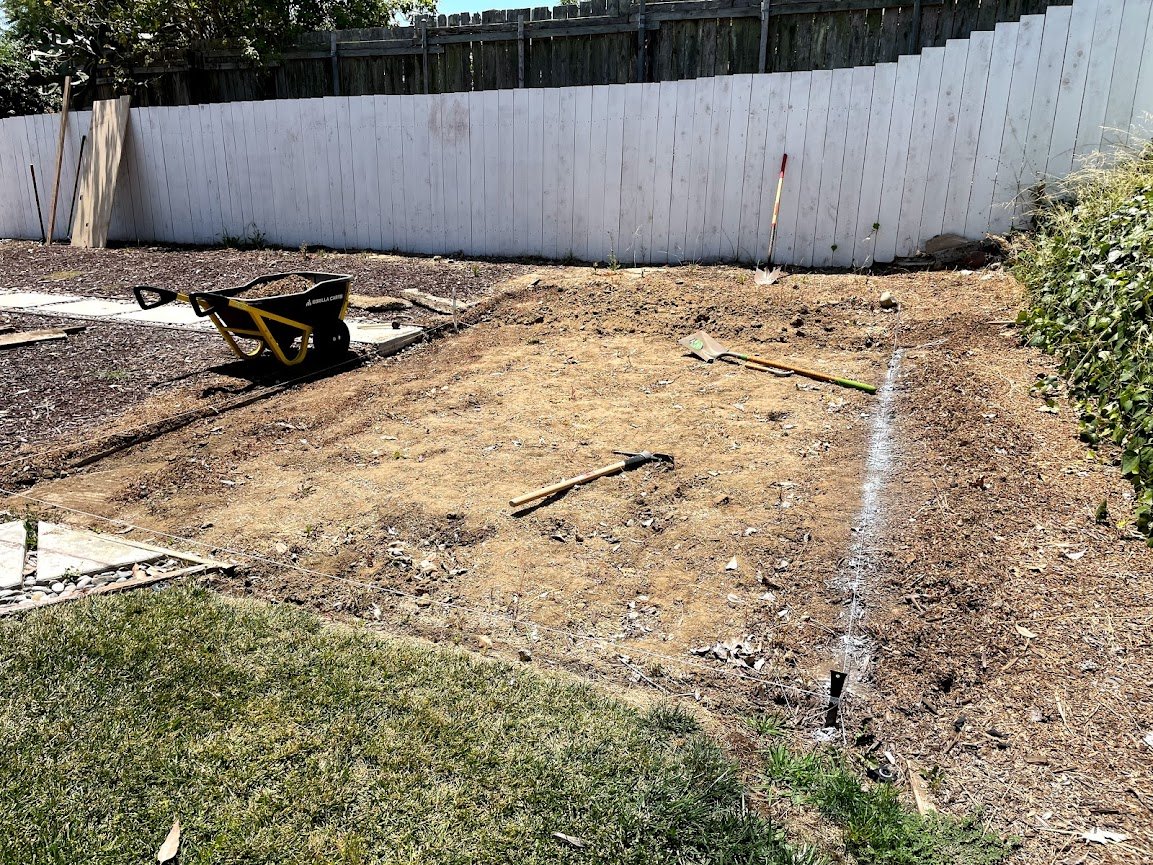
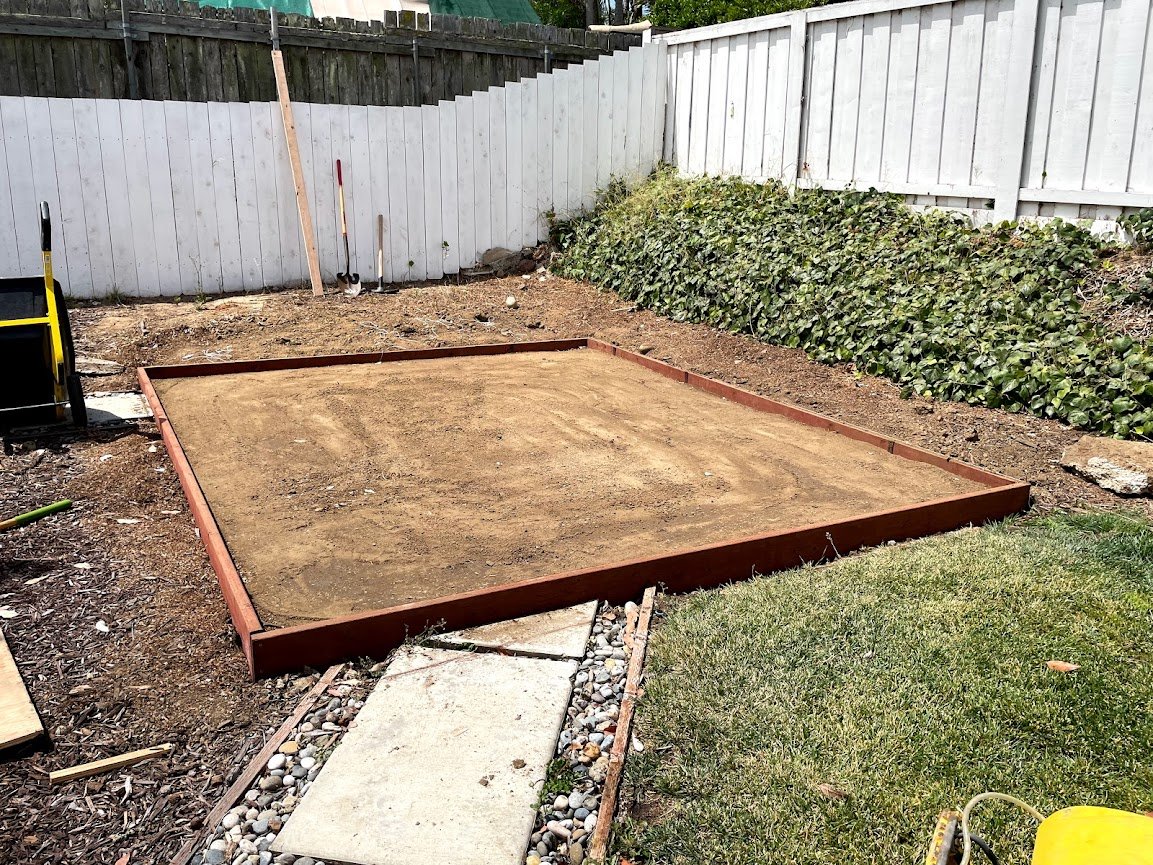
With a forced pause while I waited for delivery, I turned my attention to the other side of the yard. My good friend Dave had recently put a golf simulator in his basement and had been loving it, so I did a little research and decided to put an outdoor version in. I wasn’t sure how much use it would get, but Briana and I agreed that regardless it would be nice to have a cleaned-up, leveled-off area on that side of the yard that could later be used for whatever we wanted. I figured since I was already in excavation mode, now was the time.
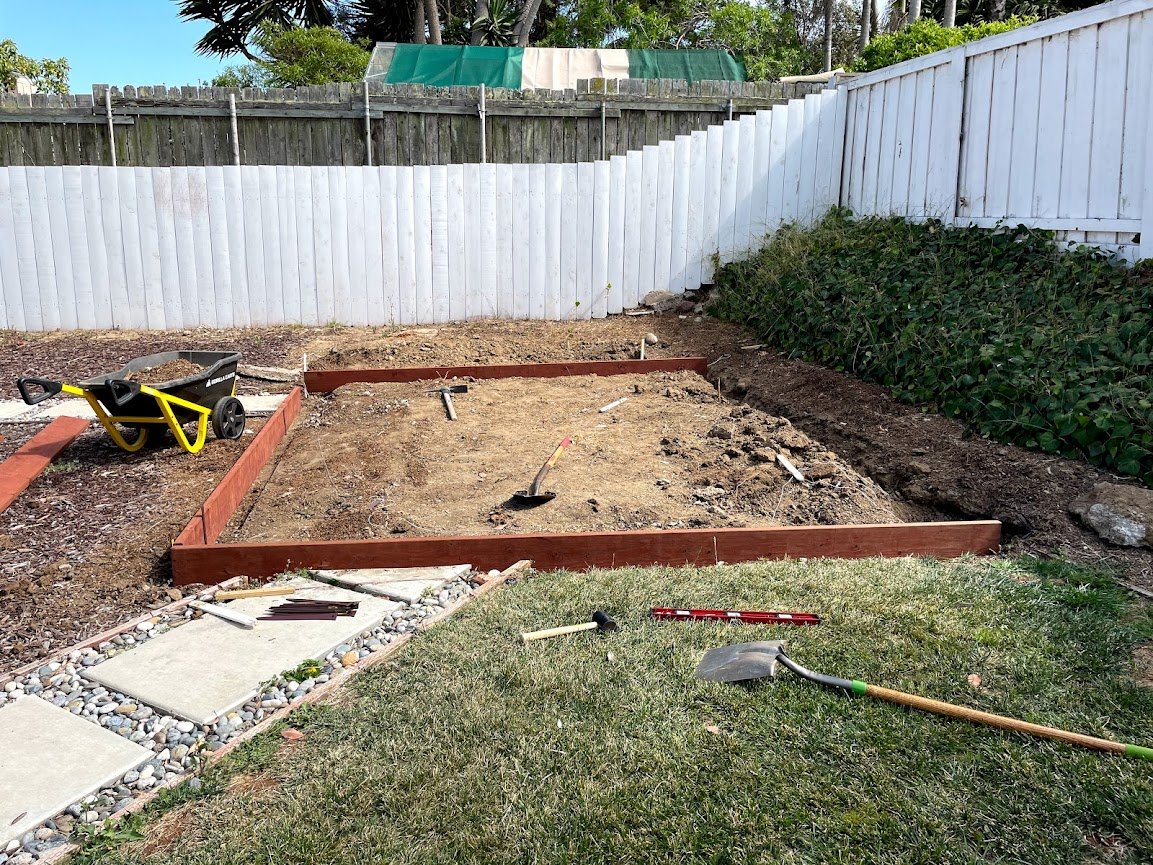
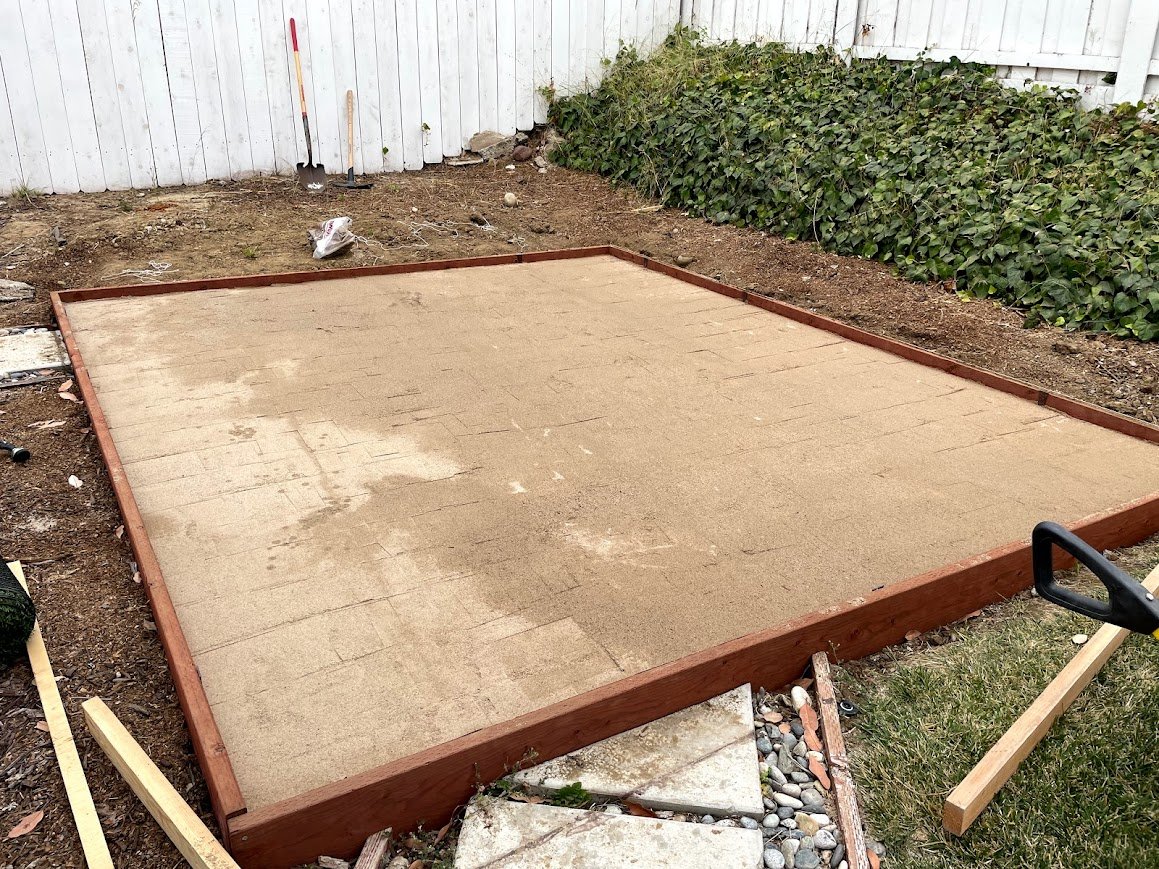
Unlike the patio area where I kept the existing slope from back to front, I wanted this area to be completely level. That meant only a little bit of digging in the front, but a lot of digging in the back. This side did not have the wooden barrier built in already, so my first goal was to dig a trench all the way around and put in a border that was level in both directions. I ended up deciding that the front would actually need to be raised a little bit so that the back edge was high enough to keep the dirt on the outside at bay. Once I had the borders in as reference points, I moved dirt from the back to the front in order to have the whole thing flat at about 2-3 inches below the top of the barrier.
With more gravel base delivered, I went back to the other side and finished backfilling. I actually ran out again at the very end. At which point, I said “the hell with it”, and mixed back in some of the dirt I had removed to fill some of the low spots. Then I took a 2x4 as a “screed” (new word that I learned in this project), which I raked over the gravel layer to get it flat and even.
With both sides ready for the top layer of sand, I went back to HD and rented my friend the plate compactor again, and compacted both areas.
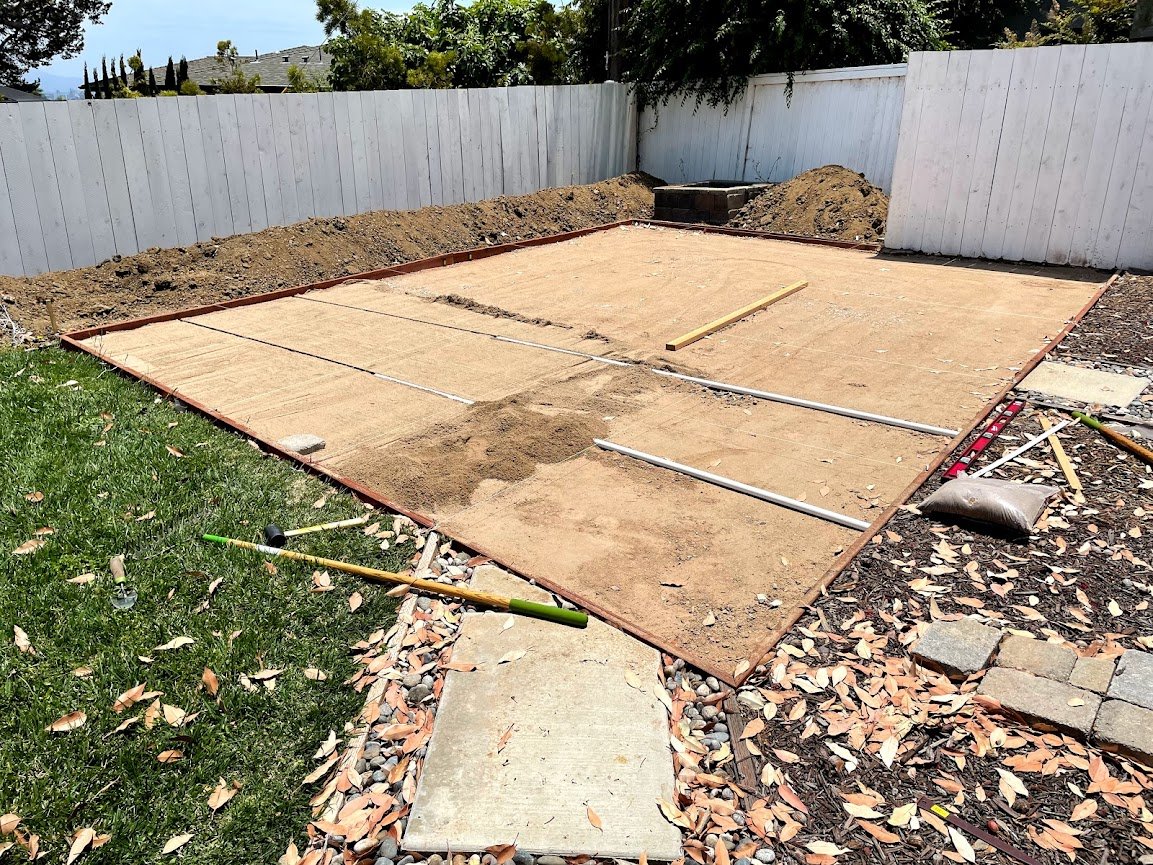
That layer done, I was ready to lay down a layer of sand. This was the level that would get everything truly flat and even for the pavers to sit on. The method I had seen watching others was to lay down PVC pipe of the thickness of the layer (in this case 1 inch). Once you have the pipe level and even—which required digging holes or trenches in some areas and building up mounds in others—you use the pipes as a guide for the screed (there it is again). That means that you may not have a consistent 1-inch of sand everywhere, but the top of the sand should be very flat and level at the desired height. Then you just need to remove the pipes and fill in those gaps. This worked pretty well. I think it would have been better if I was using three pipes instead of two.
Rather than do the whole layer of sand and then start laying pavers, I decided to do both a section at a time. I can’t remember why. Maybe I just wanted to finally see some pavers on the ground after all this work.
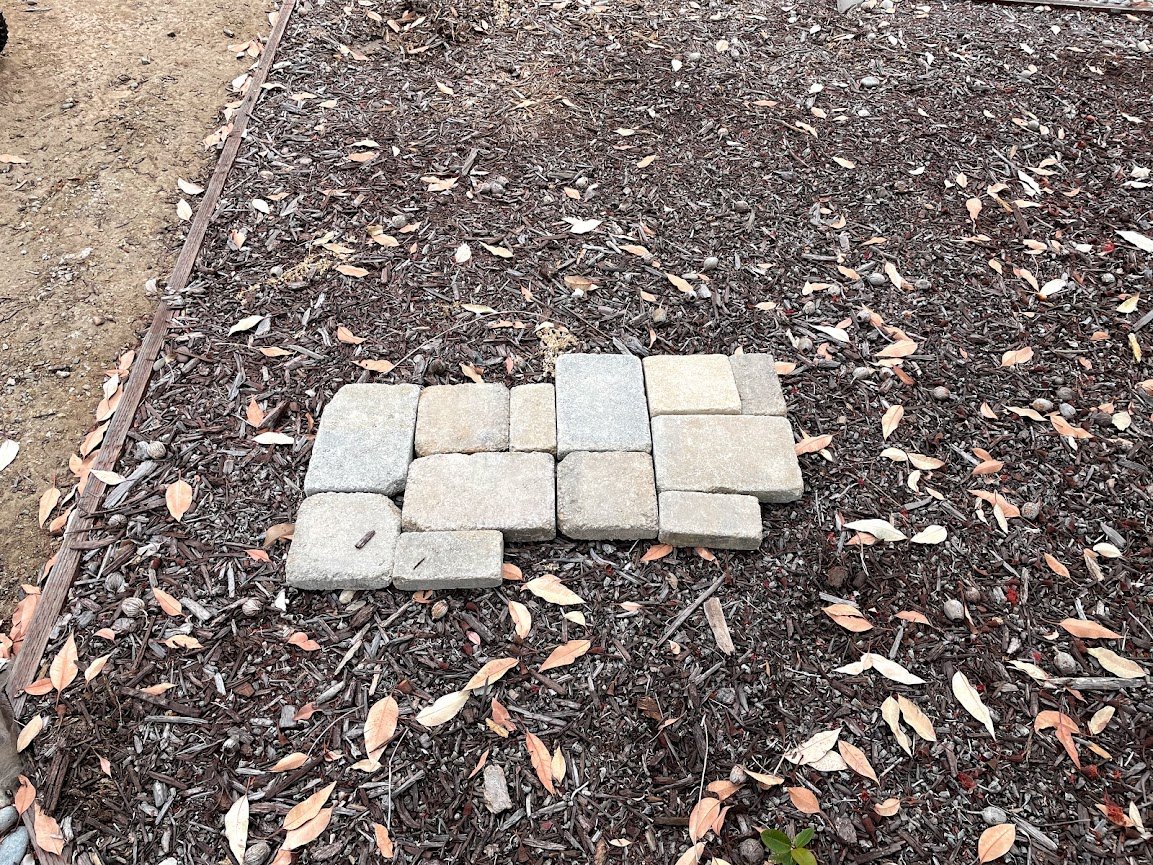
The paver pattern that we used involved three paver shapes in an offset repeating square. We liked it because it created more of a “random” feel without lots of straight lines. Laying the pavers down was pretty straightforward. I chose the right edge of the patio to use as a reference point for a straight line (the area was closer to a parallelogram than a rectangle and had no 90 degree angles), and started laying down the pavers on the sand. Any high points were hit down with a rubber mallet. In the first pass, I didn’t worry about the edges—if a full-sized paver couldn’t fit in the space up against a border, I just left it empty for the time being.
As I got closer to the far side, I was able to see that I was again short on materials. This time it was close enough that I was able to run over and grab them myself. I also took this opportunity to buy a big roll of artificial turf for the other side.


Once the area was completely filled in, I started working on the edges. These were all irregular and so would require cutting pavers. At first I used my circular saw with a masonry blade. This worked, but wasn’t super accurate and felt a little unsafe given the small size of the pavers. So I put the blade on my table saw and this worked great. The saw took a bit of a beating (and I don’t think I would do it again on my new one), but it cleaned up pretty well. To help with the dust, I got the pavers wet before cutting them. Obviously a tile saw would have been the right tool for the job, but I didn’t want to invest in buying or renting one for this small of a job. One by one, I cut and filled in the edge pieces until the paver layer was complete.


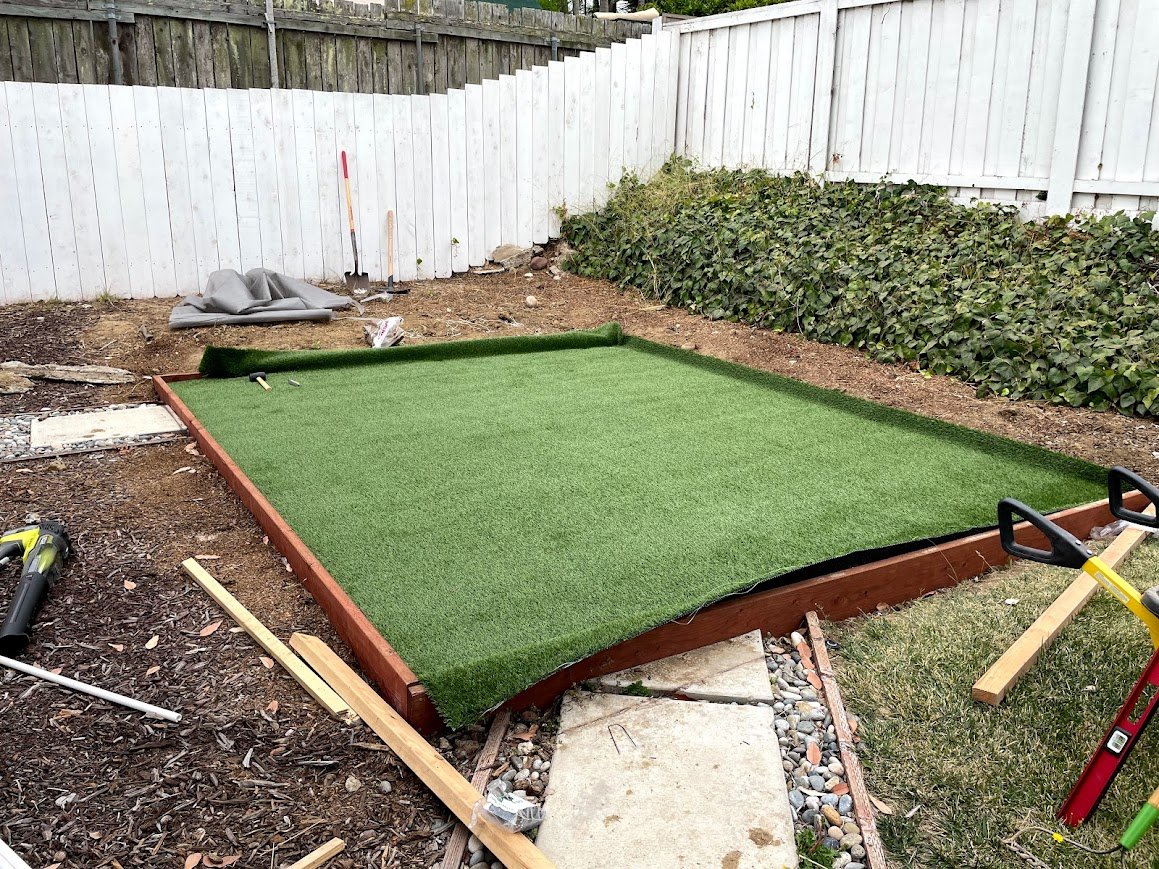
Back to the other side, I used the same method with the PVC pipes to put a layer of sand down. For this side, I didn’t do the gravel base layer, instead just putting the sand down right on top of compacted dirt. This side was going to have a lot less weight on it (turf instead of pavers), so I figured I’d be fine. I then filled in the gaps the pipes had left, and put down a layer of weed barrier. I could have put this on the dirt layer instead, but my thinking was that it would be a nice barrier between the sand and the turf.


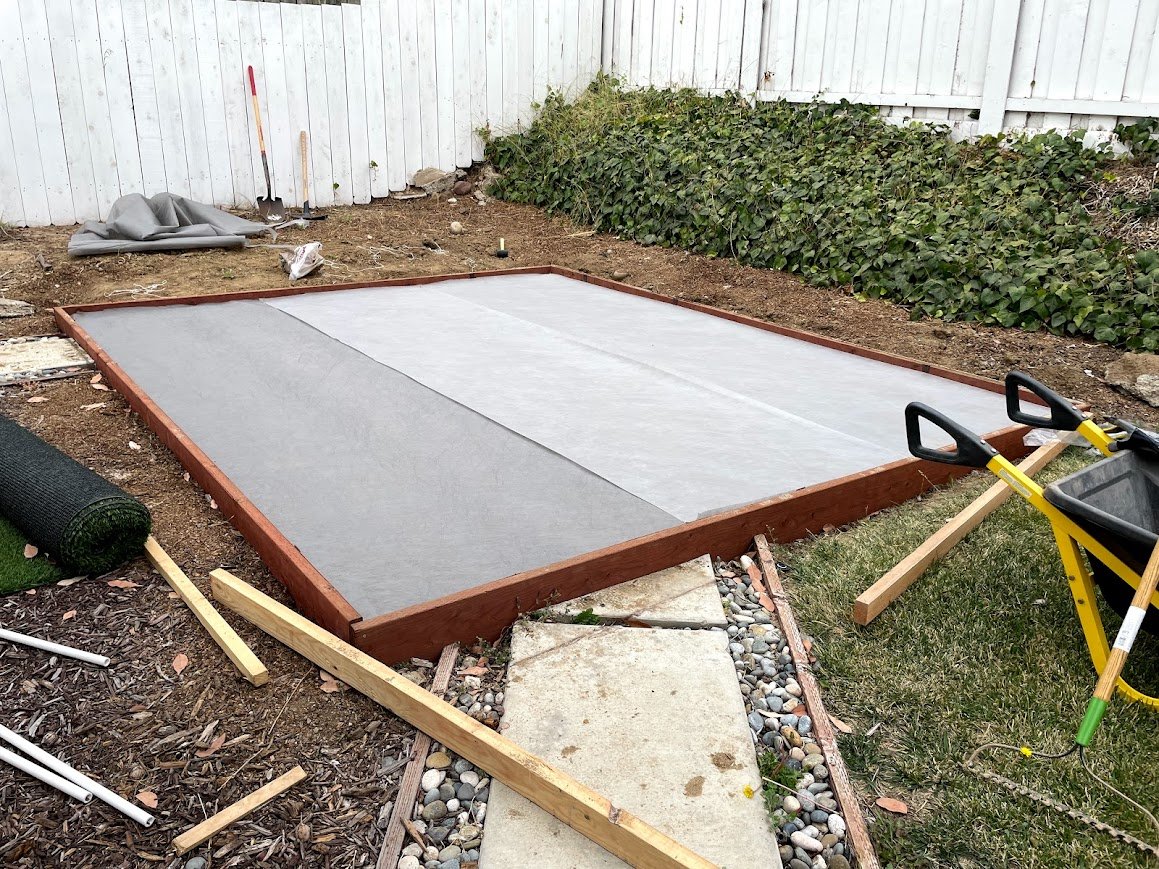
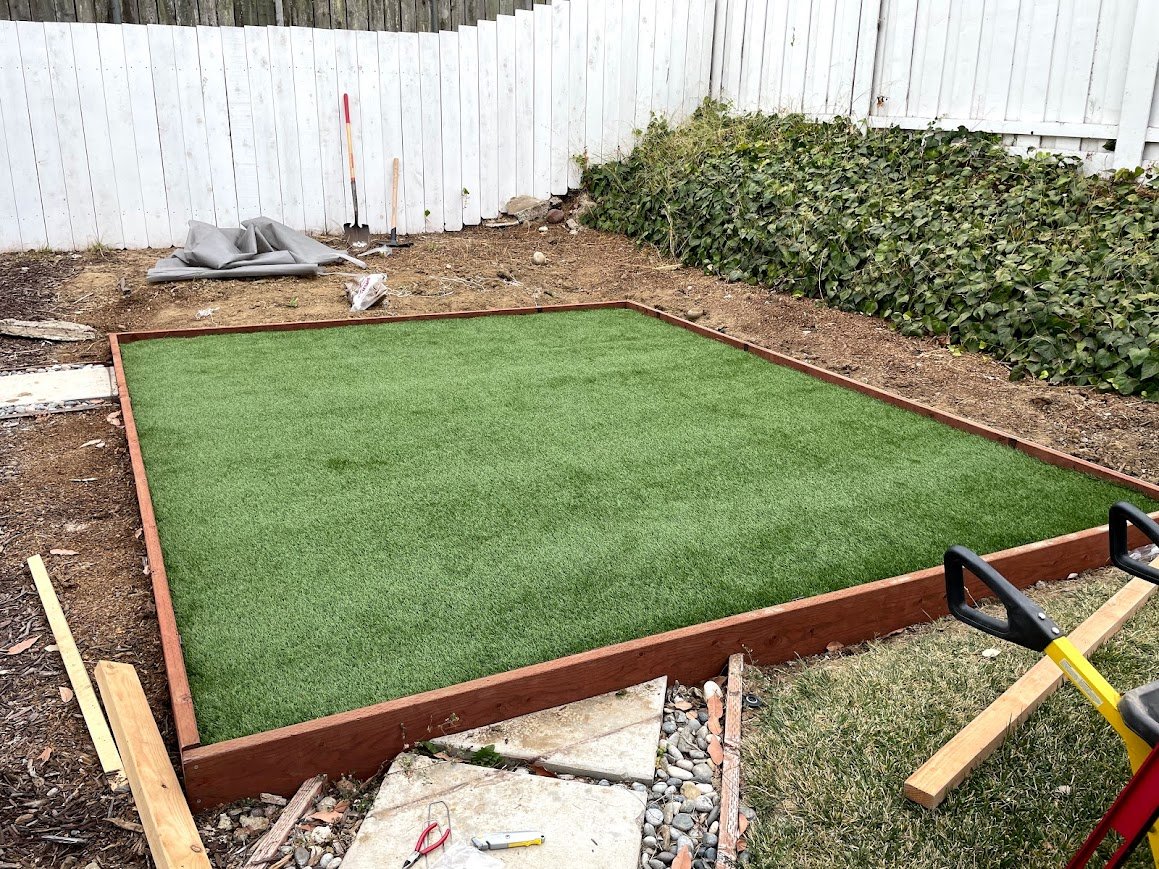
I then put the turf down using turf staples along the edges, and came back and trimmed along the borders with a carpet cutter, and construction on that side was complete!
While I was working on the right side, I was waiting for a big order of polymeric sand from Black Diamond. Polymeric sand, I had read, is the best way to fill the cracks between pavers. It goes in dry, but when wetted, it expands and solidifies into more of a grout than a sand. This sounded way better than dry paver sand which would erode over time. I tested a sample in the corner and then ordered 8 more buckets to do the whole thing. The process involved spreading a bunch of sand, brushing it into the cracks, using the hand compactor to make sure it was settled (I wrapped it in a towel to prevent any damage to the pavers), brushing away the excess, and then hosing the whole thing down. I did it in rows of about 4-5 feet at a time. Having learned my lesson on materials, I bought WAY too much of this stuff and still have 3+ full buckets if anyone needs any.
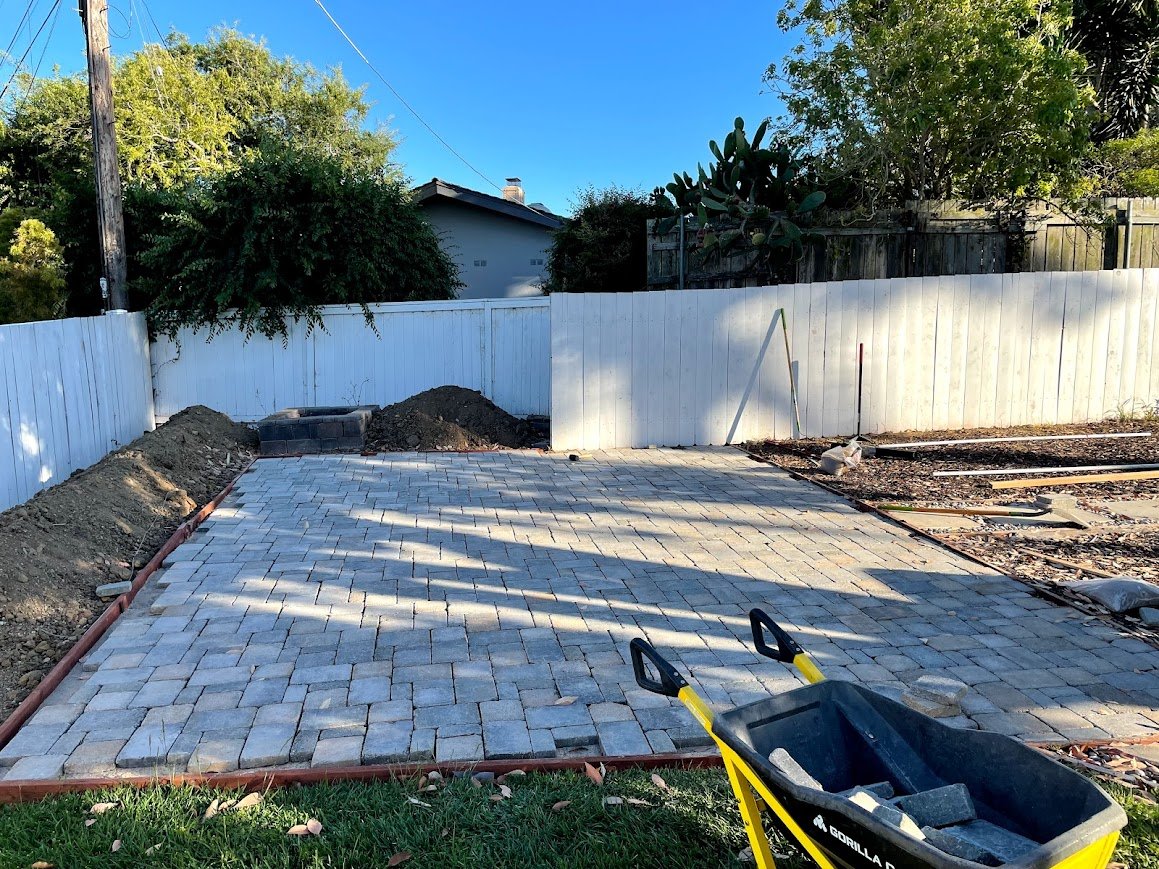
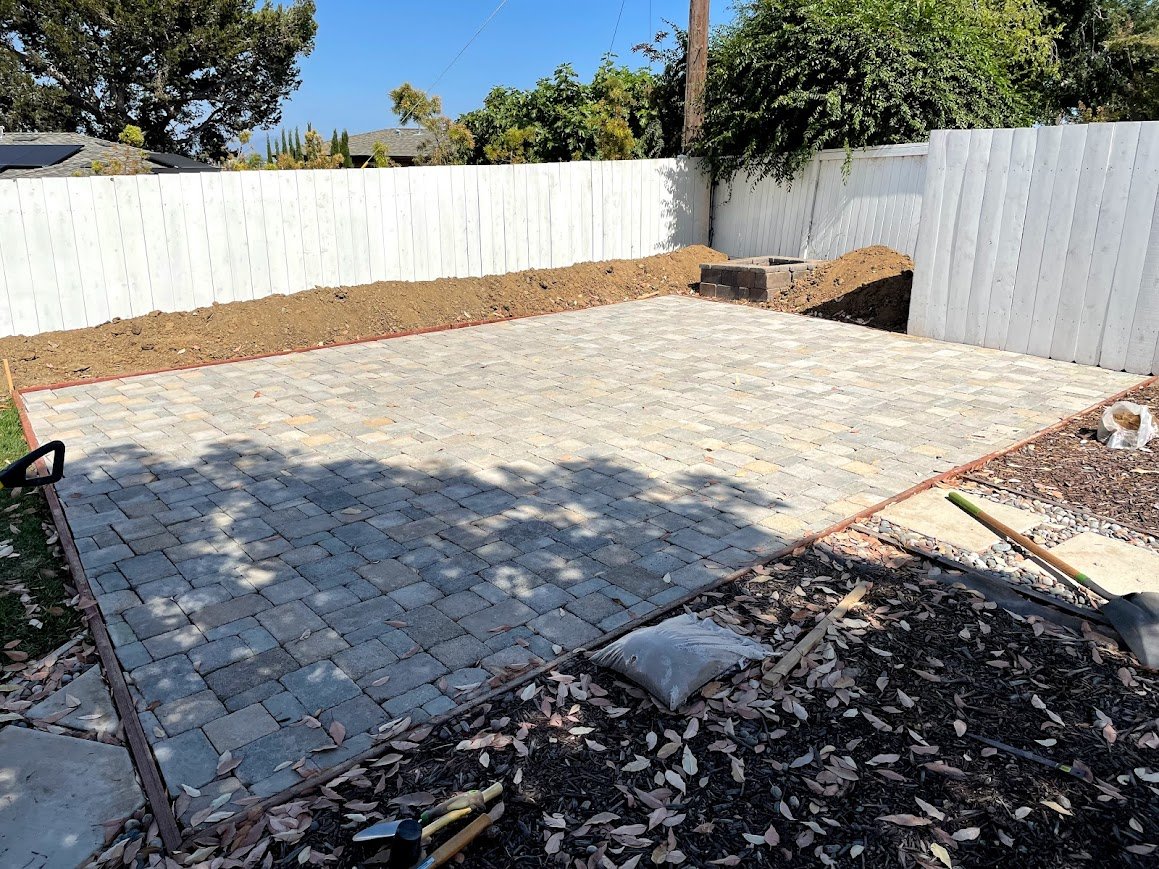
With the polymeric sand in, the main part of the patio was complete, and we moved over our new dining table.


The patio is a good size, about 450 square feet, so the table only took up a portion of it. I thought the back left corner would be perfect for a fire pit. The old one didn’t really match the new pavers, and I thought a round pit would work better than square, so I bought some samples of retaining wall blocks that matched the pavers and laid out a design. I thought a built-in curved seating area would be a good use of the corner that would otherwise be empty, and would mean the fire pit area would take up less space but still have lots of seating. Satisfied that it was going to work, I went back and bought more materials and then dry fit the whole thing.

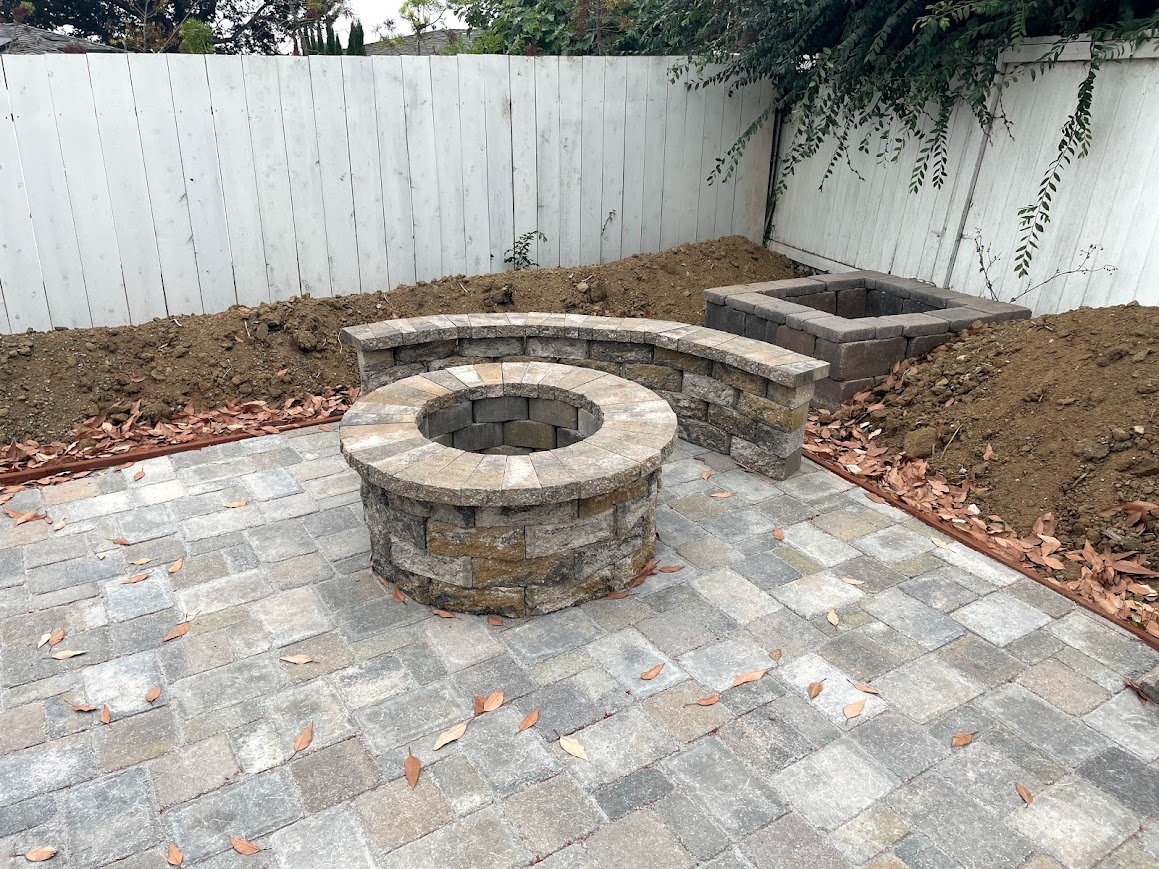
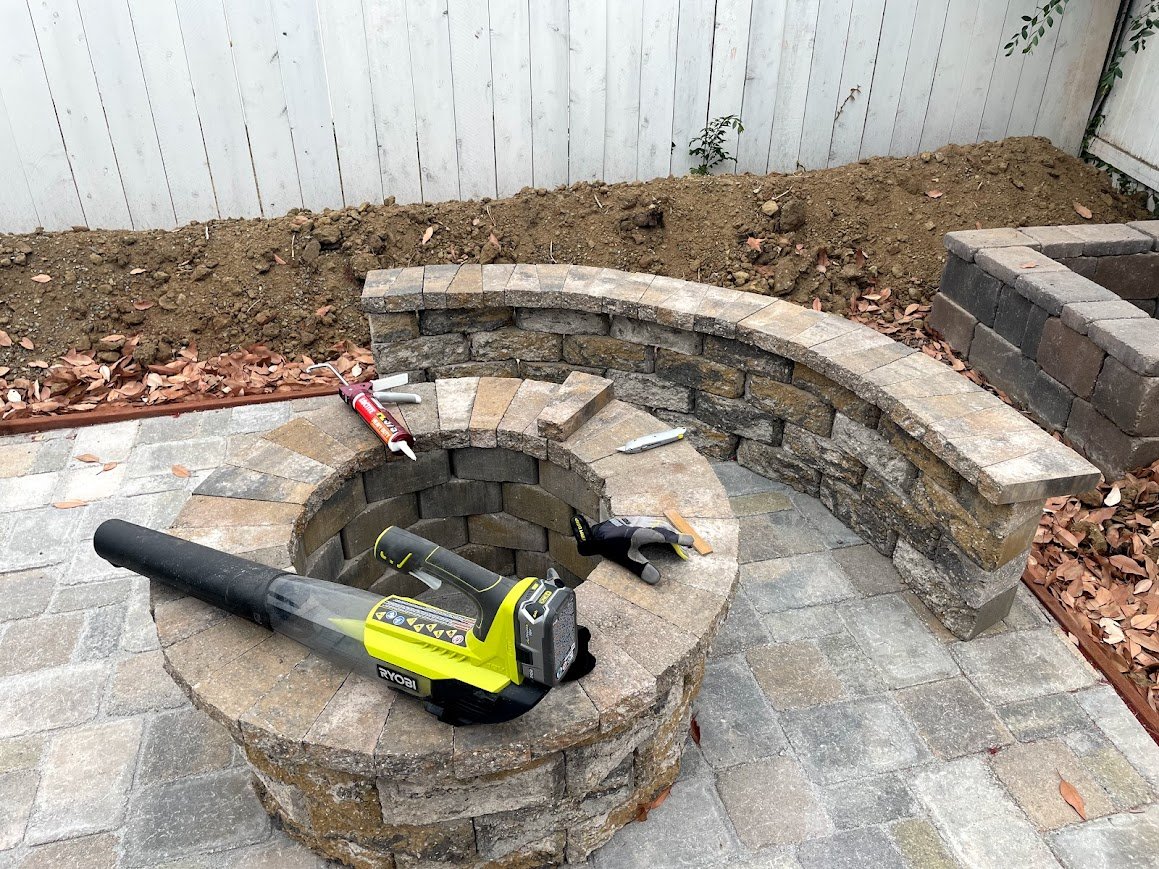
Once it was laid out the way I wanted, I took it apart down to the base layer, and used construction adhesive to permanently build it up a layer at a time. After some research, I also bought a “smokeless” fire pit insert from Breeo. I thought it would be nice to have the fire portion well contained and not have to worry about damaging the pavers or the bricks. The smokeless aspect also seemed pretty cool. The insert went in easily—I put a little bit of gravel underneath it to create a level base—and we were ready for a fire. Luckily, with about 13 pallets of material delivered for this project, we had plenty of urban firewood to use—”city logs” as my aunt Christy says.


As with pretty much every project, this one was a lot of fun but considerably more work than I was expecting. I’m happy to have done it, but not really sure whether I’d do it again. The whole thing cost me about $6,500 in materials: $4,800 for the patio, $900 for the fire pit, and $800 for the golf simulator area. I never got a professional quote, but I’d love to know what it would have cost to have someone else do it.